Monitor Stand Clamp to Desk
A monitor stand clamp to desk is a smart, space-saving solution that attaches directly to your desk edge, eliminating the need for a bulky base. It elevates your screen to the perfect ergonomic height, improves posture, and frees up valuable desk real estate for other essentials. Installation is typically tool-free and secure, making it an ideal upgrade for any home or office workspace.
Let’s be honest: the standard monitor stand that came with your computer screen is probably just… fine. It does the job of holding your screen up, but it’s a space hog. That wide, often ugly base takes up a significant chunk of your precious desk real estate. If your desk feels cluttered, cramped, or you’re constantly battling a sore neck, it might be time for an upgrade. Enter the monitor stand clamp to desk. This clever piece of hardware is a game-changer for anyone looking to maximize their workspace, improve ergonomics, and achieve a cleaner, more organized look. Instead of sitting on your desk, it clamps firmly to the edge, lifting your monitor up and freeing everything below. In this complete guide, we’ll walk you through everything you need to know about these space-saving wonders, from how they work to exactly how to choose and install the perfect one for your specific setup.
Key Takeaways
- Space Optimization: A clamp-on monitor stand attaches to your desk edge, freeing up the entire surface area underneath for storage, keyboards, or other accessories.
- Ergonomic Improvement: It allows for precise height and angle adjustments, helping you maintain a neutral neck position and reduce strain during long work sessions.
- Clamp Compatibility is Key: Not all desks work with clamps. You must check your desk’s edge thickness, material, and overhang to ensure a secure, damage-free fit.
- Weight & VESA Limits Matter: Every clamp has a maximum weight capacity and VESA mount pattern compatibility. Exceeding these limits risks instability and potential damage to your equipment.
- Stability vs. Flexibility Trade-off: Fixed clamps offer rock-solid stability for heavy monitors, while gas spring or articulating arms provide more adjustability but may have a slightly higher profile.
- Integrated Cable Management: Many modern clamp stands include built-in cable clips or channels, which are essential for maintaining a clean, clutter-free, and professional-looking workspace.
- Easy Installation, But Check Regularly: Most clamps install in minutes without tools, but you should periodically check the tightness to maintain safety and prevent shifting over time.
📑 Table of Contents
- What Exactly is a Monitor Stand Clamp?
- The Undeniable Benefits of Going Clamp-On
- Types of Monitor Stand Clamps: Finding Your Fit
- Your Step-by-Step Installation Guide
- How to Choose the Perfect Clamp for Your Desk
- Maintenance, Safety, and Long-Term Care
- Frequently Asked Questions (FAQs)
- Conclusion: Elevate Your Workspace, One Clamp at a Time
What Exactly is a Monitor Stand Clamp?
At its core, a monitor stand clamp to desk is a mounting system designed to secure a monitor arm or riser directly to the side or rear edge of your desk, rather than placing a weighted base on the desktop surface. It’s essentially a strong, adjustable clamp—think of a heavy-duty C-clamp or G-clamp—that’s engineered to grip the desk material securely without causing damage when installed correctly.
How It Works: The Mechanics of a Secure Grip
The clamp mechanism typically consists of two primary jaws: one that sits on top of the desk edge and one that grips the underside. Between them, a powerful screw or lever system applies immense pressure, creating a lock that can support the dynamic forces of an articulating arm and a heavy monitor. High-quality clamps use padded contact points (often rubber or PVC) to protect your desk’s finish from scratches and distribute pressure to prevent cracking, especially on materials like MDF or laminate. The entire assembly is then connected to a monitor arm via a standard VESA mount or a proprietary pole system.
Common Misconceptions: “Will It Damage My Desk?”
This is the number one concern, and it’s valid. The short answer is: no, it should not damage your desk if used properly. The fear comes from images of cheap, overtightened clamps cracking particleboard. A well-designed clamp from a reputable brand, installed on a desk that meets its specifications, is completely safe. The key is understanding your desk’s construction. Solid wood desks are very strong. Most modern office desks made from laminate over particleboard (like MDF) are also fine, but you must ensure the clamp’s jaws are wide enough to distribute the load and that you don’t overtighten. Always start by hand-tightening the screw until snug, then give it a final firm turn with a tool if provided—never use excessive force. For extremely thin or fragile desk edges, some clamps offer an optional “desk saver” or reinforcement plate that spreads the clamping force over a larger area.
The Undeniable Benefits of Going Clamp-On
Switching from a base stand to a clamp-on model isn’t just a minor upgrade; it’s a fundamental shift in how you interact with your workspace. The benefits cascade from that single change in mounting location.

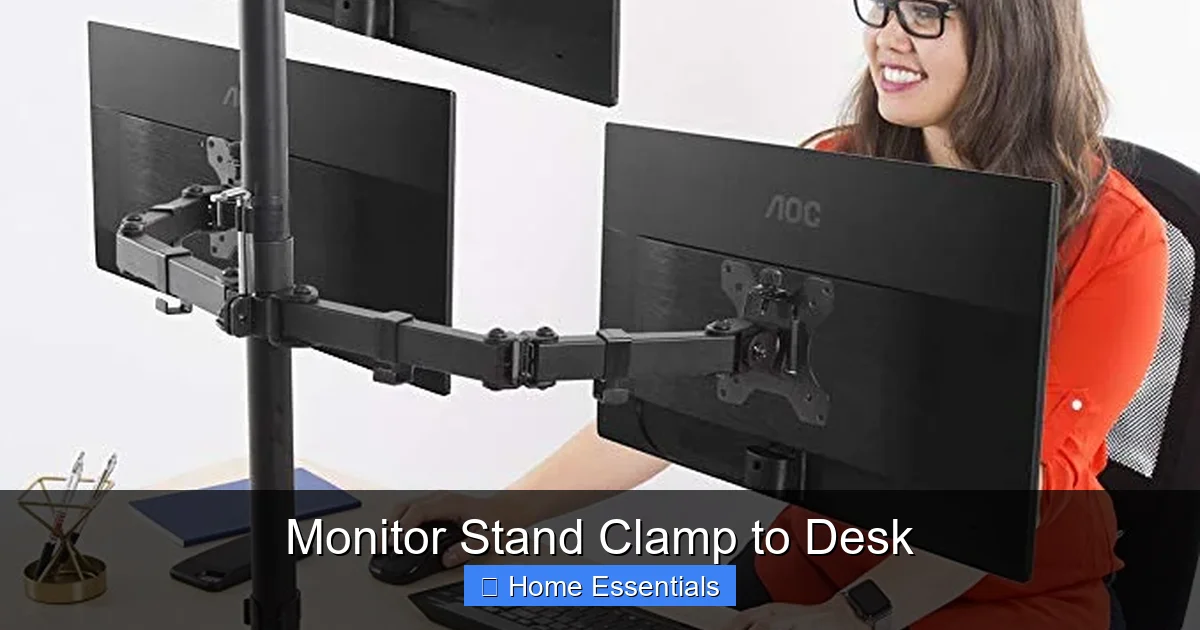
Visual guide about Monitor Stand Clamp to Desk
Image source: m.media-amazon.com
1. Reclaim Your Desk Space
This is the most immediate and tangible benefit. By eliminating the base, you instantly gain back 6-12 inches of depth and the full width of the stand’s footprint. That space isn’t just empty air; it’s functional territory. You can now slide your keyboard and mouse further back for a more comfortable arm position, have a notepad or sketchbook always within reach, or simply enjoy a cleaner, less cluttered visual field. For small-space dwellers or those with minimal desk area, this reclaimed space is nothing short of revolutionary.
2. Achieve True Ergonomic Perfection
Base stands usually offer limited height adjustment, if any. A clamp-based system is almost always paired with a fully articulating monitor arm. This combo is the holy grail of ergonomics. You can effortlessly raise, lower, tilt, swivel, and even rotate (pivot) your screen to the exact position your eyes and neck need. The ability to bring the screen closer, tilt it up or down slightly, and share it with a colleague by swiveling it out reduces neck strain, eye fatigue, and shoulder tension dramatically. For anyone working 8+ hours a day, this is an investment in your long-term health.
3. Aesthetic and Professional Upgrade
There’s no way around it: a sleek, single-arm clamp mount looks vastly more professional and modern than a bulky plastic base. It creates a floating, minimalist aesthetic that makes your entire setup look intentional and high-end. The clean lines and absence of clutter under the monitor contribute to a more focused and calming work environment. It’s a small detail that makes a big impression, especially in home offices that double on video calls.
4. Enhanced Stability for Larger Monitors
Paradoxically, for very large or ultrawide monitors (27 inches and above), a high-quality clamp arm can be more stable than a wide-base stand. The clamping force anchors the vibration-dampening arm directly to the rigid desk structure, rather than relying on a base that can wobble if the desk surface isn’t perfectly level or if you bump the desk. A good gas spring arm will hold even a 34-inch ultrawide monitor steady without any sag or bounce.
5. Future-Proof Flexibility
Most clamp-on monitor arms use a standard VESA mount pattern (the four screw holes on the back of your monitor). This means if you upgrade your monitor in the future, your expensive, high-quality arm can likely move with you. You’re not stuck with a proprietary base that only fits one model. This interoperability makes a good clamp arm a long-term investment.
Types of Monitor Stand Clamps: Finding Your Fit
Not all clamps are created equal. The right type for you depends on your desk, your monitor, and how you work. Understanding the key differentiators is crucial before you buy.

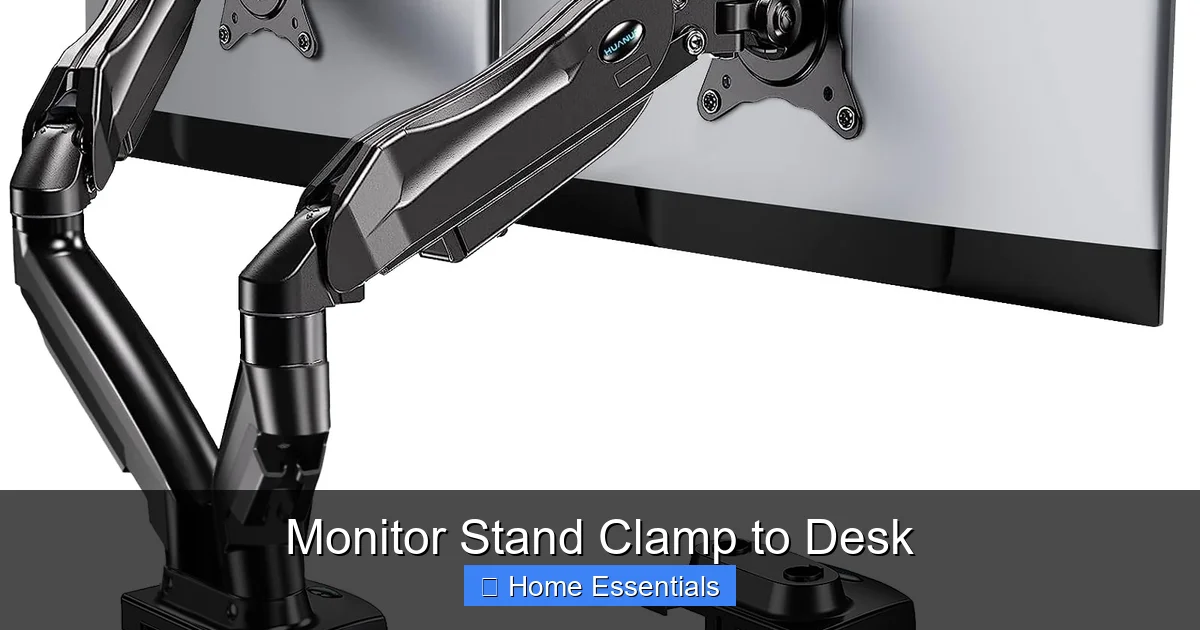
Visual guide about Monitor Stand Clamp to Desk
Image source: m.media-amazon.com
Fixed vs. Articulating (Gas Spring) Arms
This is the first major decision point.
- Fixed Arms: These are rigid poles with a fixed height and a joint for tilting. They are incredibly sturdy, have a very low profile (the arm sits close to the desk), and are typically more affordable. They are perfect for a single, static setup where you don’t need to share the screen or frequently adjust height. Best for heavier monitors where a gas spring might struggle.
- Articulating / Gas Spring Arms: These use a pneumatic cylinder (like an office chair) to provide effortless, one-handed height and tension adjustment. You can easily push the screen up, pull it down, or swing it side-to-side. They offer maximum flexibility for shared desks, sit-stand transitions, or users who like to tweak their position throughout the day. They tend to have a slightly larger clamp mechanism to house the spring mechanism.
Clamp Design & Desk Compatibility
The clamp itself comes in a few styles:
- Standard Edge Clamp: The most common. It grips the top and bottom of the desk edge. Requires a minimum desk thickness (usually 0.75″ to 1.5″) and a slight overhang (the part of the desk edge that hangs down) to grip the underside.
- Grommet Mount: Some arms offer an optional grommet mount that replaces the clamp. This is a metal plate that bolts through a hole you drill in your desk surface. It provides an even more permanent, rock-solid installation with zero visible hardware from the side. Ideal for high-end desks or if your desk edge is too thin or fragile for a clamp.
- Dual-Mount / Clamp & Grommet: Many premium arms come with both clamp and grommet hardware in the box, giving you ultimate flexibility.
Material and Build Quality
Look for clamps made from forged aluminum or high-strength steel. Plastic components should be minimal and used only for non-structural parts like cable clips. The internal screw mechanism should be robust metal, not cheap plastic that will strip. A well-built clamp feels solid, with no flex or play when you apply pressure to the arm.
Your Step-by-Step Installation Guide
Installing a monitor stand clamp to desk is usually straightforward, but doing it correctly the first time is critical for safety and stability. Here’s a detailed walkthrough.
Visual guide about Monitor Stand Clamp to Desk
Image source: m.media-amazon.com
Before You Begin: Tools and Prep
Most systems require only an Allen key (hex wrench), which is almost always included. Have a soft cloth or microfiber pad on hand to protect your desk surface during installation. Before you even open the box, measure your desk.
- Edge Thickness: Use a ruler or calipers to measure the exact thickness of your desk’s front or side edge where you plan to clamp. Compare this to the clamp’s stated minimum and maximum capacity.
- Overhang Depth: Measure how far the desktop extends beyond the desk’s supporting frame or legs. The clamp needs enough material underneath to grip. Typically, you need at least 1-2 inches of overhang.
- Clearance: Ensure there are no desk drawers, keyboard trays, or obstructions directly under the clamp location.
The Installation Process (Standard Edge Clamp)
- Assemble the Arm: If your arm comes in parts, attach the arm pole to the clamp mechanism first. This is often the heaviest component.
- Position the Clamp: Place the clamp on the desk edge where you want it. For most desks, the best location is the rear edge, centered behind your monitor. This provides the best leverage and keeps the arm’s pivot point close to your line of sight.
- Loosen the Clamp: Fully open the clamp by turning the large knob or screw counter-clockwise. The jaws should be wide enough to clear your desk edge.
- Place and Tighten: Slip the top jaw over the desk edge. Then, while holding the clamp in place, swing the bottom jaw up underneath the desk. Begin tightening the screw by hand until it’s snug against the underside. Use the included tool for the final 2-3 turns. You want it very tight, but stop if you feel the desk material beginning to compress excessively or crack. The goal is firm, not destructive.
- Attach the Monitor: With the arm securely clamped, attach your monitor. Lay the monitor face-down on a soft, static-free surface (a microfiber cloth on your desk is perfect). Align the VESA mounting holes on the back of the monitor with the plate on the arm. Use the provided screws to secure it. Do not overtighten; snug is sufficient.
- Final Adjustments & Cable Management: Gently adjust the arm to your desired height and angle. Use the tension adjustment knob (on gas springs) if the monitor sags or is too stiff. Finally, route your monitor’s power and video cables through the arm’s integrated cable management clips or channels. This is where a microfiber cloth for dusting comes in handy to wipe down the desk and arm before final setup.
Pro-Tips for a Flawless Install
- Center of Gravity: For very wide or heavy monitors, position the clamp as close to the monitor’s center as possible to minimize torque on the desk edge.
- Test Before Final Tightening: Once the clamp is snug but not final, gently test the arm’s movement. Make sure you have the range of motion you need before committing to the final tight turn.
- Check for Wobble: After mounting the monitor, give it a gentle nudge from different angles. A properly installed clamp should have minimal to no wobble. Any significant movement means the clamp isn’t tight enough or isn’t compatible with your desk.
How to Choose the Perfect Clamp for Your Desk
With so many options, how do you narrow it down? Here is your definitive checklist for selecting a monitor stand clamp to desk that will serve you perfectly for years.
1. Desk Thickness & Material: The Non-Negotiable Factor
This is the first filter. If the clamp doesn’t fit your desk, nothing else matters. Measure your desk edge thickness accurately. Look for a clamp with a range that comfortably includes your measurement. For example, if your desk is 1.25″ thick, a clamp rated for 0.75″ – 1.5″ is ideal. If you have a glass desk or a very thin IKEA-style desk (often ~0.75″), you need a clamp specifically designed for thin edges. Conversely, for thick solid wood desks (1.5″+), you’ll need a heavy-duty clamp. Always check the manufacturer’s specs.
2. Monitor Weight and Size: Know Your Load
Every monitor arm has a maximum weight capacity, often between 8 lbs (for small, fixed arms) and 35+ lbs (for heavy-duty gas springs). Find the exact weight of your monitor (usually on a sticker on the back or in the manual) and add a few pounds for the cable and dust. Choose an arm with a capacity at least 20% higher than your monitor’s weight for a safety margin. For ultrawide or very heavy monitors (like some 32″+ gaming models), prioritize arms with the highest weight ratings and consider a fixed arm for maximum stability.
3. VESA Compatibility: The Mounting Standard
VESA is the standard mounting hole pattern on the back of monitors. Common sizes are 75x75mm and 100x100mm. Some larger monitors use 200×100 or other patterns. Check your monitor’s VESA pattern and ensure the arm’s mounting plate supports it. Most universal arms support both 75 and 100mm, which covers ~90% of monitors. If you have an odd pattern, you’ll need an adapter or a specific arm.
4. Desired Range of Motion
Think about your workflow. Do you just need height and tilt? A simple fixed arm is fine. Do you need to swivel the screen to share with someone? You need a swivel joint. Do you want to rotate to portrait mode for coding or documents? You need a pivot (rotation) function. Gas spring arms offer the most fluid, one-handed adjustment across all these axes. Read reviews to see if the arm’s motion feels smooth and holds position well without constant readjustment.
5. Cable Management Features
A tangle of cables dangling from your monitor is the opposite of a clean setup. Look for arms with built-in cable clips, internal routing channels, or at least a sturdy plastic hoop to gather cables. Better cable management means a cleaner look and less dust accumulation. While you’re at it, consider using a proper microfiber cloth technique to keep your monitor screen dust-free without scratching it.
6. Build Quality and Warranty
Read professional and user reviews. Feel the heft. A good clamp arm has weight; it’s made of metal, not hollow plastic. Check the warranty—reputable brands offer 5-10 year warranties, which is a strong signal of confidence in their product’s durability.
Maintenance, Safety, and Long-Term Care
Your new clamp arm is built to last, but a little care goes a long way in ensuring safety and preserving its function.
Routine Safety Checks
Once a month, perform a quick inspection. Ensure the clamp screw is still tight (you’ll be surprised how much desk vibration can loosen it over time). Check for any cracks or stress marks on your desk edge, especially if it’s laminate. Gently move the monitor through its full range of motion. Listen for any new squeaks or feel for any slipping. If the arm feels loose at any joint, consult the manual—most have tiny set-screw adjustments to tighten pivot points. Never ignore a wobble; re-tighten the clamp immediately.
Cleaning Your Stand and Monitor
Dust and desk grime can accumulate in the arm’s joints over time, affecting smooth movement. Use a soft brush or a microfiber cloth lightly dampened with water to wipe down the arm’s surfaces. Avoid harsh chemicals, solvents, or abrasive cleaners, as they can degrade plastic parts and finishes. For the monitor screen itself, always use a clean, dry, high-quality microfiber cloth designed for screens. Spray any screen cleaner onto the cloth, not directly on the screen, to avoid liquid seeping into the edges.
Preventing Desk Damage
Prevention is the best policy. Always use the protective rubber pads on the clamp jaws. If your desk has a delicate veneer or is made of soft particleboard, consider adding a thin piece of cardboard or a purpose-made desk saver between the clamp and the desk edge to spread the pressure. Never exceed the clamp’s rated capacity. If you move desks, carefully loosen the clamp completely before attempting to lift it off—dragging it can gouge the edge.
When to Upgrade Your Arm
Even the best products have a lifespan. If you notice persistent sagging that tension adjustments can’t fix, excessive play in joints that can’t be tightened, or if you’re upgrading to a monitor that exceeds your arm’s weight limit, it’s time for a new one. Modern arms are constantly improving in smoothness and cable management, so an upgrade can also be for convenience, not just necessity.
Frequently Asked Questions (FAQs)
Can I use a monitor stand clamp on any desk?
No. Clamps require a desk with a suitable edge thickness (usually 0.75″ to 2″) and enough overhang underneath for the lower jaw to grip. Glass desks, very thin metal-framed desks, or desks with no overhang (like some wall-mounted floating desks) are generally incompatible. Always measure your desk’s edge before purchasing.
What is the weight limit I should look for?
Find your monitor’s exact weight from its specifications. Choose a clamp arm with a weight capacity at least 10-20% higher than that number. For a 10lb monitor, a 12-15lb rated arm is the minimum. For a 20lb monitor, look for a 25lb+ rated arm. Exceeding the limit can cause dangerous sagging or clamp failure.
Will the clamp leave marks or damage my wooden desk?
Not if installed correctly. Quality clamps have wide, padded jaws that distribute pressure. On solid wood, there should be no mark. On laminate over particleboard, a very tight clamp on a thin edge *could* potentially cause a slight indentation or crack if overtightened. Use the included rubber pads, tighten firmly but not with brute force, and consider a desk saver plate for extra protection on fragile surfaces.
How do I clean the monitor screen without scratching it?
Always use a clean, soft, lint-free microfiber cloth. Gently wipe in a circular motion. For stubborn smudges, slightly dampen the cloth with distilled water or a 50/50 mix of distilled water and white vinegar. Never spray liquid directly onto the screen. For detailed techniques on safe screen cleaning, refer to a dedicated guide on how to clean electronics with microfiber cloths.
What if my desk is too thick for the clamp?
If your desk edge exceeds the clamp’s maximum thickness, you have a few options. First, see if the manufacturer sells an “extra reach” or “thick desk” adapter kit. Second, consider a grommet mount instead, which requires drilling a hole in your desk but has no thickness limit. Third, you might need to return the clamp and find a model specifically designed for heavy-duty or thick-desk applications.
How often should I check the tightness of the clamp?
Do a quick “finger-tighten” check every two weeks. After a few months, the initial settling may require a final firm turn with the tool. After that, a bi-monthly or monthly check is sufficient for most environments. If your desk is bumped frequently or is on an unstable surface, check it more regularly. The rule is: if you feel any movement at all, tighten it immediately.
Can I use the clamp on the side of my desk instead of the back?
Yes, absolutely. Clamping to the side edge is a great option if your desk is against a wall and you want the arm to swing out into the room, or if your back edge has obstructions. Just ensure the side edge has the same thickness and sufficient overhang as the back. The installation process is identical. Be mindful of the arm’s swing radius to ensure it doesn’t hit a wall or cabinet.
Conclusion: Elevate Your Workspace, One Clamp at a Time
Choosing to install a monitor stand clamp to desk is one of the simplest yet most impactful upgrades you can make to your computer workstation. It directly attacks the trifecta of common workspace woe: clutter, poor ergonomics, and an uninspired aesthetic. By freeing up your desk surface, you gain not just physical space but mental clarity. The ability to position your screen perfectly eliminates the chronic neck and shoulder pain that plagues so many of us who spend our days glued to a screen. And the clean, professional look of a floating monitor simply makes working in your space more enjoyable.
The key to success is in the details: measuring your desk, respecting weight limits, choosing the right type of arm for your needs, and installing it with care. Don’t be intimidated by the process—it’s a beginner-friendly DIY project that takes less than 15 minutes and requires minimal tools. Treat your back, your eyes, and your productivity to this upgrade. Once you experience the freedom of a clutter-free, ergonomically perfect desk, you’ll wonder how you ever worked any other way. Your ideal workspace is waiting, held in place by a simple, strong, and incredibly smart clamp.
Frequently Asked Questions
What is Monitor Stand Clamp To Desk?
Monitor Stand Clamp To Desk is an important topic with many practical applications.