Ikea Monitor Stand for Desk
An IKEA monitor stand for your desk is a simple, affordable upgrade that transforms your workspace. It promotes better posture by raising your screen to eye level, adds crucial storage with shelves or drawers, and helps manage messy cables. With minimalist Scandinavian designs, these stands blend seamlessly into any home office, making them a smart, budget-friendly solution for a cleaner, more ergonomic setup.
Let’s be honest. Your desk is probably a war zone. A jungle of cables, a stack of paperwork, a coffee mug from three days ago, and your monitor… sitting directly on the desktop, forcing you to hunch your shoulders and crane your neck downward. It’s a tiny, daily torture session for your spine. But what if I told you the antidote to this common woe is waiting for you at your local IKEA? We’re talking about the humble, yet incredibly powerful, IKEA monitor stand for desk. It’s not just a piece of plastic to lift your screen; it’s a foundational ergonomic tool, a storage ninja, and a style statement all rolled into one flat-pack box. In this deep dive, we’ll unpack everything you need to know about choosing, using, and loving an IKEA monitor stand to finally build the tidy, healthy, and inspiring workspace you deserve.
Key Takeaways
- Ergonomic Health: Elevating your monitor with an IKEA stand reduces neck and back strain by aligning your screen with your natural eye line, preventing the “tech neck” posture.
- Maximized Storage: Many models integrate drawers, shelves, or compartments, turning unused under-desk space into organized storage for peripherals, notebooks, and office supplies.
- Cable Management Hero: Built-in grommets, channels, and back panels on stands like the IKEA monitor stand for desk conceal power strips and cables, eliminating desk clutter and tripping hazards.
- Universal Compatibility: Most stands are designed for standard VESA monitor mounts and support a wide weight range, but always check your monitor’s specs against the stand’s capacity before purchasing.
- Style & Customization: IKEA’s signature minimalist aesthetic means these stands come in clean finishes (white, black, wood veneer) and are often compatible with other IKEA desk systems for a cohesive look.
- Cost-Effective Solution: Compared to specialized ergonomic brands, IKEA offers exceptional value, providing functionality and design at a fraction of the price, with some models starting under $30.
- DIY Potential: Some IKEA products (like the LACK side table) are famously repurposed as DIY monitor stands, offering a customizable height and a blank canvas for personalization.
📑 Table of Contents
- The Ergonomic Imperative: Why Lifting Your Monitor Matters
- Storage Solutions: Unlocking the Real Estate Under Your Monitor
- Cable Management: From Spaghetti to Sleek
- Compatibility & Assembly: What You Need to Check Before Buying
- Style and Aesthetic: The Scandinavian Advantage
- The Cost-Benefit Analysis: Is an IKEA Stand Worth It?
- Conclusion: Your Back, Your Clutter, Your Style—Solved
The Ergonomic Imperative: Why Lifting Your Monitor Matters
The human head is heavy. Like, really heavy. At a neutral position, it weighs about 10-12 pounds. But for every inch you tilt it forward, the effective weight on your cervical spine multiplies. When you look down at a monitor sitting on your desk, that 15-degree downward tilt can make your head feel like it weighs 27 pounds. That’s an insane, sustained load on your neck and upper back muscles. Over a full workday, this leads to stiffness, pain, headaches, and long-term postural issues.
The Golden Rule of Monitor Height
The golden rule is simple: the top third of your screen should be at or slightly below your eye line. When you sit up straight, your gaze should land naturally on the center of the screen. You shouldn’t have to tilt your chin up or down. This neutral position keeps your head balanced over your spine, eliminating that forward head posture. An IKEA monitor stand for desk is the most straightforward way to achieve this. By adding 4 to 8 inches of height (depending on the model), it instantly positions your screen in the ergonomic sweet spot. It’s a one-time adjustment that pays dividends in comfort and long-term musculoskeletal health.
Beyond Height: The Tilt and Swivel Advantage
Many IKEA stands don’t just lift; they pivot. Models like the LJUSÅS or KOPPLA often include a tilt mechanism. This allows you to fine-tune the viewing angle to eliminate glare from windows or overhead lights. A slight backward tilt (10-20 degrees) is often ideal. Some even offer swivel functionality, which is a game-changer if you share your desk or need to reference documents placed beside your keyboard. This small range of motion prevents you from twisting your entire torso, reducing spinal torsion and strain.
Storage Solutions: Unlocking the Real Estate Under Your Monitor
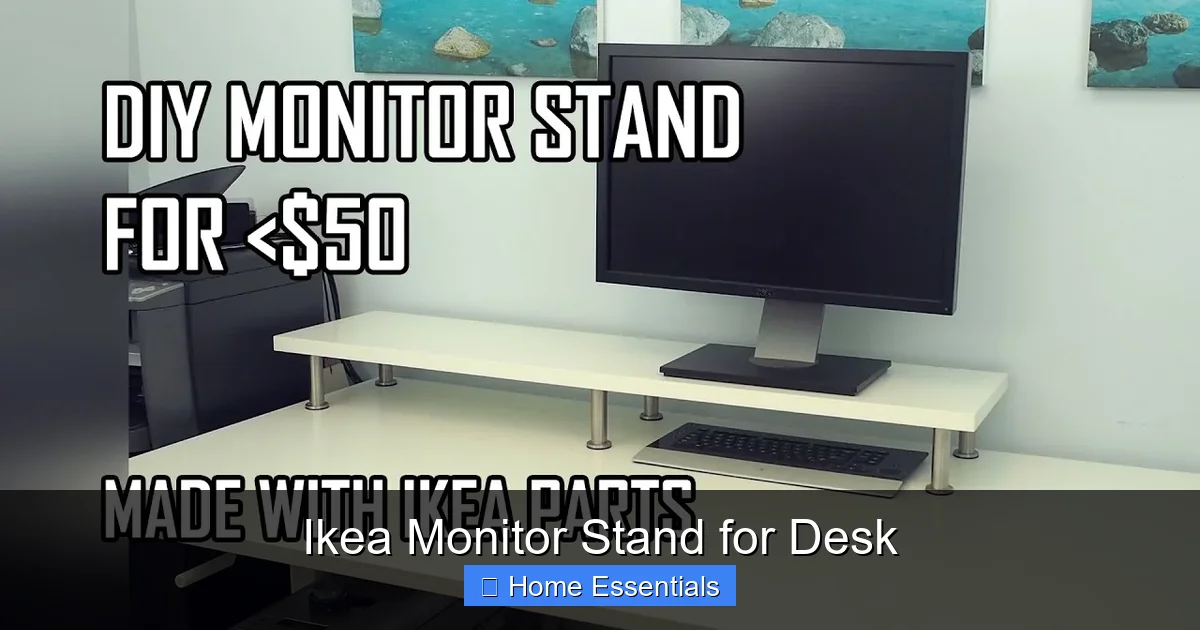
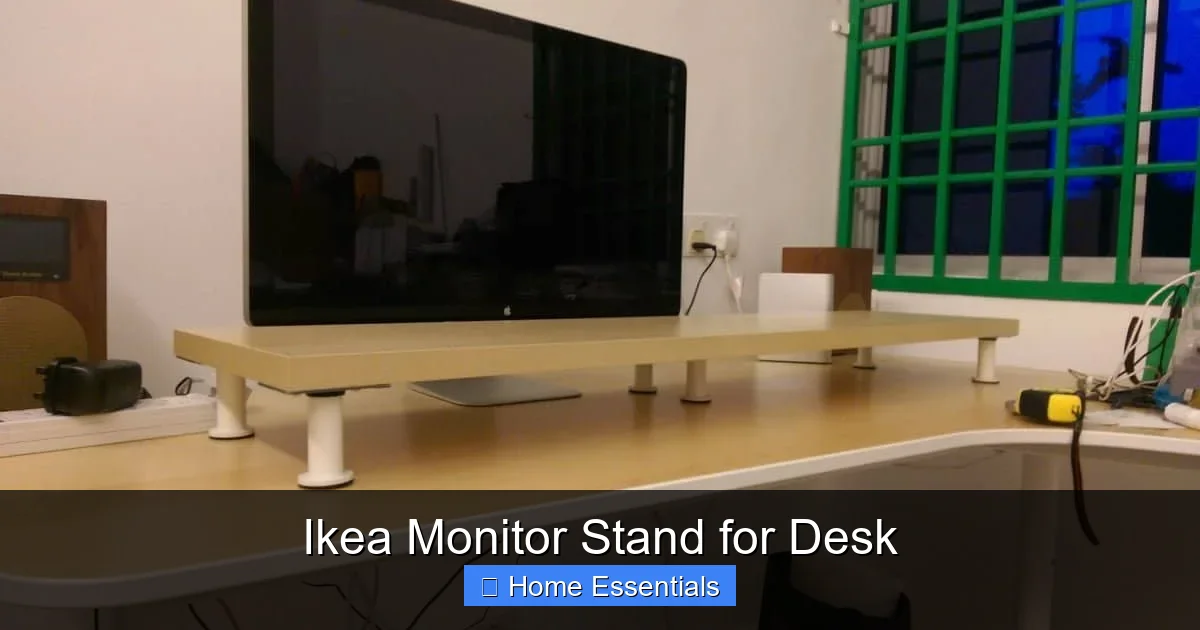
Here’s where IKEA truly shines beyond basic risers. The space under your monitor is prime, wasted real estate. An IKEA monitor stand for desk that incorporates storage transforms that void into a highly functional zone. This is about more than just hiding a keyboard; it’s about creating a command center for your workflow.
Visual guide about Ikea Monitor Stand for Desk
Image source: i.ytimg.com
Drawers for the Essentials
Stands like the iconic LACK (often used as a DIY stand) or the purpose-built OLOV feature a deep, centralized drawer. This is the perfect home for items you use constantly but don’t want cluttering your desk surface: external hard drives, USB hubs, dongles, notepads, pens, and even your wallet or keys. Having these essentials within arm’s reach, yet out of sight, drastically reduces visual noise and the time spent rummaging for things. It enforces a “clean desk” policy without sacrificing functionality.
Shelves and Open Compartments
Other designs, such as the TJENA series or certain KALLAX-inspired stands, offer open shelves or cubbies. This is ideal for items you need quick access to or want to display, like your phone/tablet stand, a small plant for air purification, a second monitor (if the stand is wide enough), or frequently referenced books. The open design also promotes airflow around your devices, which can help with heat dissipation.
The Under-Keyboard Tray Phenomenon
A classic feature on many IKEA monitor stands is a dedicated, lowered platform directly under the monitor for your keyboard and mouse. This is a brilliant two-fold solution. First, it frees up the entire main desk surface for writing, drawing, or spreading out papers. Second, and more importantly, it allows your arms to rest at a perfect 90-degree angle at your elbows, with your shoulders relaxed. Your forearms should be parallel to the floor when typing. This keyboard tray is the missing link to achieving a truly ergonomic arm position, complementing the raised monitor height. It creates a seamless, tiered workflow: eyes on screen, hands on keyboard below, everything within a comfortable, neutral reach envelope.
Cable Management: From Spaghetti to Sleek
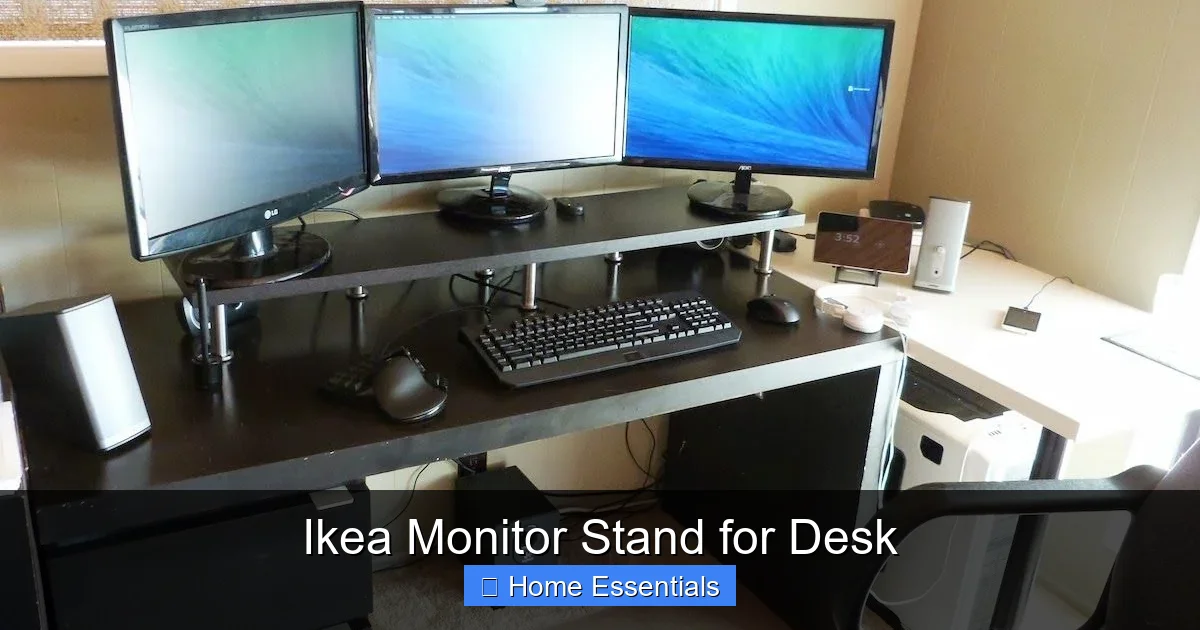
If you’ve ever looked behind your desk, you know cables have a magical ability to tangle into an impossible, dusty knot. An IKEA monitor stand for desk is often your first and best line of defense in the cable management war. It’s not just about hiding ugliness; it’s about safety, ease of cleaning, and professional polish.
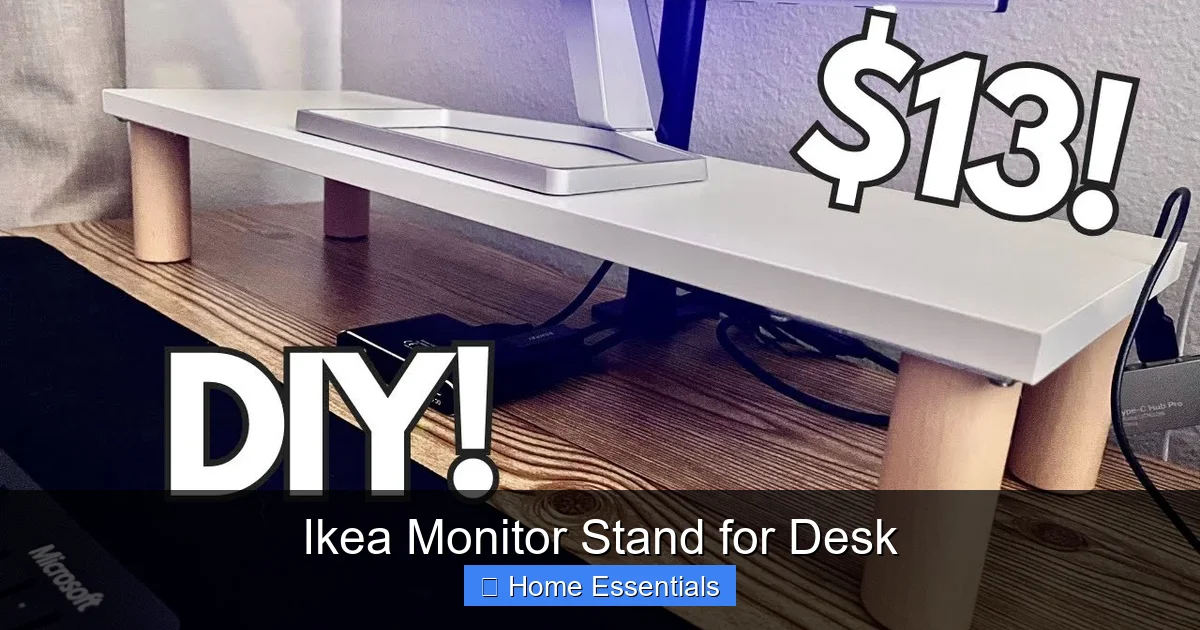
Visual guide about Ikea Monitor Stand for Desk
Image source: ikeahackers.net
Built-In Grommets and Channels
Look for stands with built-in cable grommets—those rubber or plastic rings with a hole in the middle. They sit in a hole on the stand’s surface, allowing you to thread power cables, video cables, and USB cords through neatly. This keeps them from dangling down the front of your desk. Some stands go further with internal channels or grooves on the back or underside, guiding cables along a hidden path to the floor or a power strip mounted underneath the desk. This creates a single, cohesive “cable trunk” instead of a dozen individual wires.
Integrated Power Strip Hiding Spots
Many stands feature a small, enclosed compartment or a dedicated shelf on the back or underside specifically sized for a standard power strip. You plug everything into the strip on your desk, then tuck the entire bulky block away. The only thing visible is a single, tidy power cable running from the stand to the wall outlet. This simple trick makes the entire desk setup look 100% more intentional and clean.
Maintenance Made Easy
Concentrated cables are easier to dust. But you must dust them! Dust buildup on cables and electronics can attract static and, in severe cases, become a minor fire hazard. Use a soft microfiber duster for electronics to gently sweep through the managed cable channels every few weeks. For a deeper clean, a can of compressed air (used in short bursts) can dislodge dust from tight spaces. Keeping your cable management system clean is part of the ergonomic routine. You can learn more about proper techniques with a how to use microfiber cloth for dusting guide, which applies perfectly to your organized desk setup.
Compatibility & Assembly: What You Need to Check Before Buying
Not all monitor stands are created equal, and IKEA’s range varies. Before you grab that flat-pack and rush home, you need to do two minutes of homework to ensure a perfect fit.
Visual guide about Ikea Monitor Stand for Desk
Image source: i.pinimg.com
VESA Mounts: The Universal Standard
Most modern monitors have a VESA mount pattern—a set of four threaded holes on the back. The pattern is defined by the distance between the holes (e.g., 100x100mm, 75x75mm). The stand’s mounting plate must match this pattern. IKEA’s dedicated monitor stands almost always use a universal VESA bracket that adjusts to fit the common 75x75mm and 100x100mm sizes. Simply measure the distance between the holes on your monitor’s back (in millimeters) and confirm the stand’s compatibility in the product specifications.
Weight Capacity: Don’t Overload
This is critical. Every monitor stand has a maximum weight rating. Your monitor’s weight is listed in its manual or on the manufacturer’s website. Always add a few pounds for the stand’s own mounting hardware. The IKEA monitor stand for desk you choose must have a capacity that exceeds your monitor’s weight by a comfortable margin (e.g., if your monitor is 12 lbs, get a stand rated for at least 15-20 lbs). Overloading can cause the stand to tip, collapse, or stress the mounting arms, risking damage to your expensive equipment.
Desk Thickness and Clamp vs. Grommet Mount
How does the stand attach to your desk? The two main methods are:
- Clamp Mount: A large C-clamp that grips the edge of your desk. This is versatile and doesn’t require a hole. Check the clamp’s maximum desk thickness range. A very thin desktop (<0.5 inches) or a thick, solid wood desk (>1.5 inches) might be incompatible.
- Grommet Mount: Requires a hole to be drilled through your desk surface (usually 1.5-2 inches in diameter). The stand’s post drops through and is secured from underneath. This is the most stable, permanent solution, especially for heavier monitors. If you’re not comfortable drilling, the clamp is your only option.
Always verify your desk’s edge thickness or your willingness to drill a hole.
Assembly: It’s IKEA, But It’s Simple
IKEA’s hallmark is straightforward, tool-based assembly. A monitor stand typically involves:
- Attaching the VESA plate to the back of your monitor (with provided screws).
- Attaching the mounting arm or post to the base/stand.
- Connecting the VESA plate to the arm/post.
- Mounting the entire assembly to the desk (via clamp or grommet).
You’ll need a screwdriver (often included) and possibly an Allen wrench. The instructions are purely visual, so follow the diagrams carefully. Have a friend help you hold the monitor while attaching it to the stand to avoid dropping it. Set aside 15-30 minutes; it’s rarely a complex project.
Style and Aesthetic: The Scandinavian Advantage
Let’s be real, you’re buying from IKEA. You expect clean lines, light woods, and a certain minimalist charm. The IKEA monitor stand for desk delivers in spades. This isn’t just about looking good—it’s about creating a calm, focused environment. Visual clutter is mental clutter. A stand with a simple, light-colored finish (like the white LACK or the birch veneer LINNMON) reflects light and makes a small space feel more open. Darker finishes like black or dark brown add contrast and a professional, sleek feel.
Material Matters: Particleboard vs. Solid Wood
Most IKEA stands are made from particleboard (pressed wood chips) with a melamine or veneer finish. This keeps costs low and is perfectly sturdy for the intended load. Don’t expect solid oak, but the construction is generally robust for monitor weights under 25 lbs. The finishes are scratch-resistant and easy to wipe clean. For a more premium feel, explore their solid wood or bamboo options if available in your region, though these are less common for stands.
Integrating with Your IKEA Desk System
If you already have an IKEA desk (like the popular LINNMON tabletop with ADILS legs or the BEKANT series), choosing a stand from the same brand family creates a seamless, coordinated look. The colors and material finishes will match perfectly. Even if you don’t have an IKEA desk, the neutral palettes of their stands mean they’ll blend in with almost any furniture, from a rustic farmhouse table to a modern glass desk. The minimalist design philosophy means the stand disappears visually, putting the focus on your work, not your furniture.
The Cost-Benefit Analysis: Is an IKEA Stand Worth It?
We’ve talked about benefits, but let’s talk numbers. A dedicated ergonomic monitor arm from a specialty brand can easily cost $150-$300. A premium storage riser from another retailer might be $80-$150. An IKEA monitor stand for desk typically ranges from $15 for a basic fixed-height riser to $50-$70 for a fully-featured model with drawers, tilt, and cable management. For less than the price of a nice dinner out, you can solve multiple workspace problems.
Breaking Down the Value
What are you really paying for?
- Ergonomics: You’re investing in your long-term physical health, potentially avoiding thousands in future chiropractic or physical therapy bills.
- Productivity: An organized desk reduces time spent searching for things and minimizes visual distractions, directly boosting focus and efficiency.
- Space: You’re gaining square footage on your desktop by moving items underneath or into drawers.
- Equipment Safety: Proper mounting and weight distribution protect your monitor from accidental knocks and falls.
- Aesthetics: You’re paying for a design that makes your workspace feel intentional and professional.
When you stack it up, the IKEA monitor stand for desk offers an almost unbeatable return on investment. It’s the definition of a high-impact, low-cost upgrade.
The DIY Wildcard: The Famous LACK Hack
You cannot discuss IKEA monitor stands without mentioning the legendary LACK side table hack. For under $10, this small, lightweight table is the ultimate blank slate. People cut it down, paint it, stain it, add cable management sleeves, and mount monitors directly to it with VESA brackets. It’s a testament to IKEA’s modular, adaptable design. If you want a very specific height or a unique look, the LACK hack gives you complete creative control. Just ensure it’s stable enough for your monitor—you may need to add weight (like a sandbag) to the base for heavier monitors to prevent tipping.
Conclusion: Your Back, Your Clutter, Your Style—Solved
The search for the perfect IKEA monitor stand for desk ends not with a single answer, but with a clear path. You now know that ergonomic health is the non-negotiable starting point—get that screen to eye level. You understand that storage and cable management are the twin pillars of a functional desk, and IKEA excels at both. You’ve checked your monitor’s VESA pattern and weight, measured your desk’s thickness, and you know the difference between a clamp and a grommet. You can see how a simple piece of flat-pack furniture can be the cornerstone of a calm, efficient, and even beautiful workspace.
Don’t let another workday end with a stiff neck and a cluttered desk. The solution is affordable, available, and waiting. Head to IKEA, find the model that matches your monitor’s needs and your desk’s dimensions, and spend an afternoon assembling your ticket to a better work life. Your future self—sitting up straight, finding pens instantly, and admiring a clean desk—will thank you. And while you’re organizing your desk, don’t forget to regularly dust your new setup with a proper microfiber duster for electronics to keep everything looking pristine and functioning well. A clean workspace is a productive workspace, and it all starts with that first, smart upgrade.
Frequently Asked Questions
Can I use an IKEA monitor stand with a curved monitor?
Yes, absolutely. The key factor is the VESA mount pattern and weight capacity, not the monitor’s curvature. Ensure the stand’s VESA bracket matches your curved monitor’s hole pattern (e.g., 100x100mm) and that the stand’s weight limit exceeds your monitor’s weight. The tilt function on many stands is especially useful for optimizing the viewing angle on a curved screen.
What is the weight limit for a typical IKEA monitor stand?
Weight limits vary by model. Basic risers like the LACK (when used as a stand) have no official mount but can support 20-30 lbs if stable. Purpose-built stands like the OLOV are rated for 25-33 lbs, while heavier-duty models may support up to 40 lbs. Always check the specific product page on IKEA’s website for the exact, current weight capacity before purchasing.
How do I know if my desk is compatible with the clamp mount?
Measure the thickness of your desk’s edge where the clamp would grip. The clamp’s specifications will list a minimum and maximum thickness (e.g., 0.4″ to 1.5″). If your desk edge falls within that range, it’s compatible. If your desk is very thin (<0.4") or very thick (>1.5″), you’ll need to look for a stand with a grommet mount option or consider a different mounting solution.
Are IKEA monitor stands easy to assemble?
Yes, they are designed for simple, tool-based assembly. You’ll typically need a screwdriver (often included) and sometimes an Allen wrench. The process involves attaching a VESA plate to your monitor, connecting it to the stand’s arm, and then mounting the stand to your desk. It usually takes 15-30 minutes. The instructions are pictorial, so follow each step carefully. Having a helper to hold the monitor is recommended.
Will the stand prevent my monitor from tipping over?
A properly installed and correctly loaded stand should be very stable. Stability depends on three things: 1) The stand’s base width and weight (wider, heavier bases are more stable), 2) The monitor’s center of gravity (larger monitors may need a sturdier base), and 3) Correct assembly—all parts must be tightened securely. For very large or heavy monitors, prioritize stands with a broad, heavy base or consider a grommet mount for ultimate stability.
Where can I buy an IKEA monitor stand if I don’t live near a store?
IKEA monitors stands are available through the official IKEA website for most countries with delivery services. You can also check third-party online marketplaces like Amazon or eBay, where resellers often list IKEA items. Be cautious of sellers inflating prices and always verify the product’s authenticity and condition before purchasing from non-official sources.