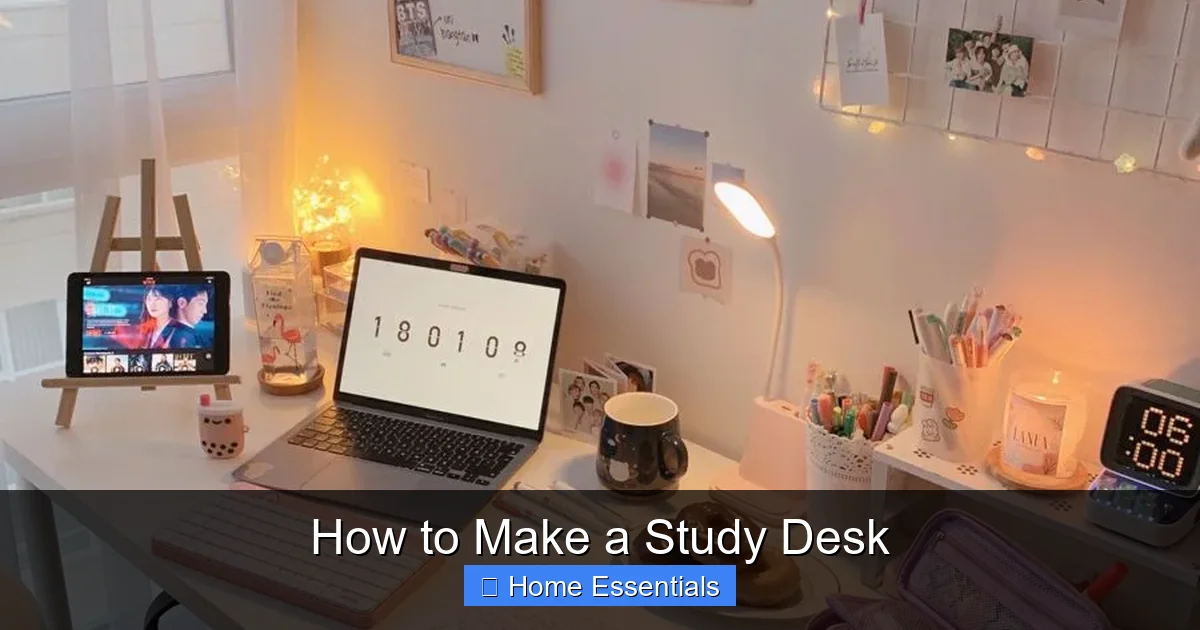
How to Make a Study Desk
Building your own study desk is a rewarding DIY project that lets you customize every detail to fit your space and style. Not only does it save money compared to buying retail, but you also get a sturdy, personalized workspace that boosts productivity. With basic tools and our clear instructions, anyone can create a functional and beautiful desk.
Have you ever stared at a generic, mass-produced desk and thought, “I wish this fit my room better” or “This feels a bit flimsy”? You’re not alone. Many of us spend hours at our desks, yet we settle for something that isn’t quite right. What if you could change that? Learning how to make a study desk is one of the most empowering and practical DIY projects you can undertake. It’s not just about building furniture; it’s about crafting a personalized command center for your work, studies, or hobbies. This guide will walk you through every single step, from a blank blueprint to a finished, functional masterpiece. We’ll break down the process into simple, manageable chunks so you can approach it with confidence, even if you’ve never picked up a power tool before. Get ready to roll up your sleeves and create a desk that is truly yours.
Key Takeaways
- Plan meticulously: Measure your space, define your needs, and sketch a design before buying a single board to ensure your desk fits perfectly and functions well.
- Choose materials wisely: Select wood (like pine, oak, or plywood) based on your budget, desired look, and required durability for a desk that will last.
- Use the right tools: Essential tools include a saw, drill, sander, level, and clamps. Proper tools make the building process safer, faster, and more precise.
- Sand and finish carefully: Thorough sanding removes rough edges, while a good stain or paint plus a protective sealant (like polyurethane) enhances beauty and prevents damage.
- Prioritize ergonomics: Design for a proper height (typically 28-30 inches), ensure adequate legroom, and incorporate cable management for a comfortable, clutter-free workspace.
- Build with pride: A self-built desk offers unmatched customization, potential cost savings, and the deep satisfaction of creating a core piece of your home office.
📑 Table of Contents
- Phase 1: The Blueprint – Planning Your Perfect Study Desk
- Phase 2: Gathering Your Arsenal – Materials and Tools
- Phase 3: The Build – Step-by-Step Construction
- Phase 4: The Finishing Touch – Staining, Painting, and Protecting
- Phase 5: Ergonomics and Smart Customization
- Phase 6: Assembly, Final Placement, and Long-Term Care
- Conclusion: More Than Just a Desk
Phase 1: The Blueprint – Planning Your Perfect Study Desk
Rushing into the building phase is the number one cause of DIY frustration. A little time spent planning saves hours of rework and ensures your final desk is a perfect fit. This phase is all about vision and logistics. You’re answering critical questions: How big can it be? What will it store? How will it look? Grab a notebook, a tape measure, and let’s design on paper first.
Assessing Your Space and Needs
Start with cold, hard measurements. Use a tape measure to record the exact dimensions of the area where the desk will live. Consider the wall length, window placement, and door swing. Leave at least 24-30 inches of clearance behind the desk for chair movement and ventilation. Next, think about your workflow. Do you need space for dual monitors, a laptop, a drawing tablet, and a physical notebook? Make a list of all your essential desk items (computer, lamp, books, organizers). This list dictates your required surface area. Also, consider storage: do you need deep drawers for files, open shelves for books, or a simple cabinet for supplies? Your answers here shape the desk’s footprint and form.
Sketching Your Design
You don’t need to be an artist. A simple, scaled sketch is your blueprint. Use graph paper (each square = 4 or 6 inches) to draw the top view (plan) and a front/side view (elevation). Mark all dimensions: total width, depth, and height. Indicate where legs or supports will go. Sketch the location of any drawers, shelves, or keyboard trays. This visual helps you spot problems early. For instance, you might realize a planned bookshelf will block a vent. This is also the time to decide on a style: a minimalist floating desk, a classic trestle desk, or a modern cabinet-style desk. Explore ideas online, but always anchor your design to your specific space measurements and needs.
Budgeting and Sourcing Inspiration
Set a realistic budget. The cost of how to make a study desk varies wildly. A simple pine desktop with sawhorse legs might cost $100-$150. A solid oak desk with dovetail drawers could exceed $500. Your material choices drive the cost. Factor in hardware (screws, hinges, drawer slides), finish (stain, polyurethane), and any specialty tools you need to buy or rent. Now, source inspiration. Websites like Pinterest, Ana White, or Fine Homebuilding have countless free plans. You can use a plan as-is or modify it. The key is to find a design that matches your skill level. A beginner should avoid complex joinery like mortise-and-tenon joints and opt for simpler pocket-hole screw assembly.
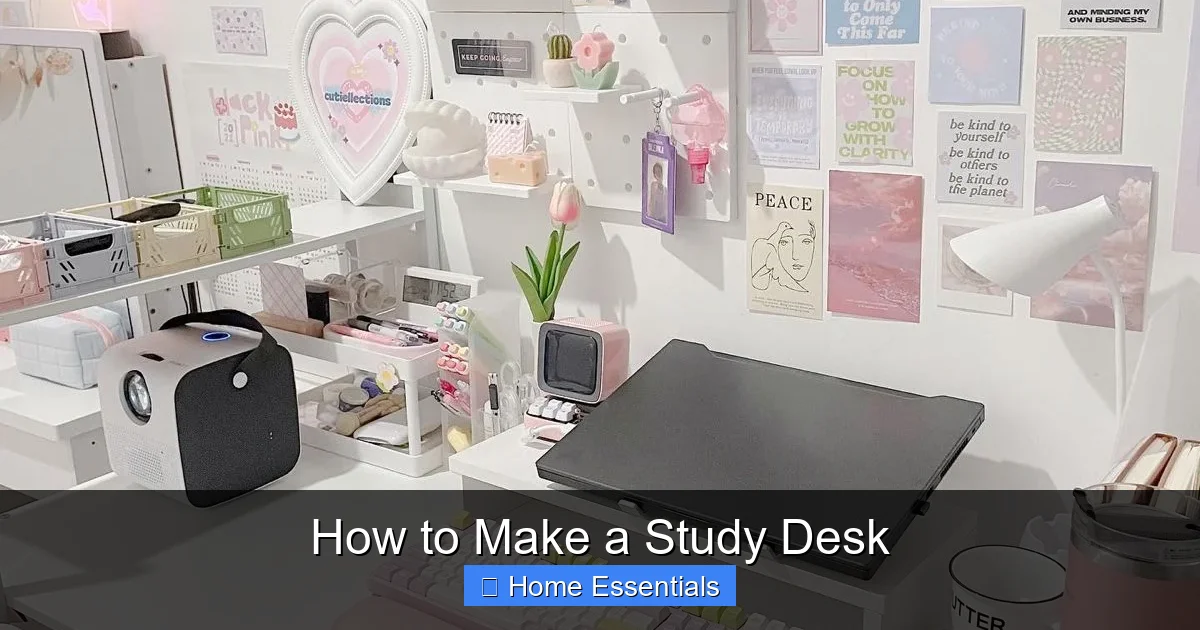
Phase 2: Gathering Your Arsenal – Materials and Tools
With a plan in hand, it’s time to shop. The right materials ensure your desk is sturdy and beautiful. The right tools make the job possible and safe. This section is your shopping list and tool belt guide.

Visual guide about How to Make a Study Desk
Image source: i.pinimg.com
Choosing Your Wood and Core Materials
The desktop is the star. Here are common options, from budget to premium:
- Plywood: A fantastic, stable choice. Use Baltic birch or maple-faced plywood for a clean look with a veneer. It won’t warp like solid wood and is cost-effective. You’ll need to edge-band the raw sides for a finished look.
- Pine (Select or Better Grade): A soft, easy-to-work-with solid wood. It’s inexpensive and takes stain nicely but is prone to dents and scratches. Great for a rustic or painted look.
- Oak (Red or White): A durable, beautiful hardwood with a prominent grain. More expensive and harder to work with, but makes a stunning, long-lasting desk.
- MDF (Medium-Density Fiberboard): Super smooth and stable, perfect for a painted finish. It’s heavy and doesn’t hold screws as well as wood, so use solid wood for edges and supports.
For legs and frames, you can use dimensional lumber (2x4s, 4x4s), hardwood square stock, or even pre-made furniture legs. For a modern look, consider metal hairpin legs. For supports and shelves, plywood or solid wood boards work. Always buy materials with a slight margin for error—your cut pieces might have a small flaw you need to work around.
The Essential Tool Checklist
You can build a great desk with a core set of tools. Here’s what you’ll need:
- Measuring & Marking: Tape measure, combination square, pencil.
- Saws: A circular saw or handsaw for straight cuts. A jigsaw for curves. A miter saw (chop saw) is a huge bonus for perfect angled cuts.
- Drilling: Cordless drill/driver and a set of drill bits. A pocket-hole jig (like Kreg Jig) is a game-changer for invisible, strong joints.
- Sanding: Random orbital sander (highly recommended) with assorted grit sandpaper (80, 120, 220). Hand sanding blocks for touch-ups.
- Clamping: Several bar clamps or F-clamps (at least 4) are vital for holding pieces together while you screw or glue.
- Level & Square: A 4-foot level and a carpenter’s square ensure your desk is true and not crooked.
- Safety: Safety glasses, ear protection, and a dust mask are non-negotiable.
If you lack a tool, check local tool libraries or rental shops. Renting a large saw for a day is often cheaper than buying one you’ll rarely use.
Phase 3: The Build – Step-by-Step Construction
Now, the hands-on fun begins. We’ll use a classic, sturdy design: a solid desktop supported by a trestle-style base with a simple storage hutch. This is adaptable. Follow these steps in order.

Visual guide about How to Make a Study Desk
Image source: png.pngtree.com
Step 1: Cutting Your Pieces to Size
Lay out your plywood or board on a stable, flat surface (sawhorses and a sheet of rigid foam insulation work great). Use your tape measure and square to mark every cut precisely. Double-check all measurements before cutting. The adage “measure twice, cut once” is your mantra. For a desk 60″ wide, 30″ deep, and 30″ tall, you might cut:
- 1x Desktop: 60″ x 30″
- 2x Legs/Aprons: 28″ long (for height, minus desktop thickness)
- 2x stretchers (for base stability): 48″ long
- 1x back panel for hutch (optional): 48″ x 12″
- Shelves or drawer fronts as per your design.
Make your cuts carefully. If using a circular saw, clamp a straight edge as a guide for perfectly straight lines. Label each piece with a pencil (e.g., “Left Leg,” “Desktop Front”).
Step 2: Assembling the Base Frame
This is the skeleton. A strong base prevents wobble. A simple trestle base is very effective. Lay the two long stretchers parallel, 48″ apart (for our 60″ desktop). Attach the legs to the ends of the stretchers. Use a drill to create pilot holes (smaller than your screw) to prevent splitting. Drive screws through the stretcher into the leg. Use clamps to hold everything square while you fasten. Check for square by measuring diagonals from corner to corner; they must be equal. For extra strength, add diagonal braces from leg to stretcher. If you’re building a hutch, assemble its frame separately first.
Step 3: Attaching the Desktop
Now, flip your base frame upside down. Place the desktop upside down on top, centered. There are two main attachment methods:
- From Above (Concealed): Use pocket holes drilled through the aprons (the horizontal pieces connecting legs) into the underside of the desktop. This hides the screws completely. This is the cleanest look.
- From Below: Drive screws up through the top of the base frame (legs or stretchers) into the desktop. Use wood plugs or dowels to hide the screw heads in the desktop surface.
Before final tightening, place the desk right-side up on a flat floor. Use your level to check that the desktop is perfectly flat. Shim under the legs if the floor is uneven. Once level, fully tighten all screws.
Step 4: The Critical Sanding Phase
This step separates an amateur-looking project from a professional one. All cut edges, screw holes, and the entire surface must be sanded smooth. Start with 80-grit sandpaper on your orbital sander to remove saw marks and rough spots. Always sand with the grain of the wood to avoid scratches. Move to 120-grit for a smoother feel, then finish with 220-grit for a silk-like surface ready for finish. Pay special attention to edges—round them slightly so they’re not sharp. Wipe the entire desk down with a tack cloth or a slightly damp microfiber cloth to remove all dust. A clean surface is essential for a good finish. For more on using cleaning cloths effectively, see our guide on how to use a microfiber cloth for cleaning.
Phase 4: The Finishing Touch – Staining, Painting, and Protecting
This is where your desk gets its personality. A good finish protects your hard work from spills, scratches, and wear. It can also completely transform the look of the wood.
Visual guide about How to Make a Study Desk
Image source: i.pinimg.com
Staining for Natural Wood Beauty
If you love the wood grain, stain is the way. Test the stain on a scrap piece first! Stir (don’t shake) the stain thoroughly. Using a lint-free cloth or foam brush, apply the stain liberally in the direction of the grain. Let it sit for 5-15 minutes (follow can instructions), then wipe off the excess with a clean cloth. The longer you leave it, the darker it gets. For an even tone, apply a second coat after the first is dry. Let the stain dry completely (usually 4-6 hours) before proceeding.
Painting for a Clean Slate
Painting offers endless color options and can hide wood imperfections. Prime first with a good primer (oil-based for durability, water-based for easy cleanup). Sand the primer lightly with 220-grit once dry. Then, apply two thin coats of your chosen paint (chalk paint, acrylic latex, etc.) using a brush for edges and a foam roller for flat surfaces for a smooth, brush-mark-free finish. Sand lightly between coats with fine sandpaper. This layering technique prevents drips and yields a furniture-quality finish.
Applying a Protective Topcoat
Regardless of stain or paint, a topcoat is non-negotiable for a desk that sees daily use. Polyurethane is the gold standard. It’s available in gloss (shiny), satin (soft sheen), and matte (flat). For a desk, satin is a great compromise—it hides minor wear better than gloss and is easier to clean than matte. Apply 2-3 thin coats with a synthetic brush or a lint-free cloth, sanding lightly (with 320-grit sandpaper) between each coat once dry. Wipe away all dust before the next coat. This sealed surface will resist water rings, pen marks, and general abrasion.
Phase 5: Ergonomics and Smart Customization
Your desk is now a beautiful piece of furniture. Let’s make it an ergonomic powerhouse. A well-designed desk supports your body and your workflow.
Getting the Height Just Right
The standard desk height is 28-30 inches. But the best height is the one that allows your elbows to be at a 90-degree angle when your forearms are parallel to the floor, with your feet flat on the ground. If you share the desk with someone of a very different height, consider an adjustable-height mechanism. You can build a desk with a fixed height but pair it with an adjustable chair and a monitor arm. For a truly custom solution, you could build a desk with a manual crank or electric lift mechanism, though that’s a more advanced project.
Conquering Cable Chaos
A tangled nest of cables undermines a clean desk aesthetic and is a dust magnet. Plan your cable management during the build. Drill a 2-3 inch grommet hole in the desktop (near the back or center) to route power strips and device cables down to the floor. Install a cable tray or net under the desktop to hold power strips and excess cord. Use adhesive cable clips on the underside of the desktop to route individual cables neatly to their devices. A clean cable setup is a sign of a pro-level build.
Adding Storage That Works For You
Storage is highly personal. Integrate what you need:
- Drawers: Build simple box drawers with slides. Full-extension ball-bearing slides are worth the extra cost for easy access.
- Shelves: Open shelves are great for books and decor. Adjustable shelf pins allow you to change spacing later.
- Hutch: A wall-mounted hutch adds vertical storage without taking up desktop real estate. Ensure it’s securely anchored to wall studs.
- Keyboard Tray: A sliding tray under the desktop frees up surface space and promotes better arm positioning.
Build these components to your exact specifications. Need a deeper shelf for large art books? Make it 12″ deep instead of 10″. This is the beauty of DIY.
Phase 6: Assembly, Final Placement, and Long-Term Care
The final stretch! This is about securing everything, moving it into place, and establishing a care routine so your desk looks great for years.
Final Assembly and Hardware Installation
If you built the desk in a workshop, it’s time for final assembly on-site. This is easier for large desks. Assemble all major joints, but don’t fully tighten every screw until the desk is in its final position. Place the desk against the wall. Use your level one last time on the desktop. Shim under the base as needed until it’s perfectly level. Now, fully tighten all screws and bolts. Install all hardware: drawer slides, knobs, hinges, shelf pins. Use a drill with a countersink bit to create neat, flush holes for screw heads if needed. For any glass or acrylic inserts, handle with care and secure them properly.
Moving and Positioning Your Desk
A fully built desk is heavy. Enlist a friend. Lift with your legs, not your back. If it’s very large, you may need to tilt it and use furniture sliders. Once in place, check for stability. Gently push on the desktop from different angles. If it wobbles, identify the source—an uneven floor or a loose joint. Use furniture levelers (adjustable feet) on the base legs to compensate for floor irregularities. These screw-on feet are a lifesaver. Anchor a tall or heavy desk to the wall studs with an L-bracket for safety, especially in homes with children or pets.
Daily and Seasonal Maintenance
Protect your investment with simple habits. Dust the surface weekly with a soft, dry microfiber cloth. For routine cleaning, dampen the cloth slightly with water or a mild wood cleaner. Avoid harsh chemicals, ammonia, or abrasive cleaners. Immediately wipe up spills to prevent staining. Every 6-12 months, apply a fresh coat of furniture wax or a rejuvenating product to maintain the finish’s luster and protective qualities. For deeper cleaning of glass or glossy surfaces, learn specific techniques from our guide on how to clean glass with a microfiber cloth to avoid streaks. If you notice a minor scratch in the finish, you can often buff it out with a specialized scratch remover or by applying a small amount of the same stain/finish blend. For more on caring for cleaning tools, see how to properly wash microfiber cloths to keep them effective for your desk care routine.
Conclusion: More Than Just a Desk
You did it. You transformed a pile of lumber into a cornerstone of your home. How to make a study desk is a journey of planning, precision, and patience that culminates in a deeply personal reward. This isn’t just a table; it’s a custom-tailored tool for your productivity and creativity. It’s built to your dimensions, suited to your style, and crafted with your own hands. The skills you learned—reading plans, measuring accurately, using tools safely, and finishing wood—are transferable to countless other projects. Take a moment to admire your work. Feel the smooth surface, test the stability, and organize your first item on it. That feeling of pride and ownership is something no store-bought desk can ever provide. Now, make it your own. Add a plant, a photo, or your favorite mug. Your perfect study desk is ready for the next big idea.
Frequently Asked Questions
How much does it actually cost to make a study desk versus buying one?
Cost varies by materials. A basic pine desk can cost $100-$200 in materials. A mid-range oak or plywood desk with nice hardware might be $300-$500. Retail desks of similar quality and size often start at $400 and go well over $1,000. Building your own typically offers better quality for the price, especially if you already own some tools.
I have no woodworking experience. Can I really do this?
Absolutely. Start with a simple design using pocket-hole screws and pre-cut lumber from a home center. Many big-box stores offer wood cutting services. Focus on taking your time with measurements and sanding. The most important tools are a tape measure, a drill, and an orbital sander. Follow tutorials closely and don’t rush.
What is the single most important step to ensure a sturdy, wobble-free desk?
Ensuring your base frame is perfectly square and using adequate bracing. After assembling the base, always measure the diagonals—they must be equal. A diagonal brace from leg to stretcher on each side dramatically increases rigidity. Also, securely attaching the desktop to the base (using pocket holes or screws from below) prevents any racking or movement.
How long will a DIY plywood or pine desk last?
With a proper finish (stain/sealant or paint/topcoat), a well-built desk from quality plywood or pine will easily last 10-20 years in a home office. The finish is what protects it from moisture, scratches, and wear. Reapply a coat of protective wax or polyurethane every few years to rejuvenate the surface and extend its life significantly.
Can I build a desk without a dedicated workshop?
Yes. You can do all the cutting and sanding in a garage, basement, or even a driveway on a sunny day. Use sawhorses and a large sheet of rigid foam as a cutting surface. For dust control, sand outdoors or use a simple drop cloth and wear a mask. Many of the best projects happen in small, adaptable spaces.
What’s the best way to hide screws and create a professional look?
The Kreg Pocket-Hole System is the #1 recommendation for beginners wanting invisible joints. It creates strong, angled screw holes that are completely hidden from view when the piece is assembled. For attaching the desktop, pocket holes drilled through the aprons into the desktop underside are the cleanest method. Wood plugs or dowels can also hide screw holes in visible areas.