Dual Monitor Stand for Desk
A dual monitor stand is a game-changer for any desk-based workstation. It elevates your screens to the perfect ergonomic height, frees up valuable desk real estate by lifting monitors off the surface, and introduces crucial cable management. This simple upgrade reduces neck strain, organizes your workflow, and creates a cleaner, more professional workspace. Choosing the right stand involves considering adjustability, weight capacity, and mounting style to fit your specific monitors and desk.
Let’s be honest. That beautiful new 4K monitor you bought deserves a better home than just sitting on a stack of books or a wobbly factory stand. If you’ve joined the multi-monitor club—and millions have—you’re likely all too familiar with the desk real estate crisis. Keyboards get shrunken, notepads are exiled to the floor, and a jungle of cables threatens to swallow your whole setup whole. Enter the hero of our story: the dual monitor stand for desk. This isn’t just another accessory; it’s a fundamental ergonomic and organizational upgrade that changes how you interact with your digital workspace. Think of it as giving your monitors a proper, adjustable apartment while cleaning up the messy neighborhood below. In this guide, we’ll walk through everything you need to know, from why you absolutely need one to how to pick the perfect model and set it up for maximum comfort and productivity.
Key Takeaways
- Ergonomic Health: A dual monitor stand positions screens at eye level, preventing neck and shoulder strain from prolonged downward gazing.
- Space Reclamation: Lifting monitors off the desk surface instantly frees up space for keyboards, documents, and other essentials.
- Cable Chaos Control: Integrated cable management channels and clips hide unsightly wires, creating a tidy and safe work environment.
- Productivity Boost: Seamless screen real estate allows for effortless window tiling, reducing task-switching time and improving focus.
- Versatile Mounting: Options include clamp-on, grommet, and freestanding models to suit virtually any desk design and thickness.
- Durability Matters: A sturdy build with high weight capacity ensures monitor safety and long-term stability, even with larger displays.
- Easy Maintenance: A clean stand and monitor surface is crucial; use proper tools like a microfiber duster for electronics to avoid scratches.
📑 Table of Contents
The Transformative Benefits of Going Vertical
Before we dive into types and specs, let’s talk about the “why.” The benefits of swapping your stock monitor feet for a dedicated dual monitor stand are immediate and profound. It’s one of the highest-impact, lowest-cost upgrades you can make to your workstation.
Ergonomics: Save Your Neck and Shoulders
The single biggest reason to invest is your health. Most factory monitor stands are too low, forcing you to tilt your head down for hours. This leads to “tech neck,” chronic shoulder tension, and even long-term spinal issues. A quality stand lets you raise both screens so the top third is at or just below eye level. Your gaze should be straight ahead or slightly down (about 15-20 degrees). This neutral posture keeps your head aligned over your spine, dramatically reducing muscle fatigue. For dual monitors, proper adjustment also means swiveling each screen to meet your natural line of sight, eliminating the need for awkward torso twisting.
Space: Reclaim Your Desktop Kingdom
Lifting two monitors off the desk surface isn’t just about height; it’s about liberating square footage. That space underneath becomes usable real estate. You can slide your keyboard and mouse forward for a more comfortable typing position, keep a notepad and pen within easy reach, or simply enjoy a clean, uncluttered surface. For smaller desks or those with a keyboard tray, this space reclamation can be the difference between a cramped, frustrating setup and a roomy, efficient one. The dual monitor stand essentially creates a multi-level workspace vertically.
Productivity: See More, Do More
Two monitors are a productivity engine, but only if they’re positioned correctly. A good stand allows for precise angle adjustment. You can angle the primary monitor straight ahead and swivel the secondary one to face you directly, creating a seamless panoramic view. This is perfect for referencing documents, keeping communication apps (like Slack or Teams) open on one side, or having your coding environment on one screen and output on the other. The reduction in window-toggling and head-turning saves seconds per minute, which adds up to hours of focused work over a week. Furthermore, a stable stand prevents annoying screen wobble during intense typing sessions, keeping your visual field steady.
Cable Management: Tame the Jungle
Let’s not forget the spaghetti monster under your desk. Most modern dual monitor stands come with built-in cable management. This usually includes clips, channels, or sleeves that route your monitor power and video cables up through the stand’s pole, keeping them bundled and hidden from view. This does more than just look neat; it improves safety by reducing trip hazards, makes cleaning under the desk infinitely easier, and gives your setup a professional, streamlined aesthetic. Some stands even have a dedicated channel for a laptop power brick or USB hub.
Types of Dual Monitor Stands: Finding Your Perfect Match
Not all stands are created equal. The mounting mechanism is the first and most critical decision, as it must be compatible with your desk. Here are the main types you’ll encounter.

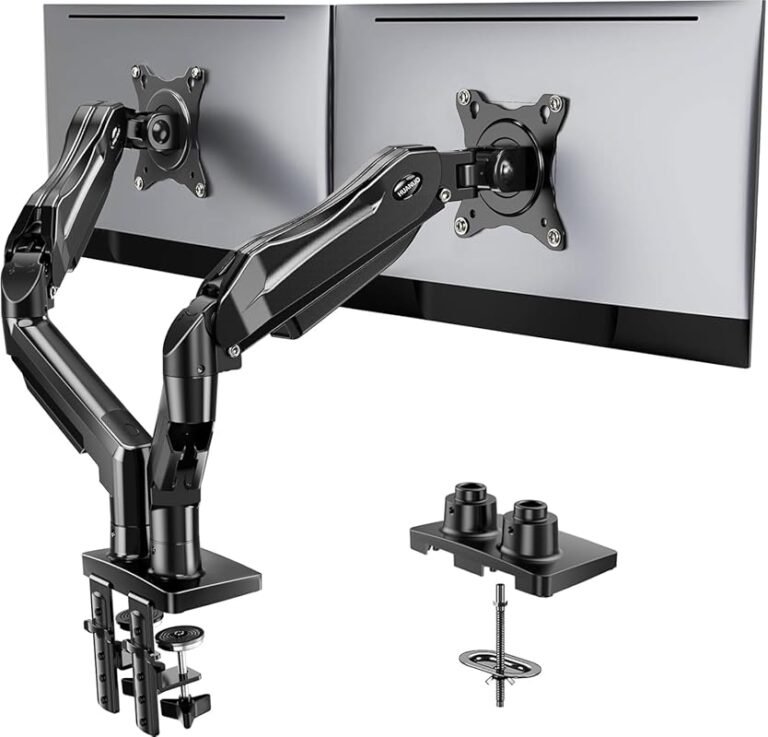
Visual guide about Dual Monitor Stand for Desk
Image source: m.media-amazon.com
Clamp-On Stands: The Popular Choice
As the name suggests, these stands clamp onto the edge of your desk. They are incredibly versatile and easy to install without any drilling. A strong, padded clamp grips the desk surface, and the stand’s pole rises from there. Pros: No permanent modification, fits a wide range of desk thicknesses (usually check specs, but often 0.5″ to 3.5″), easy to remove. Cons: The clamp can sometimes interfere with a desk’s lip or a keyboard tray if you have one. Ensure your desk edge is robust; a flimsy particleboard edge might crack under constant pressure. These are ideal for most standard office and home desks.
Grommet Mounts: The Seamless Look
This style requires a hole (grommet) in your desk surface, typically 1.5″ to 2″ in diameter. The stand’s base drops through the hole and is secured from below with a large nut or bracket, creating a completely clean look with no visible clamp on the desk’s edge. Pros: Ultra-stable, maximum under-desk clearance, premium aesthetic. Cons: Requires drilling a hole in your desk, which is permanent. You must ensure your desk has a suitable location and material thickness. Perfect for solid wood, laminate, or glass desks where you want a built-in appearance.
Freestanding (Base) Models: Maximum Flexibility
These stands have a heavy, wide base that sits on top of your desk. They are not attached to the desk at all. Pros: Zero installation, can be moved anywhere on the desk instantly, no risk of damaging the desk surface. Great for shared spaces or renters. Cons: They consume more desk surface area with their base footprint. They can be less stable than clamped or grommet mounts, especially with very large or ultrawide monitors, as the center of gravity is higher. Best for smaller monitors or desks with ample free space.
Hybrid & Specialized Designs
You’ll also find hybrids, like a clamp-on stand with an optional grommet kit, offering future-proofing. Some stands are designed specifically for corner desks (L-shaped) or for mounting three or more monitors. If you have a specific non-standard desk, look for these specialized options.
Key Features to Look For: Beyond the Basics
Once you know the mounting type, dive into the features that separate a good stand from a great one. Don’t just buy the first one that fits your budget.
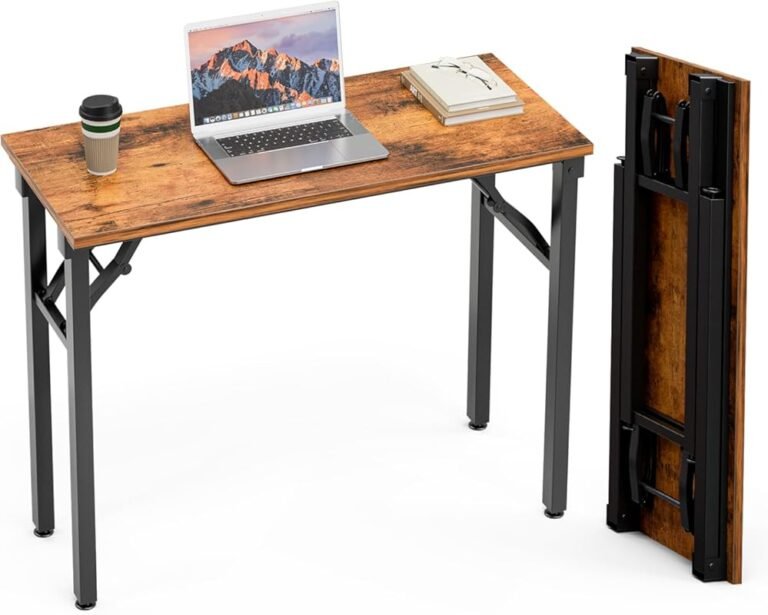
Visual guide about Dual Monitor Stand for Desk
Image source: m.media-amazon.com
Adjustability: The Heart of Ergonomics
Look for stands with a full range of motion. This includes:
- Height Adjustment: Should cover your ideal ergonomic range, typically from about 4″ to 20″ above the desk surface.
- Tilt (Pitch): Ability to angle screens up and down, usually -15° to +90°.
- Swivel (Yaw): Rotation left and right, crucial for dual-monitor angle optimization. Look for at least 180° total rotation (90° each way).
- Pivot (Portrait): Ability to rotate a screen 90° for coding, document editing, or mobile app development. Not all stands support this, so check if it’s important to you.
Gas spring arms are the gold standard here, providing smooth, effortless one-hand adjustment. Cheaper friction-based arms can be stiff and require two hands to reposition.
Build Quality & Weight Capacity
This is non-negotiable for safety. Your monitors are expensive. The stand must be built to hold them securely. Check the weight capacity per arm and the total weight capacity. Always add up the weight of both your monitors (find this on their spec sheet or with a scale) and ensure it’s well under the stand’s limit—aim for at least a 20-30% safety margin. Look for stands made from heavy-gauge steel or aluminum. A wide, sturdy base or a robust clamp mechanism is a sign of quality. Read reviews for any mentions of sagging, wobbling, or instability over time.
VESA Mount Compatibility
This is the standard hole pattern on the back of your monitor. Common sizes are 75x75mm and 100x100mm. Some larger monitors use 200x100mm or others. Your stand must support the VESA pattern of your monitors. Most stands are compatible with both 75mm and 100mm, but always verify. The stand should include the necessary screws and hardware for your specific pattern.
Cable Management System
As mentioned, this is a huge perk. Evaluate the system. Is it just a simple clip, or are there enclosed channels that run up the pole? Some stands include a small internal tray or pouch to hide a USB hub or power brick. The more comprehensive the system, the cleaner your final look will be.
Setting Up Your Dual Monitor Stand: A Step-by-Step Guide
Installation is usually straightforward, but doing it right ensures safety and perfect alignment.
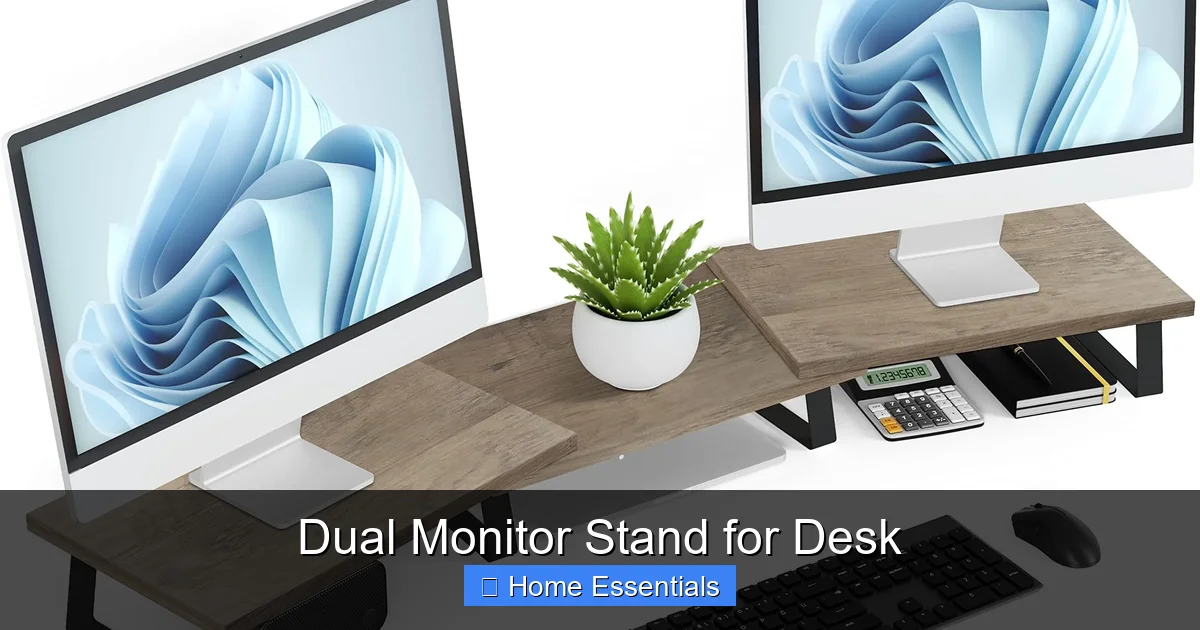
Visual guide about Dual Monitor Stand for Desk
Image source: m.media-amazon.com
Preparation and Tool Check
First, clear your desk completely. You’ll need a clean, flat surface to work on. Gather the tools: typically, the stand comes with an Allen wrench (hex key) and possibly a screwdriver. It’s wise to have your own set on hand. Have a soft cloth or towel ready to place on the desk to protect its surface from scratches during installation. Finally, know your desk’s edge thickness if using a clamp, or have your drill and hole saw ready if doing a grommet mount.
Mounting Process: Clamp-On Example
1. Attach the Mounting Plate: If your stand has a separate plate that clamps to the desk, attach the monitor arms to this plate first (it’s easier when the plate is on the desk). Ensure all bolts are snug but not over-tightened.
2. Position and Clamp: Place the plate on the desk edge where you want the monitors. Open the clamp fully. Slide it onto the desk edge, ensuring it’s seated firmly. Tighten the main clamp bolt and any secondary safety bolts until the stand is immovable. Give it a firm tug to test.
3. Attach Monitors: With the stand secure, attach the monitor brackets (VESA plates) to the back of each monitor using the provided screws. Hand-tighten first, then use the tool to snug them securely—do not overtighten and crack the monitor casing.
4. Hang the Monitors: Lift each monitor and hook the bracket onto the stand’s arm. You’ll usually hear a click or feel it lock into place. Engage any safety latches or levers.
5. Initial Cable Connection: Before fine-tuning, connect your video cables (DisplayPort, HDMI) and power cables. Route them through the stand’s management system as you go.
Fine-Tuning for Perfect Comfort
Now for the fun part. With monitors attached, adjust the stand to your ideal ergonomic position.
1. Height: Raise or lower the arms so the top of your primary monitor is at or slightly below eye level when sitting upright.
2. Tilt: Tilt the screens back very slightly (5-10°) so you view them perpendicularly. This reduces glare and improves viewing angle.
3. Swivel: Angle the monitors so they face you directly. For a dual setup, the inside edges should meet at about a 90-120° angle from your central sitting position, forming a gentle arc.
4. Distance: Sit back in your chair. The ideal viewing distance is an arm’s length away (roughly 20-30 inches). Adjust the monitors forward/back if your stand allows.
5. Alignment: Use a string or your eye as a guide. The center of your primary monitor should be directly in front of you. The secondary monitor should be angled so you can glance at it with minimal head turn.
Take your time with this step. Small adjustments make a big difference in long-term comfort.
Maintaining Your Stand and Workspace: Long-Term Care
Your dual monitor stand is a workhorse. With a little care, it will last for years and keep your setup pristine.
Regular Cleaning Routines
Dust is the enemy of electronics and moving parts. A weekly wipe-down is essential. Use a soft, lint-free microfiber cloth slightly dampened with water or a screen-safe cleaner. Never spray liquid directly onto the monitor or stand. Spray onto the cloth first. For the stand’s metal or plastic parts, a dry microfiber cloth is often sufficient. For stubborn fingerprints, a tiny drop of mild soap on the cloth will work. Pay special attention to the gas spring pistons and joint pivots—keep these clean to ensure smooth operation. For your actual monitor screens, always use a product designed for displays or a dry microfiber cloth. You can find specific guidance on using the right tools in our guide on how to use a microfiber cloth for dusting.
Long-Term Care and Inspection
Every few months, do a quick inspection. Check all bolts and screws for tightness. Vibration from typing can slowly loosen them. Tighten anything that feels less than snug. Examine the clamp or base for any signs of stress or cracking, especially if you have a heavy monitor setup. Listen for any new creaks or feel for increased wobble when adjusting—this can indicate worn bushings in the joints. If your stand has a gas spring, it should hold its position firmly. If it slowly sinks, the spring may be failing and the stand may need replacement. Keep cables tidy; a tangled cable can pull on a connector or create drag on the arm’s movement.
Conclusion: Elevate Your Workspace Today
Upgrading to a dual monitor stand for desk is more than an aesthetic choice; it’s an investment in your health, efficiency, and sanity. The journey from a cluttered, neck-aching desk to a streamlined, ergonomic command center is surprisingly simple with the right stand. Remember to measure your desk and monitors, prioritize adjustability and build quality, and take your time with the setup and fine-tuning. The result is a workspace that not only looks fantastic but actively supports your best work, day in and day out. Don’t spend another day hunched over a poorly positioned screen. Make the change, feel the difference, and unlock a new level of productivity and comfort.
Frequently Asked Questions
Will a dual monitor stand fit my desk?
It depends on the stand type and your desk. Clamp-on stands fit most standard desk edges (typically 0.5″ to 3.5″ thick). Grommet mounts require an existing or drilled hole. Freestanding bases sit on top but need surface area. Always check the manufacturer’s desk compatibility specs before purchasing.
How do I know if my monitors are compatible?
Check two things: 1) The VESA mount pattern on the back of your monitors (common sizes are 75x75mm or 100x100mm). 2) The weight of each monitor. Ensure the stand’s VESA compatibility list includes your pattern and that each monitor’s weight is well under the stand’s per-arm weight capacity rating.
Can I use a dual monitor stand with a curved monitor?
Yes, absolutely. Curved monitors work great with dual stands. The key is to ensure the stand offers enough swivel adjustment to angle each curved screen toward you, creating a cohesive, immersive field of view. Look for stands with a wide swivel range (180° or more).
What’s the difference between a gas spring arm and a friction arm?
A gas spring arm uses a pneumatic cylinder for effortless, one-hand height and position adjustment. It stays firmly in place wherever you set it. A friction arm relies on tightened bolts and friction to hold position; it’s often stiffer to move and may require two hands to adjust, especially with heavier monitors. Gas springs are superior for frequent adjustments.
How do I manage cables with a dual monitor stand?
Most stands include built-in cable management. Route your monitor power and video cables through the central pole using the provided clips or channels. Some stands have a small internal tray for a power brick or USB hub. Use zip ties or velcro straps (often included) to bundle cables neatly as they run down the pole to your desk.
Is professional installation necessary?
For most clamp-on or freestanding stands, installation is a simple DIY task requiring only basic tools (usually an included Allen wrench). Grommet mounts require drilling a precise hole, which may require more skill and tools. If you’re uncomfortable drilling into your expensive desk, consider hiring a handyman for that specific type. Always ensure the stand is securely mounted before attaching your monitors.