How to Clean Toilet Brush Holder
Keeping your toilet brush holder clean is essential for a hygienic bathroom. Regular cleaning prevents bacteria buildup and keeps unpleasant odors at bay. With the right tools and techniques, you can maintain a spotless and safe toilet brush holder in just a few minutes each week.
Key Takeaways
- Prevent bacterial growth: A dirty brush holder can harbor harmful bacteria, especially if not cleaned regularly. Regular cleaning reduces the risk of germs spreading.
- Eliminate odors: Cleaning removes residue and trapped moisture, which are common sources of unpleasant smells in bathroom fixtures.
- Extend the lifespan of your brush holder: Proper maintenance prevents corrosion and wear, helping your bathroom accessory last longer.
- Use safe, effective cleaning products: Choose non-toxic, disinfecting cleaners that won’t damage surfaces or leave harmful residues.
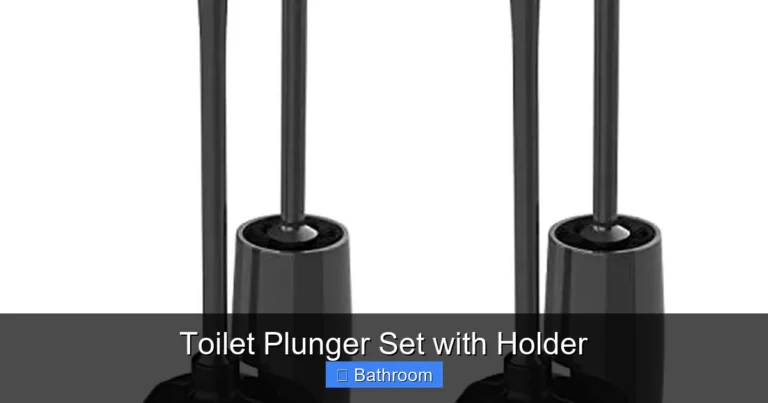
- Clean the brush and holder together: Always clean both the brush and its holder simultaneously to maintain overall hygiene.
- Schedule regular cleaning: Set a weekly routine to keep your bathroom fresh and germ-free without overwhelming your schedule.
- Consider replacement when necessary: If the holder shows signs of mold or damage, it’s time to replace it for safety and cleanliness.
📑 Table of Contents
- How to Clean Toilet Brush Holder: A Complete Guide
- Why Clean Your Toilet Brush Holder?
- What You’ll Need to Clean Your Toilet Brush Holder
- Step-by-Step Guide to Cleaning Your Toilet Brush Holder
- Common Mistakes to Avoid
- Natural and Eco-Friendly Cleaning Options
- How Often Should You Clean the Toilet Brush Holder?
- Maintaining a Clean Toilet Brush Holder
- When to Replace Your Toilet Brush Holder
How to Clean Toilet Brush Holder: A Complete Guide
We’ve all been there—you reach for the toilet brush, only to notice a slimy residue or a lingering smell that makes you pause. The toilet brush holder, often overlooked, plays a surprisingly big role in bathroom hygiene. While the brush itself gets used daily, the holder can become a hidden hotspot for bacteria, mold, and grime. If not cleaned regularly, it can compromise the entire cleaning process and even spread germs.
Cleaning your toilet brush holder isn’t just about appearances—it’s about maintaining a safe, healthy bathroom environment. A dirty holder can reintroduce bacteria into your toilet bowl, defeating the purpose of using the brush in the first place. Plus, a clean holder makes the whole cleaning routine more pleasant and effective. Whether you’re dealing with plastic, metal, or silicone, every type of holder benefits from proper care.
In this guide, we’ll walk you through everything you need to know about cleaning your toilet brush holder—from preparation to maintenance. You’ll learn how to remove stubborn buildup, disinfect safely, and keep your bathroom smelling fresh. Let’s dive in and make your toilet brush holder sparkle again!
Why Clean Your Toilet Brush Holder?
The Hidden Dangers of a Dirty Holder
Many people focus on cleaning the toilet bowl but forget that the brush and holder are just as important. When you use the brush, water, debris, and even fecal matter can splash back into the holder. Over time, this creates a breeding ground for bacteria like E. coli and Salmonella. Without regular cleaning, the holder becomes contaminated, and the next time you reach for the brush, you’re not just cleaning—you’re recontaminating.
Additionally, moisture trapped in the holder encourages mold and mildew growth. These fungi thrive in warm, damp environments and can release spores into the air, affecting air quality in your bathroom. Not only is this unsightly, but it can also trigger allergies or respiratory issues for sensitive individuals.
Benefits of Regular Cleaning
Keeping your toilet brush holder clean offers several advantages. First, it ensures that your cleaning routine is truly effective. A dirty holder undermines your efforts, no matter how well you scrub the bowl. Second, it improves the overall hygiene of your bathroom, reducing the risk of cross-contamination. Third, a clean holder looks better and feels more sanitary to use.
Moreover, regular cleaning can extend the life of your brush holder. For example, metal holders may rust if exposed to constant moisture and acidic cleaners. Plastic holders can crack or discolor if not maintained properly. By following the right cleaning steps, you protect your investment and keep your bathroom looking fresh.
What You’ll Need to Clean Your Toilet Brush Holder
Essential Cleaning Supplies
Before you start, gather the right tools. The good news is that you probably already have most of them in your bathroom. Here’s a checklist:
- Disinfectant cleaner: Choose a product labeled as a disinfectant, such as Lysol, Clorox, or a natural alternative like vinegar and baking soda. Avoid harsh chemicals that can damage surfaces.
- Microfiber cloth or sponge: A soft cloth is ideal for scrubbing without scratching. Avoid abrasive sponges that can wear down plastic or metal.
- Toothbrush or small brush: This helps reach tight corners and crevices where grime accumulates.
- Bucket or bowl: Useful for soaking or rinsing the brush and holder.
- Rubber gloves: Protect your hands from germs and cleaning chemicals.
- Paper towels: For drying and wiping surfaces.
Optional but Helpful Items
If you want to go the extra mile, consider adding these to your cleaning kit:
- White vinegar: A natural disinfectant that cuts through grease and kills bacteria.
- Baking soda: Great for scrubbing away tough stains and neutralizing odors.
- Essential oils (e.g., tea tree or lavender): Add a fresh scent and have antimicrobial properties.
- Toilet brush cleaner spray: Some brands offer sprays designed specifically for brush holders.
Having the right supplies on hand makes the cleaning process faster and more effective. You’ll spend less time searching for tools and more time getting the job done right.
Step-by-Step Guide to Cleaning Your Toilet Brush Holder
Step 1: Remove the Brush and Empty the Holder
Start by removing the brush from the holder. This allows you to clean both items thoroughly. If the brush has a removable handle or bristles, take it apart if possible. Empty any standing water from the holder into the toilet bowl—never pour it down the drain, as it can spread germs.
Next, inspect the holder for loose debris. Use a paper towel or dry cloth to wipe away any visible dirt, hair, or residue. This pre-cleaning step makes the deep cleaning process easier and more effective.
Step 2: Prepare a Cleaning Solution
Mix your cleaning solution based on your preferred method. For a chemical-free option, combine equal parts white vinegar and water in a spray bottle. Add a few drops of tea tree oil for extra disinfectant power. For a stronger clean, use a commercial disinfectant or a solution of 1 part bleach to 10 parts water (but never mix bleach with vinegar—it creates toxic fumes).
If you’re using baking soda, sprinkle a small amount directly into the holder and let it sit for 10–15 minutes to break down grime. This natural abrasive is especially useful for removing mineral deposits or soap scum.
Step 3: Scrub the Holder Thoroughly
Spray or pour the cleaning solution into the holder, making sure to cover all surfaces—especially the bottom and sides where moisture collects. Use a toothbrush or small scrub brush to work the solution into crevices. Pay attention to areas where the brush sits, as these spots often trap bacteria.
For stubborn buildup, let the solution sit for 5–10 minutes before scrubbing. This gives it time to break down grime. For metal holders, avoid steel wool, as it can scratch and create rust spots. Instead, use a soft sponge or cloth.
Step 4: Clean the Toilet Brush
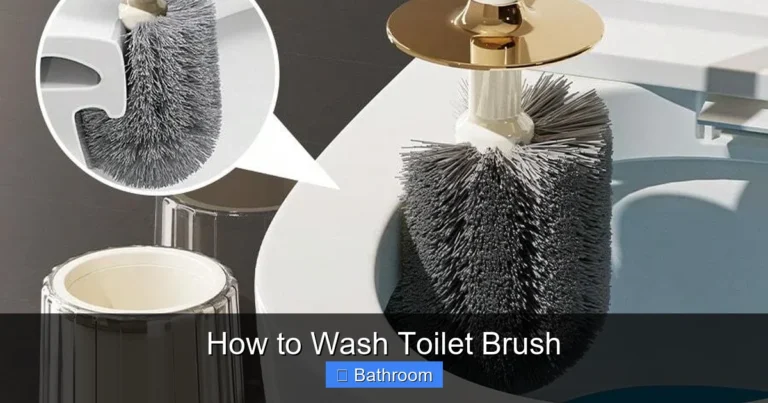
While the holder soaks, clean the brush. Rinse it under running water to remove excess debris. Then, dip it into the cleaning solution or spray it with disinfectant. Scrub the bristles and handle with a brush or cloth, paying special attention to the base where it connects to the holder.
If the brush has a plastic handle, avoid soaking it in water for too long, as this can cause warping. Instead, wipe it down with a damp cloth and let it air dry.
Step 5: Rinse and Dry Everything
After scrubbing, rinse the holder and brush thoroughly with clean water. Any leftover cleaning residue can cause irritation or leave a film. Shake out excess water from the brush and holder, then place them upside down on a clean towel or drying rack to air dry completely.
Never store a wet brush in a closed holder—this creates a damp environment perfect for mold growth. Ensure both items are fully dry before reassembling.
Step 6: Reassemble and Disinfect the Area
Once everything is dry, place the brush back into the holder. Wipe down the surrounding area—such as the toilet seat or floor—with a disinfectant wipe to prevent cross-contamination. This final step ensures your entire cleaning routine is complete and hygienic.
Common Mistakes to Avoid
Not Cleaning the Brush and Holder Together
One of the biggest mistakes is cleaning the brush and holder at different times or skipping one entirely. Since the brush sits in the holder, they share germs constantly. Always clean them together to maintain hygiene.
Using Harsh Chemicals
While bleach is effective, it can damage certain materials. For plastic holders, bleach may cause discoloration or cracking over time. Stick to mild disinfectants or natural alternatives to protect your fixtures.
Skipping the Drying Step
Drying is just as important as cleaning. Leaving the brush and holder wet allows bacteria and mold to grow. Always let everything air dry completely before reusing.
Using the Same Brush for Years
Toilet brushes should be replaced every 3–6 months, depending on usage. Old brushes become less effective and harder to clean. Replace yours regularly to maintain cleanliness.
Not Cleaning the Holder After Every Use
It’s not enough to clean the holder once a month. After each use, give it a quick wipe with a disinfectant spray to prevent buildup. This simple habit makes deep cleaning much easier.
Natural and Eco-Friendly Cleaning Options
Vinegar and Baking Soda Method
For a chemical-free clean, mix 1 cup of white vinegar with 1 cup of water in a spray bottle. Add 1 tablespoon of baking soda and shake well. Spray the solution into the holder, let it sit for 15 minutes, then scrub and rinse. The acidity of vinegar kills bacteria, while baking soda lifts stains and neutralizes odors.
Essential Oil Boost
Add 5–10 drops of tea tree, lavender, or lemon essential oil to your cleaning solution. These oils have natural antimicrobial properties and leave a fresh scent. Just remember to use them in well-ventilated areas and avoid contact with eyes.
Reusable Cleaning Cloths
Switch to washable microfiber cloths instead of paper towels. They’re more eco-friendly and can be washed and reused for months. Just launder them with hot water and detergent after each use.
By choosing natural methods, you reduce exposure to harsh chemicals while still achieving a deep clean. Plus, your bathroom will smell clean and fresh without artificial fragrances.
How Often Should You Clean the Toilet Brush Holder?
Weekly Maintenance
For most households, cleaning the toilet brush holder once a week is sufficient. This prevents buildup and keeps odors under control. After each use, give it a quick wipe with a disinfectant spray to maintain freshness.
Monthly Deep Clean
Once a month, perform a thorough cleaning using the steps outlined above. This includes soaking, scrubbing, and drying everything completely. It’s also a good time to inspect the holder for wear and tear.
Signs It’s Time to Clean
Pay attention to warning signs like:
- Persistent bad smell
- Visible mold or mildew
- Sticky or slimy residue
- Discoloration or rust (for metal holders)
If you notice any of these, clean immediately—even if it’s not your regular schedule.
Seasonal Considerations
In humid climates or during summer months, mold grows faster. Increase cleaning frequency to twice a week during these times. In winter, when bathrooms are used less, weekly cleaning is usually enough.
Consistency is key. A simple weekly routine saves time and prevents major buildup later.
Maintaining a Clean Toilet Brush Holder
Daily Habits
Small daily actions go a long way. After each use, rinse the brush under hot water and shake off excess water. Wipe the holder with a disinfectant wipe or spray. This prevents moisture buildup and keeps germs at bay.
Proper Storage
Always store the brush upside down in the holder. This allows water to drain out instead of pooling at the bottom. Avoid placing the holder in enclosed cabinets or near the shower, where humidity is high.
Regular Inspections
Check your holder monthly for signs of damage, mold, or wear. Replace it if it’s cracked, rusted, or no longer holds the brush securely. A damaged holder can harbor bacteria and become a safety hazard.
Rotate Brushes
If you have multiple brushes, rotate them every few months. This ensures even wear and gives each brush time to air out between uses. It also helps prevent overuse of a single brush, which can lead to faster degradation.
Educate Household Members
If others use the bathroom, teach them the importance of cleaning the brush and holder. Make it part of the post-use routine. A clean bathroom is a shared responsibility.
When to Replace Your Toilet Brush Holder
Signs of Wear and Tear
Over time, toilet brush holders can degrade. Common signs include:
- Rust or corrosion (especially in metal holders)
- Cracks or splits in plastic
- Loose or broken bristles
- Permanent stains or discoloration
- Mold that won’t go away despite cleaning
If your holder shows any of these signs, it’s time to replace it. Continuing to use a damaged holder puts your health at risk.
Choosing a New Holder
When shopping for a new holder, consider:
- Material: Plastic is lightweight and affordable, but metal (stainless steel) is more durable and rust-resistant.
- Design: Some holders have drainage holes or removable parts for easier cleaning.
- Mounting: Wall-mounted holders save space and keep the brush off the floor.
Look for holders with antimicrobial coatings or easy-clean surfaces. Avoid models with deep crevices where dirt can hide.
Disposal Tips
Dispose of old holders responsibly. Plastic can be recycled if clean and dry. Metal holders should be taken to a recycling center. Never flush them down the toilet—they can cause plumbing issues.
Replacing your holder every 1–2 years is a good rule of thumb, depending on usage and material.
Frequently Asked Questions
How often should I clean my toilet brush holder?
You should clean your toilet brush holder at least once a week to prevent bacteria buildup and odors. A quick wipe after each use helps maintain cleanliness.
Can I use bleach to clean my toilet brush holder?
Yes, but only for plastic holders and in diluted form (1 part bleach to 10 parts water). Avoid bleach on metal or painted surfaces, as it can cause damage.
Why does my toilet brush holder smell bad even after cleaning?
Bad odors often come from mold, trapped moisture, or leftover cleaning residue. Ensure the holder dries completely after cleaning and replace the brush if it’s old or worn.
Is it safe to clean the toilet brush with vinegar?
Yes, vinegar is a natural disinfectant. Mix equal parts vinegar and water, spray on the brush and holder, let sit for 10 minutes, then rinse thoroughly.
Can I put my toilet brush in the dishwasher?
Only if the brush and holder are labeled as dishwasher-safe. Most plastic brushes are not, as heat and water can warp or melt them. Check the manufacturer’s instructions first.
How do I remove mold from a toilet brush holder?
Mix baking soda and water into a paste, apply it to the moldy areas, and let it sit for 15 minutes. Scrub with a brush, rinse, and dry completely. Repeat if necessary.