How to Organize a Study Desk
A well-organized study desk is the cornerstone of academic and professional success. It’s not just about tidiness; it’s about designing a system that minimizes distractions and maximizes efficiency. By strategically assessing your needs, implementing smart storage, and establishing daily habits, you can create a personalized zone that boosts concentration and reduces stress. This guide provides actionable steps to declutter, organize, and maintain your perfect study space.
Let’s be honest. A messy study desk isn’t just an eyesore; it’s a productivity killer. It whispers distractions in your ear, wastes precious time searching for a pen, and creates a low-grade hum of stress you might not even consciously notice. But what if your desk could be your secret weapon? A calm, organized command center where your focus is sharp, your tools are ready, and your mind is free to dive deep into work or study. Organizing a study desk is not about achieving a sterile, magazine-worthy perfection. It’s about intentionality. It’s about creating a physical environment that actively supports your mental processes. This guide will walk you through every step, from the initial purge to the final polish, to build a study desk that works for you.
Key Takeaways
- Start with a Blank Slate: Remove everything from your desk to truly assess your space and needs before reorganizing.
- Adopt the “One In, One Out” Rule: For every new item you bring to your desk, remove an old one to prevent future clutter.
- Prioritize Vertical Space: Use walls, shelves, and monitor stands to free up valuable desktop real estate for active work.
- Conquer Cables Proactively: Use clips, ties, and sleeves to manage cords; a tangled cable nest is a major source of visual chaos.
- Design for Your Workflow: Place frequently used items (laptop, notebook, pen) within the “primary zone” (directly in front of you).
- Clean as You Go: A 5-minute end-of-day reset prevents small messes from becoming overwhelming weekend projects.
- Lighting is Non-Negotiable: Combine a bright, cool task light with ambient lighting to reduce eye strain and maintain alertness.
📑 Table of Contents
- 1. The Great Desk Purge: Assess and Declutter
- 2. The Essential Desk Toolkit: What You Actually Need
- 3. Storage Solutions That Maximize Minimal Space
- 4. Cable Management: Taming the Tangled Nightmare
- 5. Ergonomics and Lighting: Comfort is Part of Organization
- 6. Maintenance: The Daily and Weekly Habits That Prevent Chaos
- 7. Personalizing Your Productivity Zone: The Final Touch
- Conclusion: Your Organized Desk, Your Focused Mind
1. The Great Desk Purge: Assess and Declutter
You cannot organize clutter. The first and most critical step is a complete, ruthless assessment. This isn’t a quick tidy-up; it’s a diagnostic operation.
Step 1: The Total Evacuation
Clear every single item off your desk, drawers, and surrounding shelves. Yes, everything. Place it all on your bed or floor. This physical separation is powerful. It breaks the mental attachment to “where things are” and forces you to evaluate each object on its own merit. Seeing the sheer volume of stuff you’ve accumulated is often the biggest motivator to let go.
Step 2: The Four-Box Sort
As you handle each item, sort it into one of four categories: Trash/Recycle, Relocate (belongs in another room), Donate/Sell, and Keep. Be brutally honest. Is that dried-up pen from 2018 really worth the space? Are those event flyers from three months ago still relevant? Be ruthless with the “maybe” pile—it’s where clutter is reborn. A good rule: if you haven’t used it in the last three months and it’s not sentimentally valuable, it probably doesn’t belong on your study desk.
Step 3: Analyze Your True Workflow
Now, with only the “Keep” pile, think about your actual daily tasks. What do you really need within arm’s reach? For a student, it might be a textbook, notebook, and calculator. For a remote worker, it might be a second monitor, notepad, and headset. Group these items by function: writing, computing, reference, etc. This functional grouping will be the blueprint for your new layout. Before you put anything back, you must understand your essential workflow.
2. The Essential Desk Toolkit: What You Actually Need
With your core items identified, it’s time to define the toolkit for your organized desk. The goal is to have the right tools, not the most tools.

Visual guide about How to Organize a Study Desk
Image source: i.pinimg.com
Writing Instruments & Notepads
Ditch the 50 pens. Select 2-3 reliable, comfortable pens you enjoy using (a blue/black ballpoint for notes, a red for editing/ corrections). Add one highlighter set. Keep a single, dedicated notebook or a stack of legal pads for scratch work. A single pencil and sharpener is enough. Store these in a desk caddy or a designated drawer compartment. The rule is: if a pen doesn’t write smoothly immediately, it gets tossed.
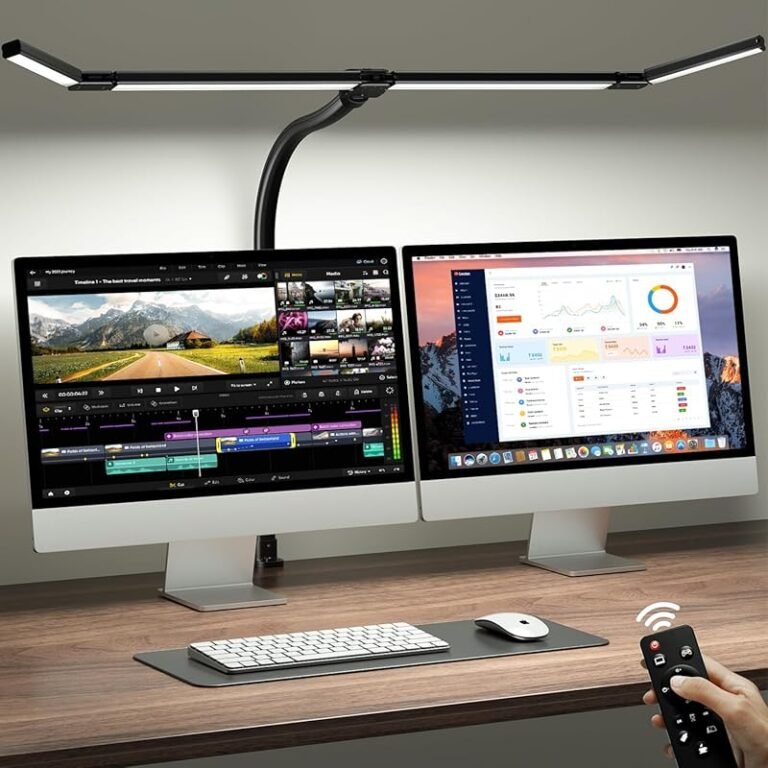
Digital Device Management
Your laptop/desktop is the hub. Ensure it’s in optimal working condition. A second monitor can dramatically increase productivity for many tasks. For peripherals, choose a wireless keyboard and mouse to reduce cable clutter. A laptop stand is a game-changer for ergonomics, raising the screen to eye level. A quality pair of headphones or earbuds with a microphone is essential for calls and focus. If you use a tablet for reference, a dedicated stand keeps it propped up neatly.
Reference & Organization Tools
This is where physical clutter sneaks in. Limit physical reference materials (books, manuals) to only what you use daily. Use a simple file organizer or a vertical letter tray for active projects. A small, stackable drawer organizer for paperclips, staples, sticky notes, and binder clips keeps small odds and ends contained and visible. A single, classic desk calendar or a clean dry-erase board for deadlines can replace dozens of sticky notes.
As you set up your digital devices, remember that a clean physical space extends to your digital environment. Just as you’d use a microfiber cloth to wipe dust from your monitor screen for clarity, regularly organize your computer desktop and files. For tips on keeping your tech dust-free, see our guide on how to clean electronics with a microfiber cloth.
3. Storage Solutions That Maximize Minimal Space
The magic of an organized desk is hiding clutter while keeping essentials accessible. This requires smart storage, not just more storage.

Visual guide about How to Organize a Study Desk
Image source: wikihow.com
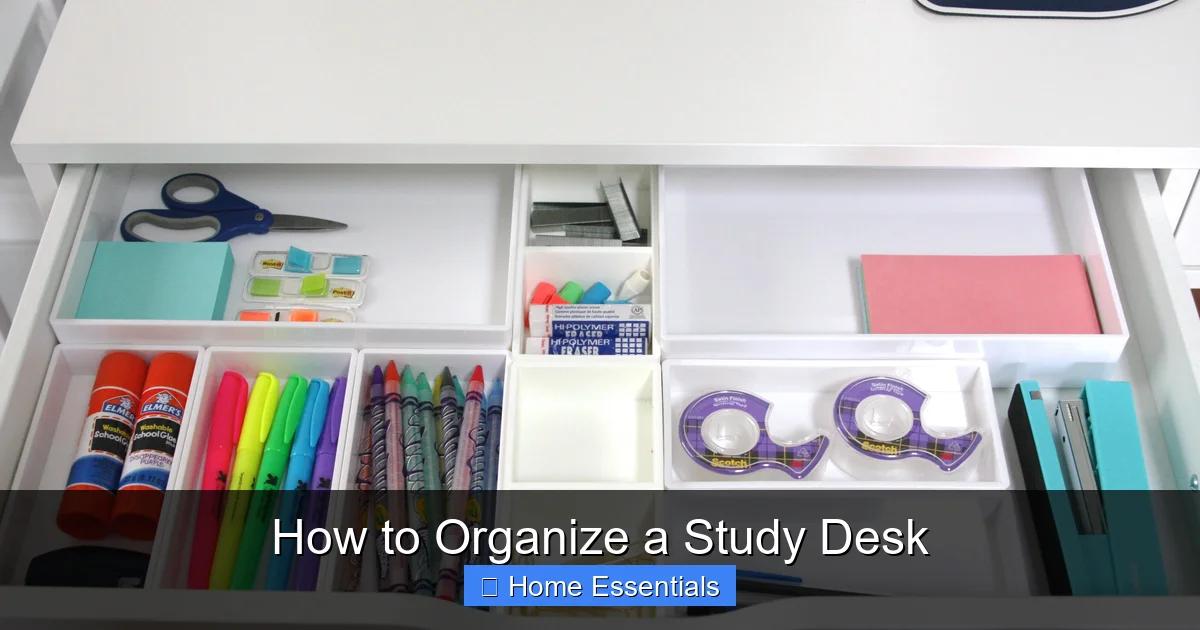
Master the Drawer
Drawers are the #1 culprit for becoming “junk drawers.” The solution is a simple drawer divider system. Use adjustable dividers to create custom compartments for your sorted toolkit (pens, clips, chargers). The golden rule: everything must have a designated “home.” When an item is out of place, you’ll know it instantly. Store lesser-used items in the back and daily-use items in the front. Consider a shallow tray for items you use while standing (like a stapler).
Go Vertical with Wall Space and Monitor Riser
Your desk surface is prime real estate. Treat it like a valuable commodity. Install a small wall shelf or pegboard above or beside your desk for books, plants, or supplies you reference occasionally. A monitor riser with built-in storage underneath is a dual-purpose hero: it improves ergonomics and creates a hidden compartment for notebooks, external drives, or your keyboard when not in use. This instantly clears 50% of your desktop.
The Power of “Beneath the Desk”
Don’t neglect the space under your desk. Use adhesive cable clips on the underside of your desk to route power strips and cables, keeping the floor clear and preventing tripping hazards. A small, low-profile rolling cart or filing cabinet tucked beside your desk is perfect for storing project files, bulk supplies, or reference books you need but don’t use hourly. This keeps your immediate desktop clear for active work.
4. Cable Management: Taming the Tangled Nightmare
If drawers are the clutter closet, cables are the jungle gym. A spaghetti pile of cords is visually chaotic and frustrating. Conquering it is 50% of the battle.

Visual guide about How to Organize a Study Desk
Image source: simplyorganized.me
Audit and Label Everything
First, unplug and trace every cable. Do you really need all of them connected at once? Use a surge protector with individual switches to easily power down unused devices. Once you know what’s what, label each cable at both ends with a label maker or a piece of masking tape (e.g., “Laptop,” “Monitor,” “Phone Charger”). This 30-second step saves hours of confusion later.
Tools of the Trade
You need a system. Start with a cable management box or sleeve to hide a power strip and its tangled offspring. Use Velcro straps or twist ties (reusable ones are best) to bundle cables together. Adhesive cable clips stuck to the back edge of your desk and the underside can route cables in clean, parallel lines from device to outlet. For a truly clean look, consider a desk grommet if you have a large desk—it’s a hole with a cover that lets you drop cables through the desktop surface.
Step-by-Step Routing Plan
1. Group: Bundle cables for each device (monitor+PC, laptop+charger). 2. Route: Plan the shortest, neatest path from device to power source. 3. Secure: Use clips to anchor the bundle along the back or underside of the desk. 4. Conceal: Place the power strip and excess cable length in a management box behind or under the desk. 5. Maintain: Once a month, check for new cables or loose bundles. This system is sustainable.
Maintaining a clean desk surface means regularly dusting your workspace. A clean surface is a distraction-free surface. For the best results, use a proper tool. Learn how to use a microfiber cloth for dusting to trap dust effectively without scattering it, keeping your organized desk pristine.
5. Ergonomics and Lighting: Comfort is Part of Organization
An organized desk that hurts your body is a failed system. True organization supports your physical well-being, allowing you to work longer without fatigue.
The Perfect Setup: Chair and Desk Height
Your feet should rest flat on the floor (or on a footrest). Your knees should be at a 90-degree angle. Your elbows should be at a 90-degree angle when typing, with your wrists straight. Your monitor’s top should be at or slightly below eye level, about an arm’s length away. A laptop stand and an external keyboard/mouse are often essential to achieve this. Don’t sacrifice posture for a neat surface—an ergonomic setup is foundational.
Lighting for Focus and Eye Health
Poor lighting causes eye strain, headaches, and fatigue. A layered approach is best. Ambient light from a ceiling fixture or floor lamp fills the room. A dedicated task light (a desk lamp with an adjustable arm) shines directly on your work. Position it to the side of your dominant hand to avoid shadows. For a modern, adjustable solution, consider a smart bulb in your task lamp. You can easily adjust color temperature and brightness. Understanding how a smart light bulb works can help you create the perfect lighting scene for concentration (cool, bright light) or relaxation (warm, dim light).
6. Maintenance: The Daily and Weekly Habits That Prevent Chaos
Organization is not a one-time event; it’s a habit. The systems you build must be supported by simple, sustainable routines.
The 5-Minute End-of-Day Reset
This is the single most important habit. Before you shut down your computer and leave your desk, set a timer for 5 minutes. In that time:
- File any loose papers into their designated tray or folder.
- Put all pens, tools, and accessories back in their assigned drawer or caddy.
- Wipe down the desk surface with a damp cloth or a quick-spritz of cleaner.
- Neaten any cables that may have been disturbed.
- Make a note of your top 3 tasks for tomorrow on your notepad.
This ritual ensures you start every day with a clean, ready-to-go desk. It’s a small investment that prevents the “Sunday Night Mess” from ever happening.
The Weekly Deep Dive
Once a week, spend 15-20 minutes on a deeper clean. Empty your desk drawers completely and wipe them out. Re-sort if things have migrated. Go through your “active” file tray and file or discard old papers. Dust your shelves, monitor, and lamp. Sanitize your keyboard and mouse (a microfiber cloth lightly dampened with isopropyl alcohol works wonders). Check your cable management—are any cords loose? This weekly check-in keeps your system calibrated.
For your weekly clean, using the right cleaning tools makes all the difference. Microfiber is ideal for electronics and surfaces because it traps dust and lint. To keep your cleaning cloths effective, you need to care for them properly. Find out how to wash microfiber cloths correctly to maintain their absorbency and prevent them from scratching your delicate desk surfaces.
7. Personalizing Your Productivity Zone: The Final Touch
Your organized desk should inspire you. This is where function meets feeling.
Motivational Elements (Less is More)
Choose 1-2 items that genuinely motivate you. This could be a framed photo, a small plant (a succulent or pothos is low-maintenance), a favorite quote in a simple frame, or a piece of art that makes you smile. The key is intentionality. Every item on your desk should have a purpose—either functional or emotional. If it doesn’t, it’s just clutter in disguise.
Minimalism vs. Maximalism: Find Your Style
There is no one-size-fits-all. A minimalist might have a laptop, a single notebook, a pen, and a plant. A maximalist creative might have art supplies, reference books, and mood boards within reach. The organizing principles are the same for both: everything has a home, everything is accessible, and the surface is clear for active work. Your style is expressed in the items you keep and how you store them, not in the amount of stuff. Be honest with yourself about what you truly need to have out versus what can be stored away.
Conclusion: Your Organized Desk, Your Focused Mind
Organizing your study desk is an act of self-respect. It’s a declaration that your time, your focus, and your peace of mind are valuable. It’s not about achieving a picture-perfect look for Instagram; it’s about building a physical foundation for mental clarity. Start with the purge. Be honest about what you use. Invest in a few key organizers—drawer dividers, a cable management kit, a good lamp. Then, protect your investment with the 5-minute daily reset. The result won’t just be a tidy desk. It will be a reliable partner in your work and studies, a calm harbor in a busy world, and a space where you can truly sit down and think. Your most productive self is waiting for you at an organized desk. Go build it.
Frequently Asked Questions
How often should I reorganize my study desk?
You shouldn’t need a full reorganization often if you maintain it. A small tweak to your system every 2-3 months is normal as projects or seasons change. The key is the daily 5-minute reset and weekly deep clean, which prevent the need for massive overhauls.
What’s the best way to organize a very small desk?
For small desks, vertical space is your best friend. Use a wall-mounted shelf, a monitor riser with storage underneath, and a pegboard on the wall. Keep only the absolute essentials on the surface: your computer, one notebook, and one pen. Everything else belongs in a drawer or on a nearby small cart.
How do I deal with a lot of paper without creating clutter?
Use a three-tray system: “Inbox” (new papers), “Action” (requires immediate attention), and “File” (for reference). Process the “Inbox” daily, moving items to the other trays. At the end of the week, file everything in the “File” tray. Digitize what you can using a scanner or phone app to reduce physical volume.
Is it better to have a closed storage desk or an open one?
For most people, a mix is best. Open storage (shelves) for items you use constantly and want to see (reference books, daily planner). Closed storage (drawers, cabinets) for everything else—supplies, cables, messy paperwork. Closed storage is visually calming and prevents dust accumulation.
How can I make my desk organization sustainable?
Sustainability comes from habits, not products. Implement the “One In, One Out” rule. Always do your 5-minute end-of-day reset. Store items where they are used (e.g., stapler in the drawer you use for documents, not a random drawer). Regularly audit your supplies to avoid over-buying.
What’s the most common mistake people make when organizing a desk?
The most common mistake is focusing on aesthetics over function. Buying beautiful organizers that don’t fit your actual workflow. The second biggest mistake is not accounting for cables. A beautiful, organized desk with a cable snake running behind it feels chaotic. Always plan your cable management first.