Common Waxing A Car Problems And Easy Ways To Fix Them
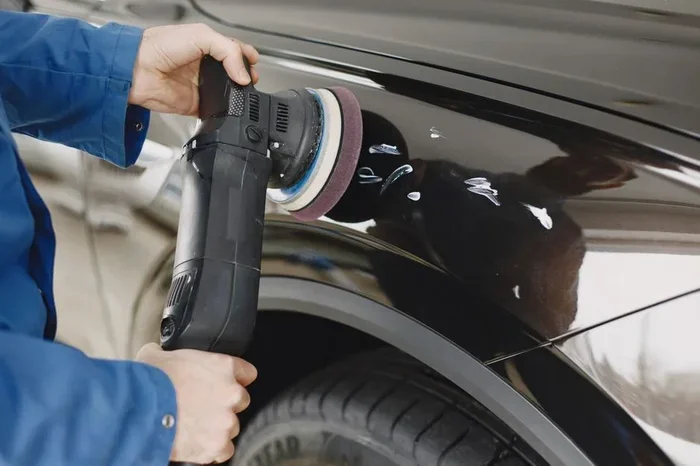
Waxing your car can go wrong in many ways, from hazing and streaking to uneven coverage and stubborn residue. These common waxing a car problems often happen because of the wrong product, bad technique, or poor preparation. The good news is that most issues are easy to fix with simple tools and a little patience. This guide walks you through the top problems and shows you exactly how to solve them.
Waxing your car is one of the most satisfying parts of car care. It protects the paint, adds shine, and makes your vehicle look brand new. But it is not always smooth sailing. Many people run into waxing a car problems that leave them frustrated and wondering if they should just skip it altogether.
The truth is, most of these problems have simple solutions. Whether you are dealing with hazing, streaks, or wax that won’t bond to the surface, you are not alone. This guide covers the most common issues and gives you easy, step-by-step fixes. You will learn what causes each problem and exactly how to avoid it next time.
Let us dive in and get your car looking its absolute best. With the right knowledge, waxing your car can be a breeze instead of a headache.
Key Takeaways
- Hazing and cloudiness are the most frequent waxing problems and usually come from applying wax in direct sunlight or on hot surfaces.
- Streaks and smears happen when you use too much wax or the wrong buffing cloth, but they are easy to fix with a clean microfiber towel.
- Wax buildup on trim and rubber can damage your car’s finish over time, so always mask off areas you don’t want waxed.
- Uneven coverage often results from applying wax in thick layers instead of thin, even coats.
- Water spots after waxing mean the surface wasn’t properly cleaned before wax application, and they can be removed with a simple rinse and re-wax.
- Using the wrong type of wax for your car’s paint condition can cause more harm than good, so always match the product to your needs.
- Patience is key — letting the wax cure fully before buffing prevents most common problems.
📑 Table of Contents
- Why Waxing Problems Happen in the First Place
- Hazing and Cloudy Residue After Waxing
- Streaks and Smears After Buffing
- Wax Buildup on Trim, Rubber, and Plastic
- Uneven Wax Coverage and Patchy Finish
- Water Spots and Contamination Under the Wax
- Choosing the Right Wax for Your Car
- Common Mistakes That Cause Waxing Problems
- Final Thoughts on Fixing Common Waxing Problems
Why Waxing Problems Happen in the First Place
Before we get into the fixes, it helps to understand why things go wrong. Most waxing a car problems come down to just a few root causes. When you know what to look for, you can prevent them before they start.
First, preparation matters a lot. If your car’s surface is not clean, wax will not stick properly. Dirt, grease, and old wax residue create a barrier that blocks the new wax from bonding. This leads to uneven coverage and a dull finish.
Second, the environment plays a big role. Waxing in direct sunlight or on a hot surface causes the wax to dry too fast. This makes it hard to buff off and often results in a hazy, cloudy look. Temperature and humidity both affect how wax cures and how easily it comes off.
Third, using the wrong product or too much product is a very common mistake. Not all waxes work the same way. Some are meant for dark cars, others for light colors. Using the wrong one can cause discoloration or streaking. And putting on too much wax just creates more work and more chances for error.
The Role of Surface Preparation
Think of surface prep as the foundation of a house. Without a solid base, everything on top will fail. Before you even open a wax applicator, your car needs to be washed and dried thoroughly. A clay bar treatment can remove embedded contaminants that a regular wash misses.
After washing, make sure the surface is completely dry. Water droplets trapped under wax cause spots and uneven texture. Some car owners also use a prep spray or primer to help the wax grip better. This small step can make a huge difference in the final result.
Hazing and Cloudy Residue After Waxing
Hazing is one of the most annoying common waxing a car problems. You apply the wax, it looks great, but once it dries, your car looks like it has a film over it. Instead of a glossy shine, you get a dull, cloudy appearance.
The main cause is applying wax in direct sunlight or on a hot surface. When the wax dries too quickly, it does not bond properly to the paint. Instead, it sits on top and creates a haze that is hard to remove.
Another cause is using too much wax in one application. Thick layers take longer to cure and often leave behind a chalky residue. This is especially true with paste waxes, which are thicker than liquid or spray waxes.
How to Fix Haze on Your Car
Fixing haze is simpler than you might think. Start by getting a clean microfiber towel and spraying it with a quick detailer or diluted wax remover. Gently wipe the affected area in circular motions. Do not press too hard, or you risk scratching the paint.
If the haze is stubborn, try a second pass with a fresh towel and a little more detailer spray. Most haze issues clear up within two to three wipes. For heavy haze, a light clay bar pass can remove the residue without harming the paint.
To prevent haze in the future, always wax your car in the shade. A garage or a covered area works best. Let the wax cure for the time recommended on the product label before buffing it off.
Quick Tips to Avoid Haze
- Always wax in a cool, shaded area.
- Apply thin, even coats instead of thick layers.
- Use a quality microfiber buffing cloth.
- Follow the curing time on the product label.
- Work in small sections, about two feet by two feet.
Streaks and Smears After Buffing
Streaks are another one of the most frustrating waxing a car problems. You put in the work, buff the wax off, and then you see ugly lines and smears all over the panel. It is discouraging, but the fix is usually straightforward.
Streaks happen when there is too much wax left on the surface after buffing. This often occurs when you use the wrong type of cloth or when you buff too aggressively. Old, dirty towels can also leave behind lint and fibers that create streaks.
The type of wax you use matters too. Some spray waxes are prone to streaking if you do not buff them off quickly enough. Paste waxes can also streak if you do not use enough pressure during the buffing phase.
Fixing Streaks the Right Way
To fix streaks, start with a fresh microfiber towel. Spray a light mist of quick detailer onto the towel, not directly onto the car. Wipe the streaked area gently using overlapping strokes. Work in small sections and flip the towel frequently to avoid reapplying old wax.
For tough streaks, a second application of wax followed by a careful buff can smooth things out. The key is to use a clean, soft towel every time. Never reuse a towel that has picked up dirt or old wax residue.
Here is a simple method that works well. Apply a thin layer of wax to one panel. Wait for it to haze over. Then buff it off with a clean microfiber towel using light, circular motions. This gives you the best chance of a streak-free finish every time.
Common Buffing Mistakes That Cause Streaks
- Using a dirty or worn-out towel.
- Applying too much pressure while buffing.
- Buffing in direct sunlight, which dries wax too fast.
- Not waiting long enough for the wax to haze before buffing.
- Using the wrong type of cloth for the wax product.
Wax Buildup on Trim, Rubber, and Plastic
Wax getting on areas you did not want it is a very common problem. It gets on rubber seals, plastic trim pieces, and chrome accents. Over time, this buildup can cause these surfaces to look dull or discolored. It can also make them harder to clean in the future.
The problem usually happens because people do not mask off areas before they start waxing. Or they accidentally swipe wax onto trim while buffing nearby panels. Either way, the result is the same — ugly white or greasy residue on parts of your car that should stay clean.
How to Remove Wax from Trim and Rubber
If wax has already built up on your trim or rubber seals, do not panic. Start by applying a small amount of isopropyl alcohol to a clean cloth. Gently rub the affected area. The alcohol dissolves the wax without harming the rubber or plastic.
For stubborn buildup, try a dedicated trim cleaner or a mild all-purpose cleaner. Apply it with a soft brush, work it in gently, and wipe it away with a damp cloth. Repeat if needed until the wax residue is completely gone.
To prevent this problem in the future, always use painter’s tape or masking tape to cover trim, rubber seals, and plastic pieces before you wax. This one simple step saves a lot of cleanup time later.
Prevention Is Easier Than Cure
- Mask off trim and rubber with painter’s tape before waxing.
- Use a separate applicator pad for trim areas.
- Wipe down nearby surfaces immediately if you spill wax.
- Choose a precision wax applicator for tight areas.
- Keep a detail brush handy for cleaning around edges.
Uneven Wax Coverage and Patchy Finish
An uneven, patchy finish is one of the most visible waxing a car problems. Some areas look shiny and protected while others look dull and neglected. This happens when the wax is not applied consistently across the surface.
The most common cause is applying too much pressure in some spots and not enough in others. Another cause is not working in small, manageable sections. When you try to wax large areas all at once, the wax dries unevenly and you end up with patchy results.
Temperature differences across the car can also play a role. A panel that sits in the sun will be warmer than one in the shade, causing the wax to cure at different rates.
Steps to Achieve an Even Coat Every Time
Start by dividing your car into small sections. A door panel, a hood section, or a quarter panel are good sizes. Apply the wax to your applicator pad and spread it in thin, overlapping strokes across one section.
Wait for the wax to haze over before buffing it off. This usually takes about five to ten minutes, depending on the product and the temperature. Use a clean microfiber towel and light pressure to buff each section.
Work your way around the car systematically. Start from the top and work your way down. This prevents drips and ensures you do not miss any spots. After you finish, step back and look at the car from different angles to check for any missed areas.
What to Do If You Already Have Patchy Coverage
If you notice patchy areas after the wax has cured, you can fix it. Apply a thin layer of wax directly to the dull spots. Let it haze and then buff it off with a clean towel. This second application fills in the gaps and creates a uniform finish.
For really bad patchiness, you may need to strip the old wax and start over. A wax remover or an all-purpose cleaner can dissolve the existing wax. Once the surface is clean and dry, reapply the wax using the thin, even coat method described above.
Water Spots and Contamination Under the Wax
Water spots that appear after waxing are a sign that the surface was not fully clean before you started. When water droplets sit on the paint and evaporate, they leave behind mineral deposits. If you wax over these spots, they get sealed in and become very hard to remove.
Another related problem is contamination under the wax. Tiny particles of dust, pollen, or industrial fallout can get trapped between the paint and the wax layer. This creates a rough texture and can make the wax look uneven.
Removing Water Spots After Waxing
If water spots are sealed under the wax, you have a couple of options. The first is to use a clay bar to gently lift the contaminants off the surface. Spray a clay lubricant on a small area, glide the clay bar across it, and wipe away the residue.
The second option is to strip the wax entirely and start fresh. Use a dedicated wax remover to dissolve the old wax layer. Wash the car thoroughly, dry it completely, and then reapply the wax. This gives you a clean slate and a much better result.
To avoid this problem, always decontaminate the paint before waxing. A clay bar treatment or a prep spray removes embedded particles that a regular wash cannot touch. This step takes just a few extra minutes but saves you from a world of trouble later.
Quick Prevention Checklist
- Wash your car thoroughly before every wax application.
- Use a clay bar to remove embedded contaminants.
- Dry the car completely with a clean microfiber towel.
- Apply a prep spray for extra paint protection.
- Wax in a cool, dry environment away from direct water sources.
Choosing the Right Wax for Your Car
Using the wrong type of wax is one of the sneaky common waxing a car problems that people overlook. Not all waxes are created equal, and picking the wrong one can lead to poor results, discoloration, or even paint damage.
There are three main types of car wax: paste wax, liquid wax, and spray wax. Paste waxes offer the deepest shine and longest protection but require more effort to apply. Liquid waxes are easier to use and work well for beginners. Spray waxes are the quickest option but provide the least protection.
Your car’s paint condition also matters. If your paint is fresh and in great shape, a premium carnauba wax will bring out the best in it. If your paint is older or has swirl marks, you might want a hybrid wax that includes light cleaners to improve the surface before you wax.
Matching Wax to Your Car’s Needs
For dark-colored cars, look for waxes that enhance depth and richness. Avoid waxes with fillers that can create a hazy look on dark paint. For light-colored cars, a standard carnauba wax works great and brings out a warm, natural glow.
If you are new to waxing, start with a liquid wax. It is forgiving and easy to apply. Once you get comfortable with the process, you can experiment with paste waxes for a more professional-level finish.
Also consider your climate. If you live in a hot, humid area, look for waxes with UV protection to shield your paint from sun damage. If you live in a rainy area, choose a wax that offers strong water-beading properties.
Common Mistakes That Cause Waxing Problems
Even experienced car owners make mistakes when waxing. Knowing what to avoid can save you a lot of time and frustration. Here are some of the most common errors people make.
Skipping the Prep Work
Many people jump straight to waxing without properly washing and decontaminating the surface. This is the number one cause of poor wax adhesion and uneven results. Always take the time to wash, dry, and prep your car before applying any wax.
Using Too Much Wax
More wax does not mean better results. In fact, using too much wax creates a thick layer that is hard to buff off and often leaves behind residue. A thin, even coat is all you need for great protection and shine.
Buffing Too Early or Too Late
Timing is everything when it comes to buffing. If you buff too early, the wax is still wet and you smear it around. If you buff too late, the wax has fully cured and becomes hard to remove, leaving behind a hazy residue. Watch for the wax to turn from wet to hazy, and then start buffing.
Reusing Dirty Towels
Using the same towel multiple times without washing it is a recipe for streaks and scratches. Always use a fresh, clean microfiber towel for each panel and each buffing pass. Keep several towels on hand so you always have a clean one ready.
Final Thoughts on Fixing Common Waxing Problems
Waxing your car does not have to be a source of stress. Most common waxing a car problems have simple, practical solutions. Whether you are dealing with haze, streaks, buildup, or uneven coverage, the fix is almost always within reach.
The key is preparation. Clean your car thoroughly, choose the right wax for your paint type, and work in a cool, shaded area. Apply thin, even coats and buff with a clean microfiber towel. These simple steps will prevent the majority of problems before they start.
Remember that practice makes perfect. Every time you wax your car, you will get better at it. You will learn how your car’s paint responds to different products and techniques. Over time, waxing becomes second nature, and the results speak for themselves.
So the next time you encounter a waxing problem, do not give up. Refer back to this guide, find the solution, and get back to enjoying that beautiful, protected shine. Your car deserves the best care you can give it.
Frequently Asked Questions
Why does my car wax look hazy after it dries?
Hazing usually happens when you apply wax in direct sunlight or on a hot surface. The wax dries too fast and does not bond properly to the paint. To fix it, use a microfiber towel with a quick detailer spray and gently wipe the haze away. Always wax in a cool, shaded area to prevent this.
How do I remove streaks after buffing car wax?
Streaks are caused by leftover wax or a dirty buffing towel. Spray a quick detailer onto a fresh microfiber cloth and wipe the streaked area in gentle circular motions. Flip the towel often and use a clean section for each pass. Most streaks disappear within two to three wipes.
Can I use a clay bar to fix waxing problems?
Yes, a clay bar is great for removing contamination and haze that sits on top of the wax layer. Spray a clay lubricant on the affected area and glide the clay bar gently across it. This lifts debris without scratching the paint and leaves a smooth surface for re-waxing.
What is the best way to prevent wax from getting on my car’s trim?
The best prevention method is to mask off trim, rubber seals, and plastic pieces with painter’s tape before you start waxing. This creates a barrier that keeps wax off surfaces you do not want it on. If wax does get on trim, wipe it off immediately with a cloth dampened with isopropyl alcohol.
How long should I wait before buffing car wax?
Wait until the wax turns from a wet shine to a dull haze before buffing. This usually takes five to ten minutes but depends on the product and the temperature. Check the product label for specific curing times. Buffing too early or too late can cause streaks and haze.
Is it better to wax my car in a garage or outside?
Waxing in a garage or a shaded area is always better. Direct sunlight and heat cause wax to dry too quickly, leading to hazing, streaks, and poor adhesion. A cool, indoor space gives you more control over the curing process and helps you achieve a flawless finish.