How to Check Waxing a Car and Get Flawless Results
Checking your car wax is easy when you know what to look for. This guide shows you how to inspect your wax job, spot common issues, and achieve a flawless finish every time. You will learn simple tips that make your car look amazing and stay protected.
Key Takeaways
- Inspect Regularly: Checking your wax finish every two weeks keeps your car looking great and protected.
- Watch for Water Behavior: Water beading is a clear sign your wax layer is still doing its job.
- Use the Right Tools: A microfiber towel and good lighting make inspection simple and effective.
- Reapply When Needed: Do not wait until the wax is completely gone. Reapply at the first signs of wear.
- Prep Matters: Always wash and dry your car before checking or applying a new wax layer.
- Avoid Common Mistakes: Waxing in direct sunlight or over dirty paint causes swirl marks and uneven coverage.
- Layer Smart: Combining a traditional wax with a ceramic coating boosts durability and shine.
📑 Table of Contents
- Why Checking Your Wax Job Matters
- How to Inspect Your Car’s Wax Finish
- Common Signs Your Wax Is Wearing Off
- Step-by-Step: How to Check and Reapply Wax
- Best Practices for Flawless Wax Results
- Expert Tips for Long-Lasting Protection
- Common Mistakes to Avoid
- How Often Should You Check and Reapply Wax?
- Conclusion
Why Checking Your Wax Job Matters
Waxing your car is not a one-time deal. It is something you need to do regularly. But here is the thing most people miss. They wax and forget. They do not stop to check if the wax is still doing its job.
Your car’s paint is constantly exposed to dirt, rain, sun, and bird droppings. These things eat away at your protective layer fast. A good wax finish acts like a shield. It keeps harmful elements from touching your paint directly.
When you learn how to check waxing a car properly, you save time and money. You also keep your car looking showroom fresh for much longer. A simple inspection takes only a few minutes. But it makes a huge difference in how your car looks and how well the paint stays protected.
Think of wax like sunscreen for your car. You would not just slather it on once and never look again. You would check it, reapply, and make sure it is working. The same logic applies to your car’s paint job.
What Does Wax Actually Do?
Wax fills in tiny imperfections on your paint surface. It creates a smooth, reflective layer that bounces light beautifully. This is what gives your car that deep, wet-look shine people love.
Beyond looks, wax provides real protection. It guards against UV rays that fade your paint. It stops water spots from etching into your clear coat. And it makes it harder for dirt and grime to stick to the surface.
A healthy protective coating also makes washing easier. Dirt slides right off when the wax layer is intact. You spend less time scrubbing and more time enjoying your clean car.
How to Inspect Your Car’s Wax Finish
Now let us get into the practical part. How do you actually check if your wax is still in good shape? There are a few simple methods you can use at home. No special tools needed.
The Water Bead Test
This is the easiest and most popular way to check your wax. After washing your car, let it dry completely. Then spray it with a hose or use a gentle stream of water from a bucket.
Watch how the water behaves on the surface. If your wax layer is still strong, the water will bead up into small round droplets. These beads will sit on top of the paint and roll right off.
If the water spreads out flat and soaks in, your wax is wearing thin. The surface is no longer repelling water the way it should. This is a clear sign you need to reapply.
The Slip Test
Run your clean, damp hand gently across the hood or roof of your car. A well-waxed surface feels slick and smooth. Your hand should glide almost effortlessly over the paint.
If the surface feels rough or gritty, the wax has broken down. Dirt and contaminants have started to bond with the paint underneath. It is time for a fresh application.
The Visual Glow Check
Stand your car in the shade. Look at it from different angles in natural light. A freshly waxed car has a deep, mirror-like glow. The paint looks rich and vibrant.
When the wax fades, the car looks dull and flat. You might also notice light scratches or swirl marks that were hidden before. These become more visible when the protective layer wears away.
Common Signs Your Wax Is Wearing Off
Knowing the warning signs helps you stay ahead of the problem. Do not wait until the wax is completely gone. Catching the early signs keeps your paint in great shape.
Water No Longer Beads
This is the number one sign. If rain or a quick rinse leaves flat water spots instead of pretty beads, your wax durability is fading. The surface has lost its hydrophobic properties.
Dirt Sticks More Easily
Have you noticed your car getting dirty faster after a wash? That is a red flag. A good wax layer makes it hard for dirt to cling to the paint. When that layer weakens, grime sticks like glue.
Paint Looks Dull and Faded
Sun exposure and environmental pollutants slowly wear down your wax. Over time, the paint loses its depth and luster. A polishing session followed by a fresh wax coat can bring back the glow.
You See Light Scratches
Without a protective clear coat shield, even tiny particles can scratch the paint. If you notice fine lines or swirl marks, the wax is no longer providing adequate defense.
Step-by-Step: How to Check and Reapply Wax
Once you have inspected your car and found the wax needs refreshing, here is what to do. Follow these steps for the best results every time.
Step 1: Wash the Car Thoroughly
Start with a clean surface. Use a gentle car wash soap and a soft microfiber mitt. Rinse off all dirt and grime. A dirty surface will trap contaminants under your new wax layer.
Do not use dish soap. It strips away wax and leaves the paint vulnerable. Use a product designed specifically for automotive paint care.
Step 2: Dry the Car Completely
Use a clean microfiber towel to dry every panel. Water spots can form quickly and interfere with wax adhesion. Make sure the surface is totally dry before you move to the next step.
Step 3: Inspect Again
Before applying fresh wax, do one more quick check. Look for any remaining dirt, tar spots, or old wax residue. Use a clay bar if needed to remove embedded contaminants from the surface.
This surface prep step is crucial. It ensures your new wax bonds properly to the paint. Skipping it leads to uneven coverage and poor results.
Step 4: Apply Wax Evenly
Choose a quality car wax that suits your needs. Paste waxes tend to last longer. Liquid waxes are easier to apply. Spray waxes work well for quick touch-ups between full applications.
Apply a thin, even layer using a foam applicator pad. Work in small sections. Use gentle, overlapping strokes. Less is more when it comes to wax application.
Step 5: Let It Cure
Wait for the wax to haze over before buffing it off. This usually takes about 10 to 20 minutes depending on the product. Use a clean, soft microfiber towel to gently remove the residue.
Do not rush this step. Buffing too early leaves wax streaks on the paint. Patience pays off with a crystal-clear finish.
Step 6: Do the Final Check
After buffing, step back and admire your work. Run the water bead test again. Run your hand across the surface. The car should feel silky smooth and look incredibly shiny.
This is what a proper wax application should feel like. If something does not look or feel right, you can always apply a second thin coat.
Best Practices for Flawless Wax Results
Getting great results is not just about the application. It is also about how and when you do it. A few simple habits make a big difference.
Choose the Right Time and Place
Always wax your car in the shade. Direct sunlight causes wax to dry too fast. It becomes hard to buff off and leaves a hazy residue on the paint.
Work in a cool, covered area if possible. A garage or a shaded driveway works perfectly. Avoid windy days too, because dust and debris can land on the wet wax.
Use the Right Products
Not all waxes are created equal. Some last only a few weeks. Others can protect your car for up to three months or more. Invest in a good quality product for the best paint protection.
If you want extra durability, consider a ceramic coating. These liquid polymer coatings bond chemically with the paint. They last much longer than traditional wax and offer superior protection against environmental damage.
Do Not Overwax
More wax does not mean better protection. Applying too many layers can actually cause buildup. This leads to a cloudy, uneven appearance instead of a clear, glossy finish.
Stick to the manufacturer’s recommendations. Most quality waxes work best with one or two thin layers applied correctly.
Maintain Between Waxes
You can extend the life of your wax by taking simple steps between applications. Wash your car regularly with a pH-safe soap. Avoid automatic car washes with harsh brushes. Use a quick detailer spray to refresh the surface between full wax jobs.
These small habits keep your protective coating in top shape for longer. They also reduce the frequency of full wax applications.
Expert Tips for Long-Lasting Protection
Here are some insider tips that professionals use to get the best results from their wax jobs.
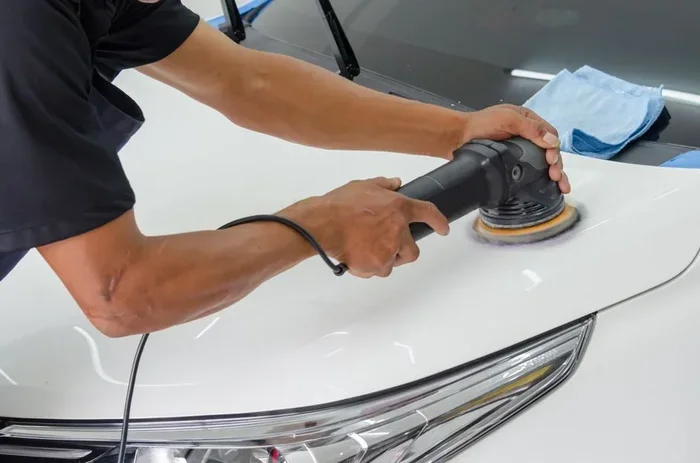
- Use a dual-action polisher for machine application. It provides even coverage and saves you time compared to hand waxing.
- Apply wax in the evening. Cooler temperatures and no direct sun give you more working time before the wax cures.
- Keep a spray detailer on hand. A quick spray and wipe between full wax jobs refreshes the shine and adds extra protection.
- Check your wax after every wash. Making this a habit helps you catch wear early and stay on top of maintenance.
- Wax before winter. Road salt and winter grime are brutal on paint. A fresh wax layer before the cold season gives you a strong defense.
- Use separate towels for washing and buffing. Cross-contamination can scratch your paint and ruin your wax finish.
These tips come from years of experience in car detailing. They are simple to follow but make a noticeable difference in the quality and longevity of your wax job.
Common Mistakes to Avoid
Even experienced car owners make mistakes when waxing. Here are the most common ones and how to avoid them.
Waxing in Direct Sunlight. This is the number one mistake. The heat causes wax to cure too quickly. You end up with a streaky, uneven finish that is hard to remove.
Applying Too Much Wax. Thick layers do not bond well to the paint. They take forever to buff off and often leave a cloudy residue. Thin, even coats work much better.
Skipping Surface Prep. Applying wax over dirty or contaminated paint traps debris underneath. This leads to swirl marks and an uneven appearance. Always wash and clay bar first.
Using Old or Dried-Out Wax. Check the expiration date on your wax product. Old wax does not apply smoothly and provides poor protection. Replace it with a fresh bottle.
Buffing with the Wrong Towel. Never use old towels or paper towels to buff wax. They leave lint and can scratch the paint. Always use a clean, high-quality microfiber towel.
Avoiding these mistakes keeps your wax finish looking great and lasting longer. A little knowledge goes a long way toward flawless results.
How Often Should You Check and Reapply Wax?
The frequency depends on several factors. Where you live, how often you drive, and what kind of wax you use all play a role.
As a general rule, check your wax every two weeks. Reapply a full coat every two to three months. If you live in a harsh climate with lots of sun, salt, or rain, you may need to reapply more often.
Cars that sit outside year-round need more frequent waxing than garaged vehicles. The same goes for cars driven daily on busy roads with lots of dust and exhaust.
Make it part of your regular car care routine. Set a reminder on your phone or mark it on your calendar. Consistent maintenance is the secret to a flawless, long-lasting paint protection layer.
Conclusion
Learning how to check waxing a car is one of the simplest and most rewarding skills you can develop. It takes just a few minutes and gives you real insight into the condition of your paint. A well-maintained wax layer keeps your car looking stunning and protects the finish from everyday damage.
Use the water bead test, the slip test, and visual inspection to stay on top of your wax condition. Apply fresh wax when you see the first signs of wear. Follow best practices for application and avoid common mistakes.
Your car is a big investment. Taking care of the paint with regular wax checks and reapplications pays off for years. You will enjoy a car that looks incredible every time you drive it. Start checking your wax today and see the difference it makes.
A little effort goes a long way. With the right knowledge and a few simple tools, you can keep your car looking flawless and well-protected all year round. That is the power of knowing how to properly check waxing a car and take action when it matters most.
Frequently Asked Questions
How often should I check my car’s wax finish?
You should check your car’s wax every two weeks. A quick visual inspection and water bead test take only a few minutes. Regular checks help you catch wear early and reapply before the paint becomes vulnerable.
Can I check the wax in direct sunlight?
It is best to inspect your car in the shade. Direct sunlight can make the paint look different than it actually is. It can also cause water to evaporate too quickly for an accurate bead test. A shaded area gives you the most reliable results.
What is the best way to remove old wax before reapplying?
Use a clay bar or a wax remover product to strip away old layers. Wash the car first, then gently work the clay bar across the surface. This removes trapped contaminants and old wax residue for a clean slate.
Does a ceramic coating replace the need for wax?
A ceramic coating offers excellent protection and lasts much longer than traditional wax. However, many enthusiasts still use a quality wax over a ceramic coating for added depth and gloss. The two can work together for superior results.
Is hand waxing better than machine waxing?
Both methods work well when done correctly. Hand waxing gives you more control and is great for small areas. Machine waxing with a dual-action polisher covers larger surfaces faster and more evenly. Choose the method that fits your time and comfort level.
What should I do if my car has swirl marks under the wax?
Swirl marks indicate paint damage beneath the wax layer. You should address them with a polish or compound before applying fresh wax. Waxing over swirl marks only seals them in and makes them more visible over time.