DIY RV Sewer Hose Support Ideas That Will Inspire You
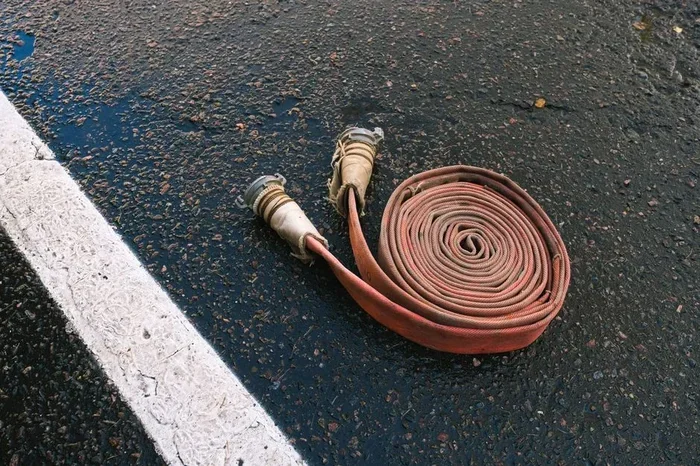
DIY RV sewer hose support ideas help you keep your sewer hose organized, off the ground, and free from kinks and leaks. These simple projects save time, protect your RV’s plumbing, and make dump station visits hassle-free. Whether you prefer wall-mounted, freestanding, or creative DIY solutions, there is a support design for every setup and budget.
If you own an RV, you know that sewer hose management is not exactly the glamorous side of the camping lifestyle. But let us be honest, a messy sewer hose setup can turn a peaceful camping trip into a smelly headache. That is why DIY RV sewer hose support ideas have become a go-to solution for RV owners who want a cleaner, smarter, and more organized setup.
Whether you are a full-time RVer or a weekend warrior, having a solid sewer hose support system makes all the difference. It keeps the hose elevated, prevents kinks, and stops unpleasant leaks from happening on your campsite. The best part? You do not need to be a professional plumber or spend a fortune to build one. With a few basic tools and some creative thinking, you can craft a support system that fits your rig perfectly.
In this guide, we will walk you through a variety of DIY RV sewer hose support ideas that are easy to build, affordable, and incredibly effective. From wall-mounted brackets to freestanding stands, you will find something that matches your space and style. Let us dive in and get those ideas flowing!
Key Takeaways
- Wall-mounted supports keep your sewer hose elevated and tidy during storage and use.
- Freestanding DIY stands offer flexibility and work great for temporary setups.
- Proper hose support prevents kinks, leaks, and damage to your RV’s sewer system.
- Budget-friendly materials like PVC, wood, and brackets make these projects easy and affordable.
- Creative designs can double as storage solutions for other RV accessories.
- Regular maintenance of your support system extends the life of your sewer hose.
📑 Table of Contents
- Why You Need a Sewer Hose Support System
- Wall-Mounted Sewer Hose Support Ideas
- Freestanding DIY Sewer Hose Support Stands
- Creative and Unconventional Support Ideas
- Materials Comparison for DIY RV Sewer Hose Supports
- Common Mistakes to Avoid
- Maintenance Tips for Your DIY Sewer Hose Support
- Final Thoughts on DIY RV Sewer Hose Support Ideas
Why You Need a Sewer Hose Support System
Most RV owners overlook their sewer hose until something goes wrong. But a proper RV sewer hose support does more than just look neat. It plays a real role in keeping your plumbing system working the way it should.
When your hose sits flat on the ground, it can collect debris, trap moisture, and develop kinks that block the flow. Over time, these kinks weaken the hose and lead to cracks or leaks. A support system lifts the hose into a natural curve, allowing waste to flow smoothly from the RV tank to the dump station.
Here are a few key reasons why every RV owner should invest in a sewer hose support:
- Prevents kinks and blockages that cause slow drainage.
- Keeps the hose off the ground where dirt and bacteria collect.
- Reduces odors by maintaining a proper seal and flow.
- Extends the life of your sewer hose by preventing unnecessary wear.
- Makes dump station visits faster and much more pleasant.
Think of your sewer hose support as the unsung hero of your RV plumbing setup. It may not be exciting, but it sure makes your life easier every time you need to dump your tanks.
Wall-Mounted Sewer Hose Support Ideas
Wall-mounted supports are one of the most popular options among RV owners. They save space, keep the hose off the floor, and look clean and organized. If you already have experience with wall-mounted folding desk ideas, you will find this concept familiar. The same mounting principles apply, just adapted for sewer hose use.
Basic Wall-Mounted Bracket
The simplest DIY support uses a basic L-bracket screwed into the wall or side of your RV. You attach the bracket at a slight angle so the hose slides into place and curves naturally toward the dump connection.
Here is what you need for this project:
- Two metal L-brackets (heavy-duty, at least 4 inches long)
- Self-tapping screws or bolts
- A rubber pad or foam cushion (to protect the hose)
- A drill and measuring tape
Start by measuring the height where you want the hose to sit. You want it high enough to clear the ground but low enough to connect easily to your dump station. Mark the spots, drill the holes, and secure the brackets. Place a small piece of rubber or foam on each bracket to prevent the hose from rubbing against the metal.
Adjustable Wall-Mounted Holder
If you want more flexibility, consider building an adjustable holder. This design uses a swivel hook or a sliding clip that lets you move the hose up or down depending on the height of the dump station. It is a small upgrade that makes a big difference, especially when you are camping at different sites with varying setup heights.
Quick Tip: Use a rubber-coated clip or wrap the contact points with electrical tape. This protects the hose from scratches and keeps it snug in place.
Multi-Hose Wall Storage Board
For RV owners who carry multiple hoses, a multi-hose storage board is a game-changer. This is essentially a wooden or PVC board with several hooks or brackets attached. You can store your sewer hose, a fresh water hose, and even a power cord all in one organized spot on the wall.
This idea works especially well for those who already use mounted desk solutions in their RV. The wall space you already dedicate to a folding desk can double as a hose and accessory storage area with a few extra brackets and hooks.
Freestanding DIY Sewer Hose Support Stands
Not every RV has wall space to spare, and that is where freestanding stands come in handy. These are self-supporting structures that hold your sewer hose in position without needing to mount anything to the RV body.
The T-Stand Design
The T-stand is one of the easiest DIY projects you can build. It consists of a vertical post with a horizontal bar at the top, shaped like the letter T. The hose rests on the horizontal bar and curves down toward the dump connection.
To build one, you will need:
- A 2-inch PVC pipe (about 3 feet long for the vertical post)
- A 2-inch PVC tee connector
- A shorter piece of PVC for the horizontal bar (about 18 inches)
- PVC cement and screws
- A rubber mat or base plate for stability
Assemble the T-shape, then attach the base plate to the bottom of the vertical post. The rubber mat prevents the stand from sliding on smooth surfaces. You can place this stand wherever you need it, making it perfect for temporary setups or travel.
The A-Frame Support
An A-frame stand uses two angled posts that form a triangle shape. The hose rests in the center groove or on a crossbar between the two legs. This design is very stable and can handle heavier hoses with ease.
The A-frame is especially useful for larger RVs with bigger sewer tanks. It provides a wide base that does not tip over, even on slightly uneven ground at campsites.
Portable Rolling Stand
If you want maximum portability, build a rolling stand with small caster wheels attached to the base. This lets you roll the support right up to the dump station and then move it out of the way when you are done. It is a small extra step in building, but the convenience is well worth it.
Creative and Unconventional Support Ideas
Sometimes the best support solutions come from thinking outside the box. Here are some creative ideas that go beyond the standard bracket or stand.
Repurposed Clothes Drying Rack
An old retractable clothes drying rack can be repurposed into a sewer hose support. The adjustable arms work perfectly for holding the hose at different heights and angles. Just mount it to the side of your RV or place it on the ground as a freestanding unit.
Overhead PVC Rail System
For a more permanent setup, consider installing an overhead PVC rail. This runs along the top of your RV’s awning or a mounted beam and guides the hose from the RV connection down to the dump point. It keeps the hose completely off the ground and looks very streamlined.
Some RV owners have even incorporated this idea alongside their wall-mounted desk inspiration setups, creating a fully organized exterior storage system that combines function and style.
Magnetic Hose Clips
This one is simple but clever. Use strong magnetic clips to attach the hose to the metal frame of your RV. The magnets hold the hose securely in place without any drilling or permanent modifications. Just be sure the magnets are strong enough to support the weight of a wet hose.
Materials Comparison for DIY RV Sewer Hose Supports
Choosing the right material is important for durability and ease of construction. Here is a quick comparison of the most common materials used for DIY sewer hose supports.
| Material | Durability | Cost | Ease of Use | Best For |
|---|---|---|---|---|
| PVC Pipe | High | Low | Very Easy | Freestanding stands and rails |
| Metal Brackets | Very High | Medium | Easy | Wall-mounted supports |
| Wood | Medium | Low | Easy | Storage boards and bases |
| Stainless Steel | Very High | High | Moderate | Heavy-duty and permanent setups |
| Plastic Clips and Hooks | Medium | Very Low | Very Easy | Light-duty and temporary holds |
Each material has its strengths. PVC is lightweight and easy to cut, making it perfect for beginners. Metal brackets offer the most strength for wall-mounted setups. Wood is affordable and easy to work with for storage boards. Choose based on your budget, skill level, and how permanent you want the support to be.
Common Mistakes to Avoid
Even with the best intentions, DIY projects can go wrong if you skip important steps. Here are some common mistakes RV owners make when building sewer hose supports.
- Using weak materials: A support that cannot handle the weight of a full, wet hose will fail quickly. Always choose materials rated for the load.
- Ignoring the hose curve: Your support should allow the hose to maintain a gentle downward slope. A sharp bend creates blockages and slows drainage.
- Mounting too low: If the support is too close to the ground, the hose drags through dirt and debris. Keep it at least 12 inches off the ground.
- Skipping protective padding: Metal brackets and PVC can scratch and degrade your hose over time. Always add rubber or foam padding at contact points.
- Forgetting to secure the support: A support that shifts during travel can damage your hose and your RV. Use screws, bolts, or heavy-duty adhesive to keep everything in place.
Avoiding these mistakes will help your DIY support last for many camping seasons to come.
Maintenance Tips for Your DIY Sewer Hose Support
Once you have built your support system, a little maintenance goes a long way. Here are some quick tips to keep everything in top shape.
- Inspect the support monthly for loose screws, cracks, or rust.
- Clean the hose regularly after each dump to prevent buildup on the support.
- Replace rubber padding when it wears down to ensure the hose stays protected.
- Lubricate any moving parts on adjustable or swivel supports.
- Store the hose properly when not in use, coiling it loosely to avoid permanent kinks.
Taking care of your support system means taking care of your entire sewer setup. A well-maintained support leads to fewer problems on the road and more time enjoying your trip.
Final Thoughts on DIY RV Sewer Hose Support Ideas
Building your own DIY RV sewer hose support is one of those small projects that makes a huge difference in your daily RV life. It is affordable, customizable, and surprisingly satisfying to complete. Whether you go with a simple wall-mounted bracket or a full overhead rail system, the key is to find a design that fits your RV layout and your personal needs.
Start with one of the ideas in this guide, gather your materials, and spend an afternoon building something that will serve you on every camping trip. Your future self, standing at the dump station with a tidy, kink-free hose, will thank you.
The best part about these DIY RV sewer hose support ideas is that they are just the beginning. Once you get comfortable with one design, you can modify it, combine ideas, and create a support system that is truly unique to your rig. Happy building, and happy camping!
Frequently Asked Questions
What is the easiest DIY RV sewer hose support to build?
The basic wall-mounted L-bracket is the easiest option. It requires just two brackets, a few screws, and about 15 minutes of work. It is perfect for beginners who want a quick and effective solution for their RV sewer hose management.
Can I use PVC pipe for a freestanding sewer hose stand?
Yes, PVC pipe is one of the best materials for freestanding stands. It is lightweight, easy to cut, affordable, and resistant to moisture. A simple T-stand made from PVC is a great first DIY project for any RV owner.
How high should my sewer hose support be off the ground?
Aim for at least 12 inches off the ground. This keeps the hose clear of dirt, debris, and standing water while still allowing easy connection to the dump station. Adjust the height based on your specific RV setup and campsite conditions.
Do I need special tools to build these supports?
No special tools are needed. A basic drill, a measuring tape, a saw for cutting PVC or wood, and a screwdriver are all you need. Most of these projects can be completed with a simple household tool kit.
How do I prevent my sewer hose from kinking on the support?
Make sure the support allows the hose to follow a gentle, natural curve. Avoid sharp bends or tight angles. Adding rubber padding at contact points also helps the hose maintain its shape without kinking under its own weight.
Can I combine multiple DIY support ideas for my RV?
Absolutely. Many RV owners combine a wall-mounted bracket with a freestanding stand for maximum flexibility. You can also add a storage board to keep all your hoses and accessories organized in one place. Mixing and matching ideas is the best way to create a support system that works perfectly for your setup.
=== CONCLUSION ===
DIY RV sewer hose support ideas give you the power to customize your RV setup with affordable, practical solutions. From simple wall-mounted brackets to creative freestanding stands, there is a project here for every skill level and every RV layout. The key is to start simple, learn as you go, and build something that truly works for your needs. With the right support system in place, you will spend less time worrying about your sewer hose and more time enjoying the open road.