How to Fix a Punctured Bike Tire With These Easy Steps
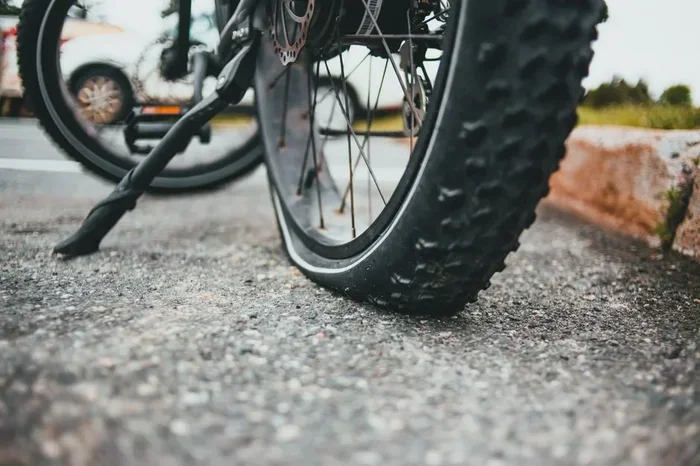
Fixing a punctured bike tire is easier than you think. With a few basic tools and a patch kit, you can repair a flat tire in under 30 minutes. This guide walks you through every step of bike tire repair, from removing the wheel to inflating your tire again.
Riding your bike is one of the best feelings in the world. The wind in your face, the rhythm of your pedals, and the open road ahead. But then it happens. You hear a soft hiss, feel the tire lose air, and realize you have a flat. A punctured bike tire can stop your ride in an instant. The good news is that fixing it is simpler than most people think.
Whether you are a casual rider or a daily commuter, knowing how to repair a bike tire is a valuable skill. You do not need to be a mechanic. You just need the right tools, a little patience, and this guide. We will walk you through every single step of bike tire repair so you can get back on the road quickly and confidently.
In this article, we cover everything from finding the puncture to reinflating your tire. We also share tips to prevent future flats and help you build a basic roadside repair kit. By the end, you will feel prepared to handle any bike puncture like a pro.
Key Takeaways
- Spot the puncture fast: Learn how to find the hole in your bike tube quickly and safely.
- Essential tools matter: A tire lever, patch kit, and bike pump are all you need for most repairs.
- Follow each step carefully: Removing, patching, and reinstalling the tube requires patience and the right technique.
- Prevent future flats: Simple habits like checking tire pressure can reduce bike punctures significantly.
- Know when to replace: Some tire damage is beyond repair, and that is okay.
- Roadside readiness: Carry a basic bike tool kit so you can fix a flat anywhere.
📑 Table of Contents
Gather Your Tools Before You Start
Before you touch the bike wheel, make sure you have everything ready. Fixing a punctured bike tire is much easier when you are organized. You do not want to be searching for tools while your tire is still off.
What You Will Need for Bike Tire Repair
- Tire levers: These small plastic tools help you pop the tire off the rim without damaging it.
- Patch kit: A patch kit contains glue, sandpaper, and small patches to seal the hole in your inner tube.
- Bike pump or inflator: You need this to reinflate the tire after the repair is complete.
- Wrench set: Some bikes use quick-release wheels, but others need a wrench to loosen the nuts.
- Clean rag or cloth: This helps you wipe the tube and find the puncture more easily.
- Water or soap solution: A simple mix helps you spot air leaks by watching for bubbles.
Keeping these items in a small bag at home or in your backpack makes roadside repair much smoother. A basic bike tool kit with a multi-tool, tire levers, and a mini pump fits easily in a saddle bag.
Remove the Wheel From the Bike
Now that you have your tools, it is time to remove the wheel with the flat tire. This is the first major step in fixing a punctured bike tire, and it is straightforward once you know how.
Step 1: Flip the Bike Over
Turn your bike upside down so it rests on the handlebars and seat. This gives you stable access to the wheel. If you have a bike stand, even better. But most riders can fix a flat right on the ground.
Step 2: Release the Brake
Before removing the wheel, release the brake cable. This opens the brake pads so the wheel can slide out freely. Most bikes have a quick-release lever near the brake caliper. Simply flip it, and the brake opens.
Step 3: Loosen the Axle
For bikes with quick-release wheels, flip the lever to the open position and unscrew it slightly. For bikes with nutted axles, use a wrench to loosen both nuts. Once loose, pull the wheel straight out of the frame.
Set the wheel aside in a safe, flat spot. You are now ready to work on the tire itself.
Take Out the Inner Tube and Find the Puncture
This is the most important part of bike tire repair. You need to remove the tube, locate the puncture, and prepare the area for patching.
Step 1: Deflate the Tire Completely
Press the valve stem to release any remaining air. If your bike has a Presta valve, unscrew the small nut first. For a Schrader valve, just press down on the pin. A fully deflated tire is much easier to work with.
Step 2: Use Tire Levers to Remove the Tire
Insert a tire lever under the tire bead, hooking it onto a spoke. Then slide the lever along the rim to pop one side of the tire off. Use a second lever a few inches away and work your way around the rim. The first side should come off smoothly.
Pro tip: Never use metal tools like screwdrivers. They can damage the rim and the tube inside.
Step 3: Pull Out the Inner Tube
Gently pull the tube out through the opening. Start at the valve stem and work the rest of the tube free. Inflate the tube slightly so it holds its shape. This makes finding the puncture much easier.
Step 4: Locate the Puncture
There are two great methods to find where the air is escaping.
- The water method: Fill a bucket with water and hold sections of the inflated tube underwater. Look for bubbles. The bubbles show exactly where the hole is.
- The feel method: Run your fingers slowly along the entire tube. You can often feel the hole, especially if it is a large tear or a sharp object still embedded.
Mark the puncture with a piece of chalk or a pen. This helps you remember the exact spot when you are ready to patch.
Step 5: Check the Outside of the Tire
Before you patch the tube, look at the outside of the tire. Run your fingers along the tread to find whatever caused the puncture. Glass, thorns, wire, and small rocks are common culprits. Removing the object now prevents a second flat from the same cause.
Patch the Inner Tube
With the puncture located, you are ready to apply the patch. This is the core of any bike tire repair and it takes just a few minutes.
Step 1: Clean and Rough the Area
Use the sandpaper or rough pad from your patch kit. Gently roughen the area around the puncture. This creates a surface for the glue to bond to. Wipe away any dust with a clean rag.
Step 2: Apply the Glue
Spread a thin layer of rubber cement over the roughened area. Make sure the patch covers the hole completely. Let the glue dry until it feels tacky. This usually takes about one to two minutes.
Step 3: Press the Patch Firmly
Peel the backing off the patch and press it firmly over the puncture. Hold it down for at least 30 seconds. Apply even pressure across the entire patch. The bond needs to be strong to hold air.
Expert insight: Let the patched tube sit for a few minutes before reinstalling it. This gives the glue extra time to set and creates a stronger seal.
Reinstall the Tube and Tire
Now that your tube is patched, it is time to put everything back together. This step is just as important as the repair itself.
Step 1: Slightly Inflate the Tube
Give the tube just enough air so it holds its shape. This makes it much easier to fit back inside the tire. Do not overinflate, or the tube will bulge and make installation difficult.
Step 2: Tuck the Tube Back In
Start at the valve stem. Push the valve through the hole in the rim first. Then work the rest of the tube into the tire, tucking it evenly around the entire rim. Make sure the tube is not twisted or pinched anywhere.
Step 3: Seat the Tire Back on the Rim
Start at the valve stem and push the tire bead back onto the rim with your thumbs. Work your way around until the tire is fully seated. The last few inches may require a bit more force, but tire levers can help.
Important: Make sure the tube is not sticking out between the tire and the rim. This is the most common cause of a new flat right after repair.
Step 4: Inflate the Tire to the Right Pressure
Use your bike pump to inflate the tire to the recommended pressure. You can find this number on the side of the tire. It is usually written as PSI (pounds per square inch). Proper tire pressure is key to a smooth ride and preventing future flats.
Check Your Work Before Riding
Before you hit the road, take a moment to double-check everything. This final check saves you from another frustrating flat.
- Look at both sides of the tire to make sure the bead is seated evenly.
- Spin the wheel and watch for any wobbling or rubbing against the frame.
- Squeeze the tire with your hands. It should feel firm and round.
- Reattach the wheel to the frame and tighten the axle nuts or quick-release lever.
- Reengage the brake and test it by squeezing the brake levers.
Once everything checks out, take a short test ride in a safe area. Listen for any unusual sounds and feel for any wobbling. If the tire holds air and the ride feels normal, you are all set.
Prevent Future Bike Punctures
Fixing a flat is great, but preventing them is even better. A few simple habits can save you from frequent roadside repair sessions.
Check Your Tire Pressure Regularly
Underinflated tires are the number one cause of bike punctures. Low pressure causes the tube to pinch against the rim, leading to what is called a pinch flat or snake bite. Check your tire pressure before every ride with a simple gauge.
Inspect Your Tires Before Rides
Run your fingers along the tire tread before each ride. Look for glass, thorns, or embedded debris. Removing small objects early can prevent them from working their way through to the tube.
Use Tire Liners or Sealant
Tire liners add a protective layer between the tire and the tube. Tubeless sealant can also seal small punctures automatically. These are great options for riders who deal with frequent flats.
Carry a Repair Kit on Every Ride
Always have a mini pump, a spare tube, tire levers, and a patch kit with you. Being prepared means a flat tire never has to end your ride.
When to Replace Instead of Repair
Not every tire problem can be fixed with a patch kit. Sometimes replacement is the smarter choice.
If the tube has multiple punctures in the same area, it may be worn out. Large gashes or tears that are longer than half an inch usually cannot be patched reliably. Also, if the tire itself is badly damaged, cracked, or the tread is completely worn through, replace the tire entirely.
Investing in a new tube or tire is much cheaper than risking a blowout on the road. When in doubt, replace it.
Conclusion
Fixing a punctured bike tire is a skill every rider should have. With the right tools and a little practice, you can handle any flat tire in just a few minutes. The steps are simple: gather your tools, remove the wheel, find the puncture, patch the tube, reinstall everything, and check your work.
Remember that prevention plays a big role too. Keep your tires properly inflated, inspect them before rides, and always carry a basic repair kit. These small habits make a huge difference in your cycling experience.
The next time you hear that telltale hiss on the road, do not panic. You now know exactly what to do. Grab your tools, fix the flat, and get back to enjoying the ride.
Frequently Asked Questions
How long does it take to fix a punctured bike tire?
Most riders can repair a flat tire in 15 to 30 minutes. The time depends on your experience level and whether you have all your tools ready. With practice, you can do it even faster.
Can I use a DIY patch instead of a store-bought patch kit?
Yes, you can use a piece of rubber from an old inner tube as a temporary DIY fix. However, a proper patch kit with glue and sandpaper creates a much stronger and longer-lasting seal.
How do I know if my tire is still safe to ride after a repair?
After patching, inflate the tire and listen for any hissing sounds. Squeeze the tire to check firmness, and take a short test ride. If the tire holds air and feels normal, it is safe to continue riding.
What causes the most bike punctures?
The most common causes are underinflated tires, sharp debris like glass or thorns, and pinch flats from hitting bumps with low pressure. Regular tire checks and proper inflation prevent most of these issues.
Should I replace the tube or just patch it?
A single puncture is easy to patch. But if the tube has multiple holes, large tears, or is very old, replacing it is the better option. New tubes are inexpensive and offer a more reliable seal.
Can I fix a flat tire without tire levers?
It is possible but very difficult without tire levers. The levers help you pop the tire off the rim safely. Without them, you risk pinching the tube or damaging the rim. Always carry tire levers in your bike tool kit.