Reset Maintenance Required Toyota Corolla Made Easy

Resetting the maintenance required light on your Toyota Corolla is simple and takes just a few minutes. This guide walks you through every step so you can clear the maintenance reminder on your own without visiting a dealership. Whether you just finished an oil change or need to clear a dashboard warning light, you will find the method that works for your specific Corolla model year.
There is something satisfying about taking care of your car on your own. When that little maintenance light pops up on your dashboard, it can feel like a small alarm going off in the back of your mind. The good news is that learning how to reset the maintenance required light on a Toyota Corolla is easier than you might think. You do not need a mechanic, expensive tools, or a dealership visit. In this guide, we walk you through the entire process step by step. By the end, you will know exactly how to clear that annoying light and keep your Corolla running at its best.
The Toyota Corolla is one of the most popular cars on the road today. Millions of drivers trust it for daily commutes, road trips, and everything in between. Part of that trust comes from knowing how to handle basic upkeep. The maintenance required light is your car’s way of telling you it is time for a service check. This could mean an oil change, a tire rotation, or a general inspection. Understanding what this light means and how to respond to it is an essential part of Corolla upkeep. Let us dive into the details and make this process as simple as possible.
Key Takeaways
- Point 1: The maintenance required light is a standard Toyota service indicator that reminds you to service your vehicle at set mileage intervals.
- Point 2: You can reset the light using the trip meter or odometer buttons, depending on your Corolla model year.
- Point 3: Always reset the light only after completing the actual maintenance task, such as an oil change or tire rotation.
- Point 4: Common mistakes include turning the ignition to the wrong position or confusing the trip meter with the odometer.
- Point 5: Following your Corolla maintenance schedule helps prevent costly repairs and keeps your car running smoothly for years.
- Point 6: If the light persists after resetting, it may signal a deeper issue that needs professional diagnosis.
📑 Table of Contents
- Understanding the Maintenance Required Light on Your Toyota Corolla
- Step-by-Step Guide to Reset the Maintenance Required Light
- When Should You Reset the Maintenance Light
- Common Mistakes People Make When Resetting the Maintenance Light
- Tips to Keep Your Toyota Corolla Running Smoothly
- What to Do If the Light Will Not Reset
- Conclusion
Understanding the Maintenance Required Light on Your Toyota Corolla
Before you learn how to reset the light, it helps to understand what it is and why it exists. The maintenance required light is a Toyota service indicator built into your vehicle’s computer system. It is not a warning about a mechanical failure. Instead, it is a friendly reminder that your car is due for routine service based on mileage or time intervals.
What Triggers the Maintenance Required Message
The maintenance reminder system in your Corolla tracks your mileage. When you reach a set interval, usually every 5,000 miles, the light turns on. This interval is built into the vehicle maintenance schedule that Toyota engineers design for each model. The system uses what is often called an oil life monitoring system to track driving conditions and adjust the reminder accordingly.
Several factors can influence when the light appears. Hard driving, frequent short trips, and towing can all shorten the recommended service interval. On the other hand, gentle highway driving may extend it slightly. The key takeaway is that the light is designed to keep your car in top shape. It is not something to fear or ignore. Think of it as your car giving you a gentle nudge, much like a friend reminding you to drink water during a long day.
Why You Should Never Ignore This Light
Some drivers see the maintenance light and simply press a button to turn it off. That is a big mistake. The light exists for a reason. Skipping scheduled service can lead to worn-out engine oil, clogged filters, and other problems that cost more money down the road. Regular maintenance keeps your engine clean, your fuel efficiency high, and your Corolla dashboard symbols working properly.
Ignoring the light for too long can also void your warranty in some cases. Toyota recommends following the Corolla maintenance schedule closely. When you keep up with oil changes and inspections, your car runs better and lasts longer. Think of the maintenance light as a helpful nudge, not a nuisance. It is there to protect your investment and keep you safe on the road.
Step-by-Step Guide to Reset the Maintenance Required Light
Now for the part you have been waiting for. Resetting the maintenance light on a Toyota Corolla is a straightforward process. The exact steps can vary slightly depending on your model year, but the general method works for most versions. Below, we cover the two most common approaches so you can pick the one that fits your car.
Method 1: Using the Trip Meter Reset
This is the most popular method and works on many Corolla models from the 2000s through the 2020s. Here is how to do it:
- Turn the ignition to the “ON” position. You do not need to start the engine. Just press the start button or turn the key to the accessory position.
- Locate the trip meter reset button on your dashboard or steering column. On most models, it is labeled “TRIP” or “RESET.”
- Press and hold the trip meter reset button.
- While holding the button, turn the ignition off and then back to the “ON” position.
- Continue holding the button for about 10 to 15 seconds.
- Watch the display. The maintenance light should start to flash.
- Release the button. The light should now be off.
- Turn the ignition off and then back on to confirm the reset was successful.
This method works because it forces the car’s computer to clear the stored maintenance code. It is quick, simple, and does not require any special equipment. If the light stays on after this process, do not worry. We will cover what to do next in a later section.
Method 2: Using the Odometer Button
On some Corolla models, especially older ones, you may need to use the odometer button instead of the trip meter button. The process is very similar:
- Turn the ignition to the “ON” position without starting the engine.
- Press the odometer or trip display button to show the mileage reading.
- Turn the ignition off.
- Press and hold the odometer button.
- While holding the button, turn the ignition back to “ON.”
- Hold the button until the maintenance light flashes and then turns off.
- Release the button and turn the ignition off and on again to verify the reset.
Both methods achieve the same result. If one does not work for your specific model, try the other. The Toyota Corolla has been around for decades, and small changes in button placement and procedure happened across different generations. Your owner’s manual is always a great resource if you get stuck.
When Should You Reset the Maintenance Light
Timing matters when it comes to resetting the maintenance light. You should only clear the light after you have actually completed the service task. Resetting it prematurely defeats the purpose of the reminder system and can throw off your service interval tracking.
After an Oil Change
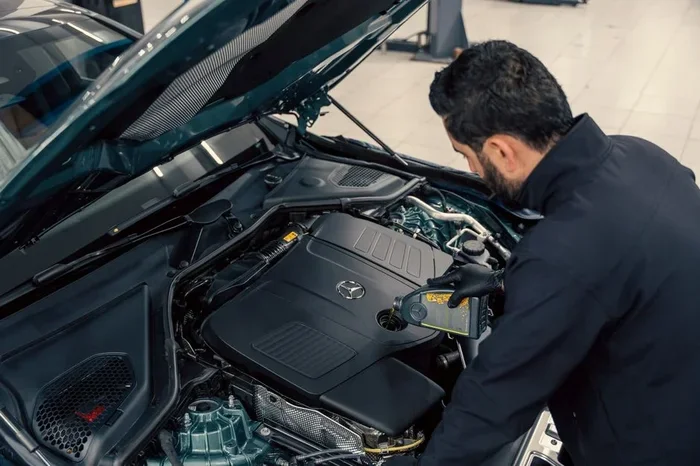
The most common reason to reset the maintenance light is after an oil change. Fresh oil keeps your engine lubricated and cool. When you get your oil changed, ask the technician to reset the light for you. Many quick-lube shops and dealerships will do this for free. If you change your own oil, follow the steps above to reset it yourself.
The oil change indicator on your Corolla is closely tied to the maintenance required light. Once you add new oil and replace the filter, the system needs to be reset to start tracking the next service interval. This is a simple but important step in car maintenance tips that many drivers overlook. Making it a habit ensures your engine stays healthy and your Toyota service light stays accurate.
After Completing Other Service Tasks
The maintenance light is not just about oil changes. It can also remind you about tire rotations, brake inspections, fluid top-offs, and air filter replacements. After any of these tasks are completed, it is a good idea to reset the light. This keeps your service records accurate and helps you stay on track with your maintenance schedule.
Some drivers like to reset the light at every oil change as a way to track their service routine. This creates a simple rhythm that makes car ownership feel manageable. You know that every 5,000 miles, the light will come on, you will service the car, and you will reset the indicator. It becomes second nature over time. This kind of routine is the foundation of good vehicle maintenance habits.
Common Mistakes People Make When Resetting the Maintenance Light
Even though the reset process is simple, people still make errors. Here are the most common mistakes and how to avoid them so you can get it right the first time.
Forgetting to Turn the Ignition to the Right Position
The most frequent mistake is not putting the ignition in the correct position. You need the “ON” position, not the “START” position. The “START” position is when the engine is running. The “ON” position powers the electronics but does not start the engine. If you try to reset the light while the engine is running, the steps will not work properly.
Take a moment to understand the difference. Turn the key or press the start button once without pressing the brake pedal. This puts the car in the “ON” or “ACC” mode. From there, you can begin the reset process with confidence. This small detail makes all the difference between a successful reset and frustration.
Confusing the Trip Meter with the Odometer
Another common error is pressing the wrong button. The trip meter and the odometer are different. The odometer shows your total mileage since the car was new. The trip meter tracks a specific journey or can be reset to zero. The reset button for the maintenance light is usually tied to the trip meter function, not the odometer.
If you are unsure which button to press, consult your owner’s manual. It will have a diagram showing exactly which button controls the trip display. This small detail can save you a lot of frustration and time. Taking a quick look at the manual before you start is always worth it.
Not Holding the Button Long Enough
Some drivers release the reset button too quickly. The process requires holding the button for 10 to 15 seconds while the ignition is in the “ON” position. If you let go too early, the light will not flash, and the reset will not complete. Be patient and hold steady. The flashing light is your signal that the process is working. Count slowly to 15 if you need to. Patience is the key to success here.
Resetting Without Completing the Actual Service
This is the most important mistake to avoid. Never reset the maintenance light just to make it go away. The light exists to protect your car and your wallet. If you reset it without doing the actual service, you are just postponing necessary maintenance. This can lead to engine damage, reduced fuel efficiency, and expensive repairs later on. Always complete the service first, then reset. That is the only correct order.
Tips to Keep Your Toyota Corolla Running Smoothly
Resetting the maintenance light is just one part of caring for your Corolla. Here are some practical tips to keep your car in excellent shape between service visits.
Follow the Recommended Service Schedule
Toyota provides a detailed service schedule for every Corolla model. This schedule outlines when to change the oil, replace filters, check brakes, and inspect fluids. Following this schedule is the single best thing you can do for your car’s longevity. Set reminders on your phone or mark your calendar so you never miss a service window.
Sticking to the schedule also helps maintain your resale value. When it is time to sell or trade in your Corolla, a full service history makes a big difference. Buyers and dealerships alike appreciate a well-documented maintenance record. It shows you took care of the car and gives confidence to the next owner.
Keep Your Car Interior Fresh and Organized
A clean car interior contributes to a better driving experience. Just as you would keep your workspace fresh and organized, maintaining a tidy car environment makes every drive more pleasant. Some drivers even enjoy adding low-maintenance desk plants to their workspace as a way to stay connected to nature, and the same principle applies to your car’s cabin. Keep surfaces clean, remove trash regularly, and use organizers for small items like coins, pens, and charging cables.
Simple habits like these make a big difference over time. A well-kept car interior also helps you notice problems faster. When everything is tidy, it is easier to spot leaks, unusual sounds, or warning lights that might otherwise go unnoticed. A clean car is a happy car, inside and out.
Check Your Fluids Regularly
Beyond oil, your Corolla needs other fluids to operate properly. Check your coolant, brake fluid, transmission fluid, and windshield washer fluid on a regular basis. Most of these checks can be done at home with minimal tools. Top off any fluids that are low, and schedule a professional service if you notice a significant drop. Staying on top of fluid levels is one of the easiest car maintenance tips you can follow.
Pay Attention to Dashboard Warnings
Your Corolla’s dashboard is packed with information. Beyond the maintenance light, there are many other symbols that communicate important info. Learn what each symbol means so you can respond quickly to potential issues. The owner’s manual has a full guide to all dashboard lights and what they indicate. Familiarizing yourself with these symbols is one of the best Corolla maintenance tips you can adopt as a new car owner.
What to Do If the Light Will Not Reset
Sometimes the maintenance light stays on even after you follow all the steps correctly. This can be frustrating, but it is usually not a sign of a serious problem. Here is what you can do to troubleshoot the issue.
First, double-check that you followed the reset procedure correctly. Make sure the ignition is in the “ON” position, not “START.” Hold the button for the full 10 to 15 seconds. Watch for the flashing light as confirmation that the reset is in progress. Sometimes it takes a second attempt to get it right, and that is perfectly normal.
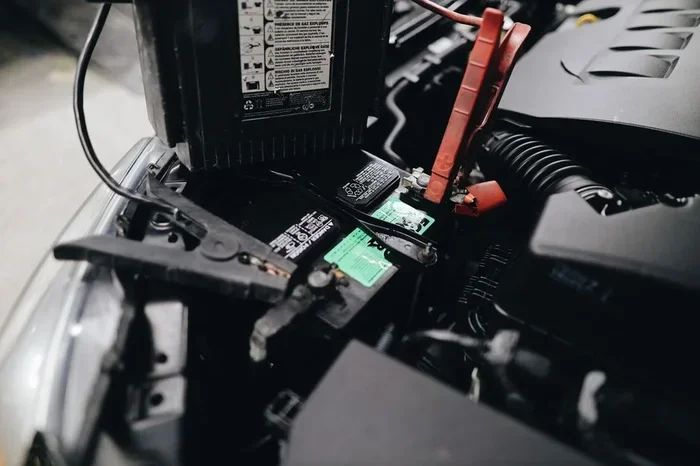
If the light still will not go off, try disconnecting the car battery for a few minutes. This resets the car’s computer system and often clears stubborn lights. Simply disconnect the negative terminal, wait two to three minutes, and reconnect it. Then try the reset procedure again. This trick works surprisingly often and costs nothing.
In rare cases, the persistent light may indicate a deeper issue with the car’s computer system or sensors. If resetting and battery disconnection do not work, it is time to visit a Toyota dealership or qualified mechanic. They have diagnostic tools that can read error codes and identify the root cause. This is especially important if other warning lights are also present on your Corolla dashboard. A professional can spot issues that are not visible to the naked eye.
Remember, the maintenance light is a helpful tool, not a cause for panic. Most of the time, a simple reset solves the problem. But when it does not, professional help is always a smart choice. Trust your instincts and get your car checked if something feels off.
Conclusion
Resetting the maintenance required light on a Toyota Corolla is a skill every Corolla owner should have. It is quick, free, and empowers you to take control of your car’s maintenance routine. Whether you use the trip meter method or the odometer button method, the process is straightforward and easy to master. You do not need to be a mechanic or a tech expert. Anyone can learn it in just a few minutes.
The key is to reset the light only after completing the actual service. This keeps your service records accurate and your car running at its best. Follow the recommended Corolla maintenance schedule, stay on top of fluid checks, and pay attention to dashboard warnings. Your Toyota Corolla is built to last, and a little proactive care goes a long way in keeping it running smoothly for years to come.
Next time that maintenance light comes on, do not panic. Grab this guide, follow the steps, and get it done in minutes. Your car, your wallet, and your peace of mind will all thank you. Take charge of your Toyota Corolla maintenance today and enjoy the confidence that comes with knowing you are taking care of your car the right way.
Frequently Asked Questions
Can I reset the maintenance light myself without going to a dealership?
Yes, absolutely. You can reset the maintenance light on your Toyota Corolla at home using simple buttons on your dashboard. The trip meter reset method works on most Corolla models and requires no special tools or professional help. Just follow the steps in this guide and you will be done in minutes.
How often does the maintenance required light come on for a Toyota Corolla?
The maintenance required light typically comes on every 5,000 miles for most Toyota Corolla models. However, the exact interval can vary based on your driving habits and conditions. Hard driving, frequent short trips, and towing may trigger the light sooner. Check your owner’s manual for the specific service interval for your model year.
Will resetting the maintenance light clear any other warning lights on my dashboard?
No, resetting the maintenance light only clears the maintenance required indicator. Other warning lights, such as the check engine light or oil pressure light, are separate systems and require different procedures to reset. If you have multiple warning lights on, it is best to have your vehicle diagnosed by a professional mechanic.
What should I do if the maintenance light comes back after I reset it?
If the maintenance light returns shortly after resetting, it usually means the service interval has been reached again or the reset was not completed properly. Try the reset procedure once more, making sure to hold the button for the full 10 to 15 seconds. If the light persists, there may be an underlying issue that needs professional inspection.
Do I need any special tools to reset the maintenance required light on my Toyota Corolla?
No special tools are needed at all. You only need access to your dashboard buttons and the ignition key or start button. The entire reset process can be done in under five minutes without any equipment beyond what is already built into your vehicle.
Is it safe to drive my Toyota Corolla with the maintenance required light on?
Yes, it is generally safe to drive with the maintenance light on for a short period. The light is a reminder, not an emergency warning. However, you should not delay service for too long. Prolonged driving without proper maintenance can lead to engine wear, reduced fuel efficiency, and potential breakdowns over time. Schedule your service as soon as you can.
=== CONCLUSION ===
Learning how to reset the maintenance required light on a Toyota Corolla is one of the simplest and most useful skills a car owner can develop. It saves time, money, and trips to the dealership. With the step-by-step methods outlined in this guide, you can handle the reset process confidently and independently.
Remember to always complete the actual service before resetting the light. Keep up with your Corolla maintenance schedule, check your fluids regularly, and pay attention to your dashboard. Your Toyota Corolla is built to last, and a little proactive care goes a long way in keeping it running smoothly for years to come.
Now that you know exactly how to reset the maintenance required light, there is no reason to put it off. The next time that light comes on, you will know exactly what to do. Take charge of your car’s maintenance and enjoy the confidence that comes with being a knowledgeable and capable car owner.