Where to Connect the Ground Wire on Your Car Battery Engine
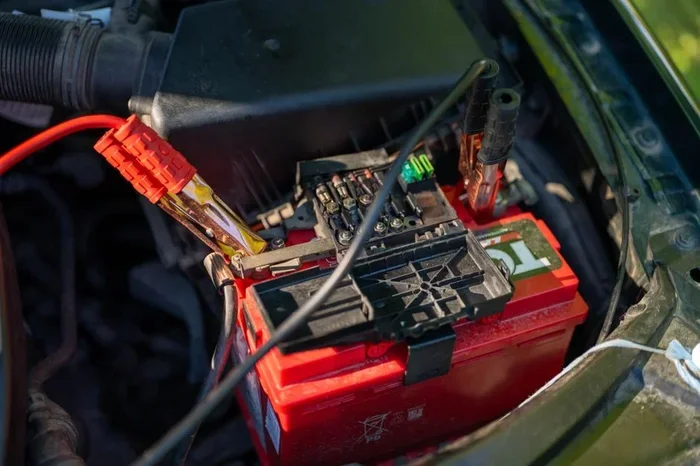
Connecting the ground wire on your car battery engine is essential for a safe and reliable electrical system. The ground wire typically connects to the negative battery terminal and then to the engine block or chassis. Understanding the correct ground wire placement prevents electrical issues, starting problems, and potential damage to your vehicle. This guide walks you through every connection point, step-by-step instructions, and common mistakes to avoid.
If you have ever wondered where to connect the ground wire on your car battery engine, you are not alone. Many car owners face confusion when dealing with ground wires. The ground wire plays a critical role in completing the electrical circuit in your vehicle. Without a proper ground connection, your car may experience starting problems, dim lights, or even electrical damage.
This guide will show you exactly where to connect the ground wire on your car battery engine. We will cover every connection point, give you a step-by-step process, and share tips to keep your electrical system running smoothly. Whether you are a beginner or a seasoned DIYer, this article has you covered.
Let us start with the basics. A ground wire provides a path for electrical current to return to the battery. In most vehicles, this path goes from the negative terminal to the engine block and then to the chassis. Think of it as the return lane on a highway. Without it, electricity has nowhere to go, and your car’s systems stop working.
Key Takeaways
- Negative Terminal Connection: The ground wire connects from the negative battery terminal to the engine block or chassis.
- Multiple Ground Points Exist: Your car has several ground connection points, including the engine block, chassis, and firewall.
- Corrosion Is a Common Enemy: Dirty or corroded ground connections cause voltage drops and electrical failures.
- Proper Torque Matters: Always tighten ground bolt connections to the manufacturer’s specifications.
- Voltage Drop Testing Helps Diagnose Issues: A simple multimeter test can reveal bad ground connections quickly.
- Never Skip the Ground Wire: Removing or bypassing the ground wire can damage your entire electrical system.
📑 Table of Contents
- Understanding the Ground Wire on Your Car Battery Engine
- Where to Connect the Ground Wire on Your Car Battery Engine
- Step-by-Step Guide to Connecting the Ground Wire
- Common Ground Wire Connection Points Compared
- Signs of a Bad Ground Connection
- Tips for Maintaining Your Ground Wire Connection
- Common Mistakes to Avoid When Connecting the Ground Wire
- When to Seek Professional Help
- Final Thoughts on Ground Wire Connection
Understanding the Ground Wire on Your Car Battery Engine
The ground wire is one of the most important parts of your car’s electrical system. It completes the circuit that powers everything from your starter motor to your radio. When people ask where to connect ground wire car battery, they are usually looking for the main ground strap or cable.
Most cars have a primary ground cable that runs from the negative battery terminal directly to the engine block. Some vehicles also have secondary ground wires that connect the engine to the chassis or the firewall. Each connection point serves a specific purpose in keeping your electrical system stable.
What Does a Ground Wire Do?
The ground wire acts as the return path for electrical current. When you turn the key, power flows from the battery through the starter motor and then needs a way back. The ground wire provides that path. Without it, the circuit remains open, and nothing happens.
Here is a simple way to think about it. Imagine a garden hose. Water flows out of the hose and then needs to return to the source. The ground wire is like the return path for that water. If the hose is kinked or blocked, water cannot flow properly. The same thing happens with a bad ground wire in your car.
Why Ground Wire Placement Matters
Where you connect the ground wire matters a lot. A poor ground connection can cause all kinds of electrical problems. These include flickering lights, slow cranking, and even damage to sensitive electronics. Many people overlook the ground wire when troubleshooting electrical issues, but it is often the root cause.
Proper ground wire placement also ensures safety. A loose or corroded ground can create heat at the connection point. Over time, this can melt insulation and cause short circuits. Taking the time to connect the ground wire correctly saves you from costly repairs down the road.
Where to Connect the Ground Wire on Your Car Battery Engine
The main ground wire on most vehicles connects to three key areas. Let us look at each one in detail.
1. The Negative Battery Terminal
The journey of the ground wire starts at the negative battery terminal. This is where the black cable connects to the battery. The negative terminal serves as the primary ground reference point for your entire electrical system.
When you look at your battery, the negative terminal is marked with a minus sign (-). It is usually smaller than the positive terminal. The ground cable attaches directly to this terminal with a clamp and bolt. Make sure the connection is tight and free of any corrosion or dirt.
2. The Engine Block
From the negative terminal, the main ground wire travels to the engine block. This is the most critical connection point for your ground wire. The engine block is where the ground wire delivers the return path for current flowing through the engine’s electrical components.
Look for a bolt on the engine block that has a wire attached to it. This is your primary engine ground point. The bolt is usually located near the starter motor or on the side of the engine block. If you have trouble finding it, follow the black cable from the battery. It will lead you right to the connection point.
3. The Chassis and Firewall
Many vehicles also have additional ground wires that connect the engine to the chassis or the firewall. The chassis ground provides a secondary path for electrical current. The firewall ground connects the engine bay to the cabin area where your dashboard electronics live.
These additional ground points help distribute the electrical load across multiple connection points. They also reduce voltage drop, which is the loss of electrical power as current travels through a wire. Multiple ground points mean a more stable and reliable electrical system.
Step-by-Step Guide to Connecting the Ground Wire
Now that you know where the ground wire connects, let us walk through the process of connecting it properly. Follow these steps carefully for a safe and reliable connection.
Step 1: Gather Your Tools
Before you start, make sure you have the right tools on hand. You will need a wrench set, a wire brush or sandpaper, dielectric grease, and a multimeter. Having everything ready saves you time and frustration.
It is also a good idea to wear safety glasses and gloves. Car batteries contain sulfuric acid, which can cause burns. Always work in a well-ventilated area and keep sparks away from the battery.
Step 2: Disconnect the Battery
Safety first. Always disconnect the battery before working on any electrical connections. Start by loosening the nut on the negative terminal. Remove the cable and tuck it away from the battery terminal. This prevents any accidental shorts or sparks.
Some people ask if they need to disconnect both terminals. For ground wire work, disconnecting the negative terminal is enough. The positive terminal does not need to be removed unless you are working near it.
Step 3: Clean the Connection Points
Corrosion is the number one enemy of a good ground connection. Use a wire brush or sandpaper to clean the battery terminal post and the engine block bolt. You want to see shiny metal, not white or green buildup.
Clean both the cable end and the connection surface thoroughly. Even a thin layer of corrosion can cause voltage drop and electrical problems. Take your time with this step. It makes a big difference in the quality of your ground connection.
Step 4: Attach the Ground Wire
Place the ground cable onto the clean connection point. Tighten the bolt securely with your wrench. You want the connection to be snug but not overly tight. Over-tightening can strip the threads or damage the connection point.
Apply a thin layer of dielectric grease to the connection. This protects against future corrosion and ensures a solid electrical connection. The grease fills in tiny gaps and keeps moisture out.
Step 5: Test the Connection
Once the ground wire is connected, reconnect the battery. Use your multimeter to test the voltage between the engine block and the negative terminal. You should read less than 0.1 volts. If you read higher than that, your ground connection may need adjustment.
Try starting the car and check for any electrical issues. Lights should be bright, the engine should crank smoothly, and all electronics should work normally. If you notice any problems, double-check your ground connection.
Common Ground Wire Connection Points Compared
Not all ground wire connections are the same. Different vehicles have different setups. Here is a comparison of common ground wire connection points found in most cars.
- Negative Battery Terminal: The primary ground reference. All ground paths start here.
- Engine Block Bolt: The main engine ground point. Provides the return path for starter motor current.
- Chassis Ground Point: Connects the engine to the vehicle frame. Reduces electrical noise.
- Firewall Ground: Connects the engine bay to the cabin. Powers dashboard electronics.
- Accessory Ground Points: Additional grounds for amplifiers, lights, or aftermarket electronics.
Each connection point plays a role in your vehicle’s electrical health. A problem at any one of these points can cause issues throughout the system. Regular inspection of all ground points helps prevent unexpected electrical failures.
Signs of a Bad Ground Connection
How do you know if your ground wire is not connected properly? There are several telltale signs that point to a bad ground connection on your car battery engine.
- Dim or Flickering Lights: If your headlights or dashboard lights dim when you start the engine, you may have a bad ground.
- Slow Cranking: A weak ground connection reduces the power available to the starter motor. This causes slow or labored engine cranking.
- Electrical Gremlins: Intermittent problems with your radio, power windows, or sensors often trace back to a poor ground.
- Battery Warning Light: A bad ground can trigger the battery light on your dashboard, even when the battery is healthy.
- Corrosion at the Terminal: Visible white, green, or blue buildup on the battery terminal indicates a corroded ground connection.
If you notice any of these symptoms, check your ground wire connections first. In many cases, a simple cleaning and reconnection solves the problem. You do not always need to replace parts or visit a mechanic.
Tips for Maintaining Your Ground Wire Connection
Keeping your ground wire in good condition is simple. A little maintenance goes a long way in preventing electrical problems. Here are some tips to help you maintain your ground wire connection.
First, inspect your ground connections at least twice a year. Look for any signs of corrosion, loose bolts, or frayed wires. Catching problems early saves you from bigger issues later. A five-minute inspection can prevent hours of troubleshooting.
Second, keep your battery terminals clean. Use a battery terminal cleaner or a mixture of baking soda and water to remove corrosion. Dry the terminals thoroughly after cleaning and apply a protective coating.
Third, avoid moving the ground wire around too much. Each time you disconnect and reconnect a ground wire, you risk damaging the connection point. If the wire is in the right place, leave it there. Only move it when you are performing maintenance or repairs.
Fourth, consider upgrading to a thicker ground wire if you add aftermarket electronics. Stock ground wires are designed for the factory electrical load. Adding amplifiers, LED lights, or other accessories increases the demand on your ground system. A heavier gauge wire handles the extra current better.
Fifth, use dielectric grease on all ground connections. This simple step prevents corrosion and extends the life of your ground wire connections. It is cheap, easy to apply, and highly effective.
For those who work on their cars in a garage, proper workspace organization makes all the difference. Having a clean, well-lit workspace helps you find connection points quickly and work safely. If you are setting up a home garage workspace, you might want to check out some tips on where to place your desk in a garage workspace for optimal comfort and efficiency.
Keeping your tools and workspace organized also helps with electrical work. A clutter-free environment means you can spot connections and wires more easily. If you want advice on organizing your workspace, take a look at how to organize your workspace for practical ideas that apply to any garage or workshop setup.
When your workspace is set up well and you have good lighting, electrical projects become much more manageable. A comfortable and organized environment helps you focus on the task at hand and reduces the chance of mistakes.
Common Mistakes to Avoid When Connecting the Ground Wire
Even experienced car owners make mistakes when working with ground wires. Here are the most common errors and how to avoid them.
Mistake 1: Connecting to the Positive Terminal. This is a dangerous mistake that can cause a short circuit. Always connect the ground wire to the negative terminal only. The positive terminal carries power, and grounding it can cause sparks, damage, or even a fire.
Mistake 2: Using a Loose Connection. A loose ground wire creates resistance in the circuit. This resistance causes voltage drop and electrical problems. Always tighten your ground connections firmly and check them periodically.
Mistake 3: Ignoring Corrosion. Many people connect a ground wire over corrosion and expect it to work. It will not. Corrosion creates an insulating layer that blocks electrical current. Always clean connection points thoroughly before attaching any wires.
Mistake 4: Using the Wrong Wire Gauge. A thin wire cannot handle the current demand of your electrical system. Use the correct wire gauge for your vehicle. If you are unsure, consult your vehicle’s service manual or an auto parts specialist.
Mistake 5: Skipping the Dielectric Grease. Some people skip this simple step and regret it later. Dielectric grease protects your connections from moisture and corrosion. It is a small step that pays big dividends in connection longevity.
When to Seek Professional Help
Most ground wire connections are straightforward and easy to handle at home. However, there are times when professional help is the right choice. If you have checked all your ground connections and still experience electrical problems, there may be a deeper issue.
Complex electrical problems, such as wiring harness damage or ECU issues, require specialized diagnostic tools and expertise. A professional mechanic can perform a thorough electrical diagnostic and identify problems that are not visible to the naked eye.
If you are uncomfortable working with car batteries or electrical systems, do not hesitate to seek help. Your safety is more important than any DIY project. A qualified mechanic can handle ground wire connections quickly and safely.
Final Thoughts on Ground Wire Connection
Knowing where to connect the ground wire on your car battery engine is a valuable skill for any car owner. The ground wire completes the electrical circuit and keeps your vehicle running smoothly. From the negative battery terminal to the engine block and chassis, each connection point matters.
Follow the steps in this guide, maintain your connections regularly, and you will avoid most ground-related electrical problems. A clean, tight, and well-maintained ground connection is the foundation of a reliable car electrical system.
Take the time to understand your vehicle’s ground wire setup. Check your connections, clean the terminals, and protect against corrosion. Your car will reward you with years of reliable electrical performance. If you ever feel unsure, a professional mechanic is always a good resource. Happy wrenching.
Frequently Asked Questions
What happens if the ground wire is not connected to the car battery engine?
Without a proper ground connection, your car’s electrical circuit remains incomplete. This means the starter motor cannot engage, lights will be dim or flicker, and electronics may malfunction. A missing ground wire prevents electrical current from returning to the battery, which stops your vehicle from operating correctly.
Can I connect the ground wire to any bolt on the engine block?
Not just any bolt. You should connect the ground wire to a dedicated ground point on the engine block. These points are specifically designed to provide a low-resistance path for electrical current. Using random bolts can lead to poor connections and unreliable grounding performance.
How do I know if my ground wire connection is good?
Use a multimeter to test the voltage between the engine block and the negative battery terminal. A reading of less than 0.1 volts indicates a good ground connection. If you read higher than that, the connection may be loose, corroded, or in the wrong location.
Should I use dielectric grease on ground wire connections?
Yes, dielectric grease is highly recommended. It protects the connection from moisture, corrosion, and dirt. A thin layer applied to the connection point after tightening helps maintain a clean and reliable electrical connection over time.
How often should I check my car battery ground wire?
You should inspect your ground wire at least twice a year. More frequent checks are helpful if you live in a coastal area or a climate with high humidity. Regular inspections help you catch corrosion and loose connections before they cause electrical problems.
Can a bad ground wire drain my car battery?
Yes, a bad ground connection can cause parasitic battery drain. When the ground path has high resistance, electrical systems may draw power even when the car is off. This slowly depletes the battery over time and can leave you stranded with a dead battery.
=== CONCLUSION ===
Connecting the ground wire on your car battery engine is simpler than most people think. The main connection runs from the negative battery terminal to the engine block, with additional points at the chassis and firewall. By following the steps in this guide, you can ensure a safe and reliable ground connection that keeps your electrical system working at its best.
Remember to clean your connections, use dielectric grease, and check for corrosion regularly. A well-maintained ground wire prevents a host of electrical problems and keeps your car running smoothly. If you ever feel uncertain, do not hesitate to consult a professional mechanic. Your car deserves a solid ground, and now you know exactly how to give it one.