How to Change a Flat Tire and Get Back on the Road Quickly

Changing a flat tire is a simple skill every driver should know. With the right tools and a calm approach, you can swap a damaged tire in under 30 minutes. This guide walks you through each step clearly, from pulling over safely to tightening the final lug nuts.
Key Takeaways
- Stay safe first: Pull over to a flat, stable surface and turn on your hazard lights before doing anything.
- Gather your tools: You need a spare tire, a jack, a lug wrench, and your vehicle manual to change a flat tire the right way.
- Follow a clear sequence: Loosen lug nuts, lift the car, remove the flat, mount the spare, and lower the vehicle carefully.
- Check tire pressure regularly: Proper tire pressure helps prevent flats and keeps your car running smoothly.
- Get professional help when needed: A spare tire is not a long-term fix. Visit a tire shop as soon as possible.
- Practice ahead of time: Familiarize yourself with the process in a safe setting so you are ready when it counts.
📑 Table of Contents
- How to Change a Flat Tire and Get Back on the Road Quickly
- Step 1: Pull Over Safely and Prepare Your Vehicle
- Step 2: Loosen the Lug Nuts Before Lifting the Car
- Step 3: Lift the Vehicle with the Jack
- Step 4: Remove the Flat Tire and Mount the Spare
- Step 5: Check Tire Pressure and Stow Your Equipment
- Common Mistakes to Avoid When Changing a Flat Tire
- When to Call for Roadside Assistance Instead
- How to Prevent Flat Tires in the Future
- Final Thoughts on Changing a Flat Tire
How to Change a Flat Tire and Get Back on the Road Quickly
Flat tires happen to everyone at some point. You are driving along, minding your own business, and then you hear a strange thumping sound. Or maybe your car starts pulling to one side. Either way, a flat tire can turn a good day into a stressful one. But here is the good news. Changing a flat tire is easier than most people think. You do not need to be a mechanic. You just need a few basic tools and a little confidence.
This guide will show you exactly how to change a flat tire step by step. We will cover everything from pulling over safely to driving on your new spare. By the end, you will feel ready to handle this situation on your own. Let us get into it.
Why Knowing How to Change a Flat Tire Matters
Flat tires do not wait for the perfect moment. They happen on highway ramps, in parking lots, and on quiet back roads at night. When your tire goes flat, you have two choices. You can call roadside assistance and wait. Or you can handle it yourself and keep moving. Knowing how to change a flat tire gives you freedom and independence. It also saves you time and money. Most roadside assistance calls cost money and can take 30 minutes to an hour. A DIY tire change takes about 15 to 30 minutes if you know what you are doing.
Beyond the practical benefits, changing your own tire builds confidence. You learn something new about your vehicle. You become a more self-reliant driver. And the next time a flat happens, you will not panic. You will just get to work.
Step 1: Pull Over Safely and Prepare Your Vehicle
The first and most important step is safety. When you notice a flat tire, do not slam on the brakes. Slowly reduce your speed and look for a safe spot to pull over. A flat, wide shoulder is ideal. A parking lot works great too. Avoid narrow roads with heavy traffic if possible.
Once you stop, turn on your hazard lights. This tells other drivers that something is wrong. If you have reflective triangles or flares, place them behind your car. This adds extra visibility, especially at night or in low-light conditions.
Before you get out of the car, grab your vehicle manual. It contains important details about your specific model. It will tell you where the jack points are and how much weight your vehicle can handle. Every car is a little different, so this step matters.
Quick Tip: Keep your phone charged and within reach. If something goes wrong, you want to be able to call for help if needed.
Gather Your Tools Before You Start
Now it is time to collect everything you need. Here is a simple checklist of tools you should have in your car at all times:
- Spare tire (check that it is properly inflated before you need it)
- Car jack (most vehicles come with a scissor jack or hydraulic jack)
- Lug wrench (also called a tire iron)
- Vehicle owner manual
- Gloves (to keep your hands clean and protected)
- Flashlight (essential if you are changing a tire after dark)
- Wheel wedges or bricks (to prevent the car from rolling)
If your car does not have a spare tire, check if it came with a tire repair kit or an inflatable sealant. These are temporary solutions, but they can get you to a shop. Always keep your emergency kit stocked with these basics.
Step 2: Loosen the Lug Nuts Before Lifting the Car
This is a step many people skip or get wrong. You need to loosen the lug nuts while the car is still on the ground. If you lift the car first, the tire will spin freely and you will not be able to break the nuts loose.
Take your lug wrench and place it on each lug nut. Turn counterclockwise. You may need to use your body weight to break them free. Do not remove them completely yet. Just loosen them about a quarter to a half turn. This breaks the resistance and makes the next steps much easier.
Quick Tip: If your lug nuts are really tight, try standing on the wrench arm for extra leverage. Wear sturdy shoes for safety.
What If the Lug Nuts Are Rusted or Stuck?
Rusted lug nuts are a common problem, especially on older vehicles or cars that sit for long periods. If a nut will not budge, try spraying it with a penetrating lubricant like WD-40. Let it sit for a few minutes. Then try again with the wrench. You can also try tapping the wrench with a hammer to break the rust seal. Never use excessive force in a way that could hurt you. Safety always comes first.
Step 3: Lift the Vehicle with the Jack
Now it is time to raise the car. Find the jack point on your vehicle. Your owner manual will show you exactly where this is. Usually, it is a reinforced area on the frame or body near the flat tire. Placing the jack in the wrong spot can damage your car or cause it to slip. Never put a jack under the floorpan or a plastic body panel.
Once the jack is in position, start raising it. Turn the jack handle or pump it steadily. Lift the car until the flat tire is about six inches off the ground. You should feel the car is stable and secure. Give it a gentle push to test it. If it wobbles, lower the car and reposition the jack.
Important: Never put any part of your body under the vehicle while it is supported only by a jack. The jack can slip and the car can fall. This is extremely dangerous.
Step 4: Remove the Flat Tire and Mount the Spare
Now the fun part. With the car lifted and the lug nuts already loosened, you can fully remove them. Turn each lug nut counterclockwise until it comes off. Set them somewhere safe, like a pocket or a small bag. They are small and easy to lose.
Grab the flat tire by the treads and pull it straight toward you. It may be heavy, so use both hands. Set it flat on the ground, out of the way. Slide the spare tire onto the lug bolts. Push it gently until the bolts poke through the holes in the rim.
Now hand-tighten the lug nuts. Put each nut back on by turning them clockwise. Tighten them as much as you can by hand. This keeps the tire in place while the car is still elevated.
Lower the Vehicle and Tighten the Lug Nuts
Slowly lower the jack until the spare tire touches the ground but the full weight of the car is not yet on it. Now use the lug wrench to tighten each nut firmly. Tighten them in a star pattern, not in a circle. This ensures even pressure and keeps the wheel balanced.
Once all nuts are tight, lower the car completely. Remove the jack and set it aside. Give each lug nut one more check. Make sure they are as tight as you can get them.
Quick Tip: Driving with a spare tire is not the same as driving on a regular tire. Most spare tires, especially compact ones, are designed for speeds under 50 mph. Keep it slow and get to a tire shop soon.
Step 5: Check Tire Pressure and Stow Your Equipment
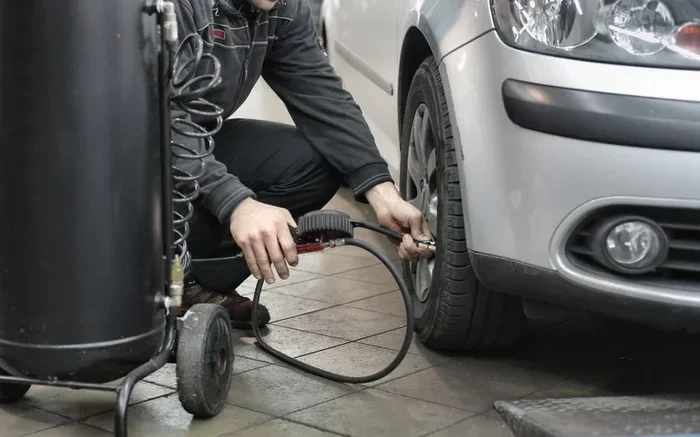
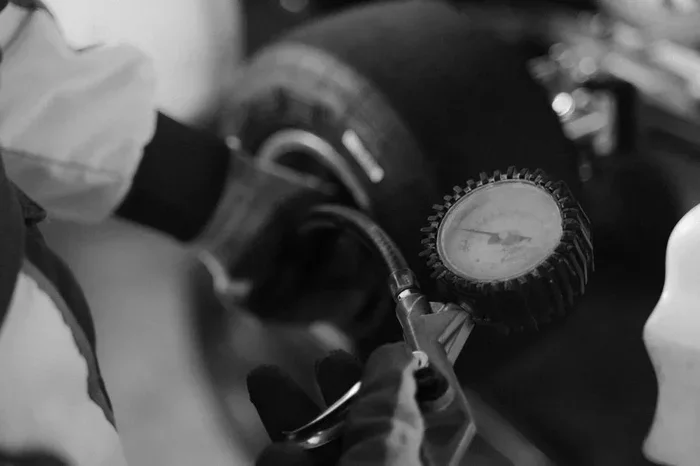
After you have changed the tire, take a moment to check the spare tire pressure. You can use a tire gauge for this. The recommended pressure is listed on a sticker inside the driver door frame or in your owner manual. If the spare is low, drive carefully to the nearest gas station and add air.
Do not forget to stow your flat tire, jack, and lug wrench back in the vehicle. Many cars have a built-in storage compartment under the trunk floor. If your flat tire is too big to fit inside, you may need to strap it to the roof or call for a tow.
Dispose of any materials you used, like gloves or packaging. Leave the roadside cleaner than you found it. This is just good practice and shows respect for other drivers.
Common Mistakes to Avoid When Changing a Flat Tire
Even with the best instructions, mistakes happen. Here are some common errors to watch out for:
- Skipping the hazard lights. Other drivers need to know your car is stopped. Always turn them on.
- Loosening lug nuts after lifting. The tire will spin and you will not get any leverage. Always loosen them first.
- Using the wrong jack point. This can damage your car or cause the jack to slip. Check your manual.
- Overlooking lug nut tightness. Loose lug nuts can cause the wheel to wobble or come off while driving. Always double-check.
- Driving too fast on a spare. Compact spares are not built for highway speeds. Keep it under 50 mph.
- Forgetting to check tire pressure. A spare with low pressure is almost as bad as a flat tire.
Avoiding these mistakes keeps you safe and ensures your tire change goes smoothly. If you ever feel unsure about any step, it is perfectly okay to call for roadside assistance. There is no shame in asking for help.
When to Call for Roadside Assistance Instead
Sometimes a flat tire is not a simple fix. You should call for roadside assistance if any of the following apply:
- You do not have a spare tire in your vehicle.
- The spare tire is also flat or damaged.
- You are on a busy highway and do not feel safe getting out of your car.
- The lug nuts are completely stripped and will not budge.
- You have tried and the jack will not hold the car securely.
- You are in a remote area with no cell service and no help nearby.
Roadside assistance services like AAA or your insurance provider can send a professional to help. They have the right equipment and experience to handle difficult situations. It is always better to be safe than sorry.
How to Prevent Flat Tires in the Future
The best way to deal with a flat tire is to avoid getting one in the first place. Here are some simple habits that help:
- Check your tire pressure monthly. Use a tire gauge to make sure each tire is at the recommended PSI. Proper tire pressure is one of the easiest ways to prevent flats.
- Inspect your tires regularly. Look for cracks, bulges, or uneven wear. These are early signs that a tire needs replacing.
- Rotate your tires on schedule. Most experts recommend rotating every 5,000 to 8,000 miles. This helps tires wear evenly and last longer.
- Avoid road hazards. Stay away from potholes, debris, and sharp objects whenever possible.
- Replace old tires. Tire rubber breaks down over time. If your tires are more than six years old, consider replacing them even if the tread looks fine.
Taking care of your tires saves you from unexpected breakdowns. It also improves your fuel economy and keeps you safer on the road. Vehicle maintenance does not have to be complicated. Small habits make a big difference over time.
Essential Items for Your Emergency Roadside Kit
Every driver should have a roadside emergency kit in their car. Here are the essentials:
- Spare tire (properly inflated)
- Jack and lug wrench
- Tire pressure gauge
- Flashlight with extra batteries
- Reflective triangles or flares
- Gloves and a rain poncho
- Basic first aid kit
- Phone charger or portable power bank
- Bottled water and non-perishable snacks
Keep this kit in your trunk year-round. You never know when you will need it. A little preparation goes a long way toward staying safe and calm during an emergency.
Final Thoughts on Changing a Flat Tire
Changing a flat tire is a skill that everyone can learn. It is not complicated, and it does not require any special training. With the right tools, a calm mindset, and the steps outlined in this guide, you can handle a flat tire confidently and efficiently. The key is preparation. Keep your tools in your car, know where your jack points are, and practice the process once or twice in a safe environment.
Remember, a spare tire is a temporary solution. Get your flat tire repaired or replaced as soon as possible. Visit a tire shop and let a professional assess the damage. They can tell you whether the original tire can be saved or if it needs to be replaced entirely.
Next time a flat tire catches you off guard, take a deep breath. You have got this. Pull over safely, follow the steps, and get back on the road. You will be glad you learned this essential skill.
Frequently Asked Questions
How long does it take to change a flat tire?
For most people, changing a flat tire takes about 15 to 30 minutes. If it is your first time, it might take a little longer. That is completely normal. With practice, you will get faster and more confident each time.
Can you drive on a spare tire for a long time?
No. Spare tires, especially compact or temporary ones, are designed for short distances only. Most manufacturers recommend driving no more than 50 to 70 miles on a spare. Get to a tire shop as soon as possible for a proper repair or replacement.
What should I do if my car jack won’t lift the vehicle?
First, make sure the jack is placed on the correct jack point. If the jack still will not lift, try repositioning it on a flat, solid surface. Never use a jack on soft ground like grass or dirt. If the jack still fails, call for roadside assistance. Do not attempt to work under a car that is not properly supported.
How often should I check my tire pressure?
You should check your tire pressure at least once a month. Temperature changes can affect pressure, so it is a good idea to check more often during seasonal shifts. A simple tire gauge takes just a few minutes to use.
Is it safe to change a flat tire on the highway?
If possible, exit the highway at the next off-ramp and find a safe location. If you cannot move the vehicle, turn on your hazard lights immediately, stay seatbelted, and call for roadside assistance. Your safety always comes before the tire.
What is the correct tightening pattern for lug nuts?
Always tighten lug nuts in a star or crisscross pattern. This ensures even pressure across the wheel and prevents it from wobbling. Avoid tightening them in a circle, as this can cause the rim to sit unevenly on the hub.
=== CONCLUSION ===
Knowing how to change a flat tire is one of the most valuable skills a driver can have. It keeps you safe, saves you money, and gives you independence when things go wrong. Follow the steps in this guide, keep your tools ready, and stay calm under pressure. You will handle any flat tire situation with confidence. Drive safe, stay prepared, and never let a flat tire slow you down for long.