How to Make Your Own Diffuser Oil in 5 Simple Steps
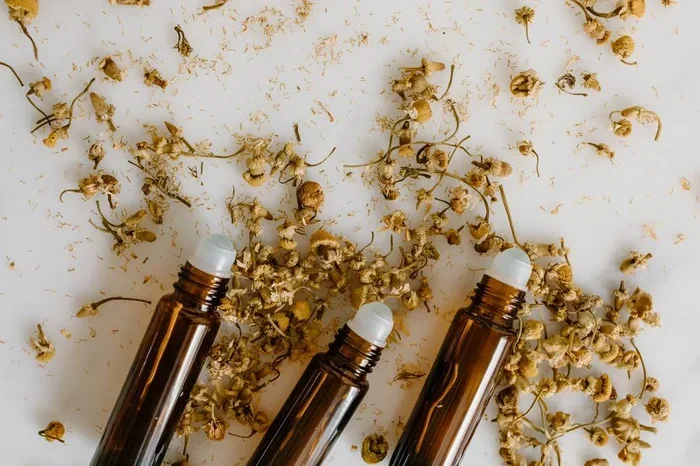
Making your own diffuser oil is easier than you think. With a few simple ingredients like carrier oils and essential oils, you can craft custom blends that fill your space with natural fragrance. This guide walks you through five straightforward steps to create beautiful, aromatic oils right at home.
Have you ever walked into a room and instantly felt calm because of a lovely scent in the air? That is the magic of a good diffuser oil. Many people love using essential oil diffusers to make their homes smell amazing. But store-bought oils can be pricey. Worse yet, you might not know exactly what is inside them. The good news is that you can make your own diffuser oil right at home. It takes just a few simple ingredients and a little bit of time. In this guide, we will walk you through five easy steps. By the end, you will have a beautiful, custom blend that smells incredible and makes your space feel warm and inviting.
Creating your own aromatic oils is a fun and rewarding experience. You get to choose every scent, every strength, and every ingredient. Whether you want something relaxing for bedtime or an energizing blend for your morning routine, the choice is yours. Plus, when you learn how to make your own diffuser oil, you save money and avoid the mystery chemicals found in many commercial products. Let us dive into the world of homemade fragrance and scent blending.
Key Takeaways
- Simple Ingredients: You only need a carrier oil and a few essential oils to get started.
- Custom Scents: Mixing your own blends lets you create unique fragrances tailored to your mood.
- Cost-Effective: Homemade diffuser oil saves money compared to store-bought options.
- Natural and Safe: You control every ingredient, avoiding harsh chemicals and synthetic fragrances.
- Easy to Scale: Once you master the basic recipe, you can make larger batches or experiment with new combinations.
📑 Table of Contents
- Why Make Your Own Diffuser Oil?
- What You Will Need to Get Started
- Step 1: Choose Your Scent Profile
- Step 2: Mix Your Essential Oils
- Step 3: Add the Carrier Oil
- Step 4: Test Your Blend
- Step 5: Store and Use Your Diffuser Oil Properly
- Common Mistakes to Avoid
- Expert Tips for Advanced Blending
- Conclusion
Why Make Your Own Diffuser Oil?
Before we get into the steps, let us talk about why this is such a great idea. Making your own diffuser oil comes with a bunch of benefits that store-bought options simply cannot match.
You Control What Goes In
When you buy oils from the store, the label might list “fragrance” without explaining what that means. With homemade blends, you know every single ingredient. You choose pure essential oils and natural carrier oils. This means no hidden synthetic chemicals or artificial fillers. If you care about natural wellness and what goes into your home, this is a huge win.
It Saves You Money
Bottles of pre-made diffuser oil can cost a lot over time. A single bottle might run you fifteen to thirty dollars. But a bottle of carrier oil costs just a few dollars and lasts for many blends. Essential oils go a long way too. A small investment in a few base oils can give you dozens of custom recipes. Over time, the savings add up fast.
You Can Create Unlimited Scents
Store shelves carry a limited range of scents. But when you blend your own, the possibilities are endless. You can mix floral, woody, citrus, and herbal notes to create something truly unique. Want a calming lavender blend with a hint of orange? Go for it. Prefer a grounding cedarwood and vanilla mix? That works too. The freedom to experiment is one of the best parts of learning how to make your own diffuser oil.
What You Will Need to Get Started
Before you begin, gather your supplies. The good news is that you do not need a lot of fancy equipment. Everything is easy to find and affordable.
Carrier Oils
A carrier oil is the base of your diffuser blend. It helps dilute the essential oils and carries the scent into the air. Popular choices include sweet almond oil, jojoba oil, and fractionated coconut oil. Each one has a slightly different scent and texture. Jojoba oil is lightweight and odorless, making it a great choice for beginners. Sweet almond oil has a mild, nutty scent that blends well with many fragrances.
Essential Oils
Essential oils are the heart of your blend. These are concentrated plant extracts that give your oil its aroma. You will want to pick a top note, a middle note, and a base note to create a balanced scent profile. Top notes are the first scents you smell. They are light and fresh. Think citrus like lemon or sweet orange. Middle notes form the core of the blend. Lavender and geranium are popular choices. Base notes are deep and grounding. Cedarwood, vanilla, and sandalwood work beautifully here.
Small Glass Bottles and Droppers
You will need a small glass bottle to hold your blend. Dark amber or cobalt blue bottles work best because they protect the oils from light. A dropper makes it easy to measure and mix your oils precisely. You can find these supplies at most craft stores or online.
Optional: Label and Notebook
Here is a tip that many beginners overlook. Label your bottles with the date and ingredients. Keep a small notebook where you write down your recipes. This way, you can recreate blends you love and avoid ones that did not turn out the way you wanted. It is a simple habit that pays off big time.
Step 1: Choose Your Scent Profile
The first step in learning how to make your own diffuser oil is deciding what kind of scent you want. Do you want something relaxing? Energizing? Romantic? Your scent profile guides every other choice you make.
Think about the mood you want to create in your space. Here are some popular scent profiles to get you started:
- Relaxing: Lavender, chamomile, cedarwood, and vanilla. Perfect for unwinding after a long day.
- Energizing: Peppermint, lemon, rosemary, and grapefruit. Great for morning focus and productivity.
- Fresh and Clean: Eucalyptus, tea tree, lemon, and mint. Ideal for a crisp, airy feeling.
- Cozy and Warm: Cinnamon, clove, orange, and sandalwood. Perfect for fall and winter evenings.
- Floral and Uplifting: Rose, ylang-ylang, geranium, and bergamot. A lovely choice for any season.
Once you pick your profile, choose three to five essential oils that fit within it. This keeps your blend balanced and not overwhelming. You can always adjust the ratios later once you see how the oils work together.
Step 2: Mix Your Essential Oils
Now comes the fun part. Mixing essential oils is like creating a little piece of art. There is no wrong way to do it, but following a simple formula helps you get great results every time.
A good starting ratio for diffuser oils is 20 to 30 percent essential oils and 70 to 80 percent carrier oil. Here is a quick breakdown:
- Top notes: 30 percent of your essential oil blend. These are your bright, fresh scents.
- Middle notes: 50 percent of your essential oil blend. These form the heart of the scent.
- Base notes: 20 percent of your essential oil blend. These add depth and longevity.
For example, if you are making a 10-milliliter bottle, you might use 3 drops of lemon (top note), 5 drops of lavender (middle note), and 2 drops of sandalwood (base note). Then fill the rest with your carrier oil. This formula gives you a well-rounded aroma that smells natural and balanced.
When you are first starting out, keep your blends simple. Three to four oils are plenty. As you gain confidence, you can experiment with more complex combinations. The key is to have fun and trust your nose. If it smells good to you, it probably is good.
One important thing to remember. Always let your blend sit for at least 24 hours before using it. This resting period allows the oils to meld together. The scent will deepen and become more harmonious. It is like letting a soup simmer. The flavors come together over time.
Step 3: Add the Carrier Oil
Once your essential oils are blended and have had time to rest, it is time to add the carrier oil. The carrier oil dilutes the essential oils and makes them safe for use in your diffuser. It also helps the scent last longer.
Here is how to do it:
- Start by adding your essential oil blend to the glass bottle.
- Pour the carrier oil into the bottle slowly. Leave a little bit of space at the top for the dropper cap.
- Put the cap on tightly and gently roll the bottle between your hands. Do not shake it vigorously. Shaking can create bubbles and may affect the scent.
- Let the bottle sit for another hour or so. This gives the oils time to fully combine.
That is it. Your homemade diffuser oil is almost ready. The carrier oil acts as a gentle base that helps the essential oils disperse evenly when you use them in your diffuser. Without it, the essential oils can be too strong and may not diffuse properly.
A quick tip. If you are using fractionated coconut oil, it stays liquid at room temperature and has a very long shelf life. Sweet almond oil is another excellent option. It absorbs nicely and has a subtle, pleasant scent of its own. Choose the carrier oil that works best for your skin and preferences.
Step 4: Test Your Blend
Testing your blend is a crucial step that many people skip. But trust us, it makes a big difference. Before you fill your entire diffuser, try a small test to see how the scent performs.
Place a drop or two of your blend on a cotton ball or a small piece of tissue. Smell it after a few minutes. Does the scent remind you of what you were going for? Is it too strong? Too faint? This is your chance to adjust before committing to a full bottle.
If the scent is too strong, add a few more drops of carrier oil. If it is too weak, add one or two more drops of essential oil. Mix gently and test again. Keep adjusting until you are happy with the result.
Also pay attention to how the scent evolves over time. A good blend will have different notes that come through as the oil settles. The top notes fade first, then the middle notes emerge, and finally the base notes linger. This layered experience is what makes homemade blends so special.
Once you are satisfied with your blend, give the bottle one final gentle roll. Your custom diffuser oil is ready to use. Place a few drops in your diffuser and enjoy the natural aroma that fills your room. You will love the difference that a homemade blend makes compared to store-bought options.
Step 5: Store and Use Your Diffuser Oil Properly
Proper storage is key to making your diffuser oil last. Essential oils can degrade when exposed to light, heat, and air. Follow these simple storage tips to keep your blends fresh for months.
- Keep bottles in a cool, dark place. A cupboard or drawer works perfectly. Avoid places near windows or stoves.
- Always use dark glass bottles. They block harmful UV rays that can break down the oils.
- Tighten caps securely. This prevents air from getting in and oxidizing the oils.
- Label everything. Write the name of the blend, the date you made it, and the ingredients used.
Most homemade diffuser oils stay fresh for six to twelve months. If you notice the scent fading or changing, it may be time to make a fresh batch. Trust your nose. It is the best indicator of whether your oil is still good.
When using your oil in a diffuser, follow the manufacturer’s instructions for the number of drops. A little goes a long way. Start with three to five drops and adjust based on the size of your room and your personal preference. You can also use your custom blend to refresh linens, spritz on pillowcases, or add to a warm bath for a spa-like experience at home.
Creating a pleasant workspace with your favorite scents can boost your mood and focus. Consider placing your diffuser near your desk where you spend most of your time. Whether you are where to place your desk for maximum productivity or setting up a calming corner, diffuser oils add a wonderful touch to any environment. You might also enjoy decorating your office desk with plants alongside your diffuser for a complete sensory experience. And while you are at it, keeping which plant is good to keep in office desk nearby can complement the natural aroma of your homemade oils beautifully. Taking a few minutes to organize your study desk and add personal touches like plants and scent makes a huge difference in how you feel throughout the day.
Common Mistakes to Avoid
Even with the best intentions, beginners sometimes make mistakes when making their own diffuser oil. Here are a few common pitfalls to watch out for:
- Using too many essential oils. More is not always better. Overloading your blend can create a harsh, overwhelming scent. Stick to the recommended ratios.
- Skipping the carrier oil. Essential oils are very potent on their own. Without a carrier oil, they can be too strong for diffusing and may irritate your respiratory system.
- Using low-quality oils. Always choose pure, therapeutic-grade essential oils. Cheap oils may be diluted or synthetic, which affects both scent and safety.
- Not letting the blend rest. Patience is important. Rushing to use your blend before the oils have melded together can result in a flat, unbalanced scent.
- Storing oils in clear glass. Clear bottles expose the oils to light, which degrades them faster. Always use dark glass containers.
Avoiding these mistakes will help you create beautiful, long-lasting blends every time. Remember, making diffuser oil is a learning process. Each blend teaches you something new about scent and composition.
Expert Tips for Advanced Blending
Once you have mastered the basics, you might want to try more advanced techniques. Here are some tips from experienced blend creators:
- Experiment with seasonal blends. Citrus and mint oils shine in summer, while warm spices and woods work beautifully in winter.
- Keep a scent journal. Write down every blend you try, including the ratios and your thoughts on the result. Over time, you will build a personal library of go-to recipes.
- Blend in batches. Making larger quantities saves time and ensures consistency. Just scale up the ratios proportionally.
- Layer your scents. Apply a drop of your blend to your wrists and let it develop throughout the day. You will notice new notes emerging as hours pass.
- Combine complementary scents. Oils from the same fragrance family tend to blend well. For example, citrus oils pair easily with other citrus or herbal oils.
These tips help you move from beginner to confident blend creator. The more you practice, the more intuitive the process becomes. Soon, you will be creating custom aromatic oils without even thinking about it.
Conclusion
Learning how to make your own diffuser oil is one of the simplest and most rewarding DIY projects you can try. It costs very little, takes just minutes to prepare, and gives you complete control over what goes into your home. From choosing your scent profile to mixing, testing, and storing your blend, every step is fun and fulfilling. You now have everything you need to create beautiful, natural fragrances that make your space feel truly yours.
Start with a simple relaxing blend and build from there. Try new combinations, keep notes, and share your creations with friends and family. Homemade diffuser oil makes a wonderful gift too. So grab your oils, pick up a bottle, and start blending today. Your perfect scent is just a few steps away.
Frequently Asked Questions
What essential oils are best for beginners?
Lavender, sweet orange, peppermint, and lemon are excellent choices for beginners. They are widely available, affordable, and blend well with many other oils. These oils also cover a range of scent profiles, from calming to energizing, making them versatile starting points for your first blend.
Can I use any carrier oil for my diffuser blend?
Most carrier oils work well, but jojoba oil, sweet almond oil, and fractionated coconut oil are the most popular. They are lightweight, have mild scents, and mix easily with essential oils. Avoid using mineral oil or petroleum-based products, as they do not blend well with essential oils and may not diffuse properly.
How long does homemade diffuser oil last?
When stored properly in a dark glass bottle in a cool, dark place, homemade diffuser oil can last six to twelve months. The essential oils may lose their potency over time, so it is best to use your blend within the first few months for the strongest scent. Always check the aroma before using if the oil has been sitting for a while.
Is it safe to use homemade diffuser oil around pets?
Some essential oils can be harmful to pets, especially cats and dogs. Tea tree, eucalyptus, and peppermint oils can be particularly risky. Before using your blend around animals, research which oils are safe and consult your veterinarian. When in doubt, use mild, pet-safe oils like lavender or chamomile in well-ventilated areas.
Can I use my diffuser oil on my skin?
Homemade diffuser oils are designed for use in diffusers, not for direct skin application. The carrier oil dilution is typically too low for safe topical use. If you want to apply essential oils to your skin, you should create a separate blend with a higher concentration of carrier oil and perform a patch test first.
Do I need a special diffuser to use homemade oil?
No, you can use any standard ultrasonic or nebulizing diffuser with your homemade oil. These devices are designed to work with water-based essential oil blends. Simply add the recommended number of drops to your diffuser’s reservoir along with water, and enjoy the natural aroma throughout your room.