How to Change Car Oil at Home Without Going to a Mechanic
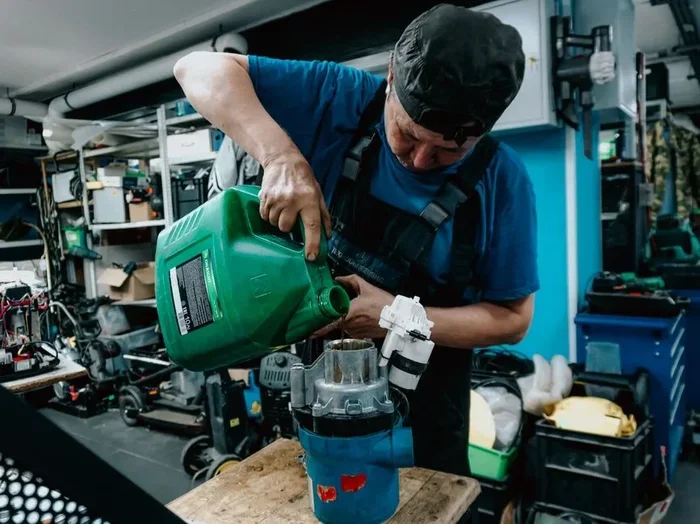
Changing your car oil at home is easier than you think and can save you serious money. With a few basic tools and about 30 minutes, you can do it yourself without visiting a mechanic. This guide walks you through every step so you can change car oil at home confidently and safely.
Key Takeaways
- Saves Money: Doing it yourself can save $50 to $100 per oil change compared to a shop visit.
- Simple Process: You only need basic tools like a wrench, drain pan, and a jack stand.
- Safety First: Always use jack stands and let the engine cool before starting.
- Proper Disposal Matters: Never dump used oil. Take it to a recycling center or auto parts store.
- Check Your Manual: Every car has different oil type and change interval requirements.
- Replace the Filter Too: Changing the oil filter along with the oil keeps your engine in top shape.
📑 Table of Contents
Why You Should Change Your Car Oil at Home
Changing your car oil at home might sound intimidating at first. But trust us, it is one of the easiest car maintenance tasks you can do. You do not need to be a mechanic or have a fancy garage. All you need is a little patience and the right tools.
So why should you bother doing it yourself? First, it saves you a lot of money. A quick oil change at a shop can cost anywhere from $50 to $100 or more. When you do it at home, you pay only for the oil and filter. That is a big difference over time.
Second, you learn how your car works. Understanding your engine and its needs makes you a better car owner. You will know exactly what is going into your vehicle and when it needs attention. This knowledge helps you spot problems early before they become expensive repairs.
Third, it gives you control over the quality of parts you use. When a mechanic does the job, you might not know what grade of oil they put in. When you do it yourself, you pick the brand, the viscosity, and everything else. Your engine deserves the best, and DIY lets you deliver that.
Finally, it is a satisfying feeling. There is something really rewarding about finishing a car maintenance task on your own. Once you learn how to change car oil at home, you will wonder why you ever paid someone else to do it.
What You Need Before You Start
Before you get under your car, gather everything you need. Having all your tools ready prevents frustrating stops in the middle of the job. Here is a simple checklist of what you will need:
- New engine oil (check your vehicle manual for the right type and amount)
- New oil filter (match it to your car model)
- Oil drain pan (to catch the old oil)
- Socket wrench and the right size socket
- Oil filter wrench (for removing the old filter)
- Jack and jack stands (never rely on a jack alone)
- Funnel (for pouring new oil cleanly)
- Rags or paper towels (for cleanup)
- Hand gloves (to keep your hands clean and safe)
- Torque wrench (to tighten the drain plug correctly)
You can find most of these items at any auto parts store or online. A quick tip: buy a drain pan with a spout. It makes transferring used oil much easier and less messy.
Step-by-Step Guide to Changing Your Car Oil
Now that you have everything ready, let us walk through the process. Follow these steps carefully and you will have a clean, successful oil change in no time.
Step 1: Prepare Your Vehicle
Start by parking your car on a flat, level surface. Turn off the engine and let it cool for at least 10 minutes. Warm oil drains better, so you can run the engine for a few minutes and then turn it off. This helps the oil flow out smoothly.
Next, engage the parking brake. This keeps your car from rolling while you are underneath it. Safety is always the number one priority. Never get under a car that is only supported by a jack. Always use jack stands for stability.
Step 2: Lift the Vehicle
Use your car jack to lift the front of the vehicle. Place the jack stands under the designated lift points. Check your owner manual if you are not sure where these points are. Once the stands are secure, give the car a gentle push to make sure it does not wobble.
Now you can slide underneath the car comfortably. You should see the oil pan and the drain plug underneath the engine. Take a moment to locate them before moving to the next step.
Step 3: Drain the Old Oil
Place your oil drain pan directly under the drain plug. Using your socket wrench, slowly loosen the drain plug by turning it counterclockwise. Be careful — the oil may start flowing right away.
Once the plug is loose, unscrew it the rest of the way by hand. Let the old oil drain completely into the pan. This usually takes about 5 to 10 minutes. While you wait, check the drain plug for any metal shavings or debris. A little is normal, but large pieces could signal engine trouble.
Step 4: Remove the Old Oil Filter
While the oil is draining, take the opportunity to remove the old oil filter. Use an oil filter wrench to loosen it. Turn it counterclockwise until it comes off.
Be prepared for a little oil spill. Have your rags ready and position the drain pan underneath. Once the old filter is off, use a rag to clean any residue from the filter mounting surface. This ensures a good seal for the new filter.
Step 5: Install the New Oil Filter
Before you install the new filter, apply a thin layer of fresh oil to the rubber gasket. This helps create a tight seal and makes future removal easier. Screw the new filter on by hand. Tighten it snugly but do not overtighten.
A pro tip: most oil filters only need about three-quarters of a turn after the gasket makes contact. Overtightening can make the filter very difficult to remove next time.
Step 6: Replace the Drain Plug
Now that the old oil has fully drained, it is time to put the drain plug back in. Thread it in by hand first to avoid cross-threading. Then use your torque wrench to tighten it to the manufacturer specification. Over-tightening can strip the threads, and under-tightening can cause leaks.
Take your time with this step. A properly tightened drain plug prevents oil leaks and keeps your engine protected.
Step 7: Add New Oil
Now you can lower the car back to the ground. Remove the oil fill cap on top of the engine. Place a funnel in the opening and pour in the new oil slowly.
Add most of the oil first, then check the level with the dipstick. Add more oil gradually until the level reaches the full mark. Do not overfill. Too much oil can cause pressure problems and damage your engine over time.
Step 8: Check for Leaks and Clean Up
Start the engine and let it run for about one minute. This circulates the new oil through the engine. Then turn it off and wait a few minutes for the oil to settle. Check the dipstick again and add more oil if needed.
Now get under the car one more time and look at the drain plug and oil filter. Make sure there are no drips or leaks. If everything looks dry and clean, you are all set.
Dispose of the old oil and filter properly. Never pour used oil down a drain or onto the ground. Pour it into a sealed container and take it to a recycling center or auto parts store that accepts used oil.
Common Mistakes People Make When Changing Oil at Home
Even with the best instructions, mistakes can happen. Here are some common errors to watch out for:
- Using the wrong oil type: Always check your vehicle manual. Using the wrong viscosity can hurt engine performance and void your warranty.
- Forgetting to replace the oil filter: Old filters clog over time. A new filter keeps contaminants out of your engine.
- Not tightening the drain plug enough: A loose plug leads to oil leaks. But overtightening strips the threads just as badly.
- Skipping jack stands: Never trust a jack alone. Jack stands are an inexpensive safety investment that can save your life.
- Overfilling the oil: Too much oil creates excess pressure in the engine. Stick to the recommended amount on the dipstick.
- Not checking for leaks afterward: Always do a final check under the car before driving away.
How to Dispose of Used Motor Oil the Right Way
Used motor oil is a hazardous material. It contains toxins that can harm the environment if not handled properly. The good news is that disposing of it correctly is very easy.
Let the old oil cool and drain completely into your drain pan. Pour it into a clean, sealed container. Many auto parts stores like AutoZone and O’Reilly accept used oil for free recycling. You can also check with your local waste management facility for drop-off locations.
Do not mix used oil with other fluids like antifreeze or brake fluid. Keep it separate in a labeled container. Recycling used oil is one of the simplest ways to be an environmentally responsible car owner.
How Often Should You Change Your Car Oil
The answer depends on your vehicle, your driving habits, and the type of oil you use. Most modern cars recommend an oil change every 5,000 to 7,500 miles. Older vehicles or those using conventional oil may need changes every 3,000 miles.
Here are some general guidelines:
- Conventional oil: Change every 3,000 to 5,000 miles
- Synthetic blend: Change every 5,000 to 7,500 miles
- Full synthetic oil: Change every 7,500 to 10,000 miles
Always refer to your vehicle owner manual for the manufacturer’s recommendation. If you drive in extreme conditions — like very hot weather, heavy traffic, or towing — you may need to change your oil more frequently.
Expert insight: Regular oil changes are the single most important thing you can do to extend your engine’s life. Clean oil lubricates engine parts, reduces friction, and prevents overheating. Skipping oil changes leads to sludge buildup and costly repairs down the road.
Benefits of Learning DIY Car Maintenance
Once you master the oil change process, you build confidence to tackle other simple maintenance tasks. Here are some benefits of learning DIY car care:
- Cost savings: You avoid labor charges that shops add to every bill.
- Convenience: You can change your oil on your own schedule, not someone else’s.
- Knowledge: You understand your car better and can communicate more effectively with mechanics when needed.
- Self-reliance: You are never stranded waiting for an appointment at the shop.
- Vehicle longevity: Regular maintenance keeps your car running longer and more efficiently.
Changing your oil at home is the perfect starting point for anyone interested in DIY car maintenance. It is simple, fast, and incredibly rewarding. Once you see how easy it is, you will start looking for other tasks you can handle yourself.
Final Thoughts
Learning how to change car oil at home is one of the best skills a car owner can develop. It saves money, builds confidence, and keeps your engine running strong for years to come. With the right tools, a little preparation, and this guide, you can do it yourself in under an hour.
Remember to always prioritize safety. Use jack stands, wear gloves, and dispose of used oil responsibly. Follow your vehicle manual for the correct oil type and change interval. And most importantly, do not be afraid to start. Every expert was once a beginner.
So grab your tools, roll up your sleeves, and give it a try. Your car — and your wallet — will thank you. Once you learn how to change car oil at home, you will never go back to paying a mechanic for something you can easily do yourself.
Frequently Asked Questions
How long does it take to change car oil at home?
Most people can complete a DIY oil change in about 30 to 45 minutes. If it is your first time, give yourself an extra 15 minutes to get comfortable with the process. With practice, you will get faster each time.
What type of oil should I use for my car?
Check your vehicle owner manual for the recommended oil type and viscosity. Most modern cars use synthetic or synthetic blend oil. Using the wrong oil can reduce engine performance and potentially void your warranty.
Can I reuse old engine oil?
No, you should never reuse old engine oil. Used oil contains contaminants and metal particles that can damage your engine. Always dispose of it properly at a recycling center or auto parts store.
Do I need to change the oil filter every time?
Yes, you should always replace the oil filter with every oil change. A clean filter keeps debris and contaminants out of your engine. Old filters clog over time and lose their effectiveness.
Is it safe to change oil at home?
Yes, it is safe as long as you follow proper safety precautions. Always use jack stands, wear gloves, and work on a flat surface. Let the engine cool slightly before starting, and be careful when handling hot oil.
How do I know if my oil change was successful?
After the oil change, start your engine and let it run for a minute. Check for leaks under the car. Use the dipstick to verify the oil level is between the minimum and maximum marks. If everything looks clean and the level is correct, your oil change was a success.