Car Interior Detailing Tips to Transform Your Ride

Car interior detailing tips can completely change how your vehicle looks and feels inside. These simple methods help you deep clean every surface, remove stubborn stains, and eliminate unwanted odors. Whether you drive a sedan or SUV, following these steps will give your car a fresh, like-new appearance that turns heads everywhere you go.
Your car’s interior takes a beating every single day. Coffee spills, food crumbs, dust, and everyday wear can make even the nicest vehicle look worn out fast. But here is the good news. Car interior detailing tips can bring your cabin back to life without costing a fortune.
Whether you are a complete beginner or someone who has been cleaning their car for years, there is always something new to learn. The right approach saves time, protects your surfaces, and makes every drive more enjoyable. In this guide, we walk you through everything you need to know about interior car cleaning and car detailing from start to finish.
We will cover the tools you need, the step-by-step process, how to handle tough stains, and how to keep your interior looking great between deep cleans. Let us dive in and transform your ride.
Key Takeaways
- Start with a thorough vacuum: Removing loose dirt and debris first makes every cleaning step more effective.
- Use the right products for each surface: Different materials like leather, vinyl, and fabric need specific cleaners.
- Tackle stains immediately: The faster you address spills and spots, the easier they are to remove.
- Don’t skip the air vents and hard-to-reach spots: These areas collect dust and affect your car’s overall freshness.
- Condition leather seats after cleaning: This prevents cracking and keeps them looking premium for years.
- Establish a regular detailing routine: Consistent maintenance saves time and keeps your interior looking great between deep cleans.
📑 Table of Contents
Why Car Interior Detailing Matters
Some people think car interior detailing is all about looks. And yes, a clean cabin does make your car feel brand new again. But the benefits go much deeper than that.
First, a clean interior protects your investment. Dirt and grime break down materials over time. They cause fading, cracking, and wear that can cost hundreds of dollars in repairs later. Second, a clean car interior directly impacts your health. Dust, pollen, and bacteria build up in seats, carpets, and air vents. This affects the air you breathe every time you drive.
Third, there is the resale value factor. Buyers notice a well-maintained interior. A freshly detailed car interior can increase your trade-in or resale price significantly. Studies show that cars with clean interiors sell faster and at higher prices than those that look neglected.
The Hidden Costs of a Dirty Interior
Dirt acts like sandpaper on your surfaces. Every time you sit down or shift around, particles scratch and wear your materials. Over months and years, this adds up fast. Stains from food and drinks can become permanent if not treated quickly. Odors from spills or pets sink deep into fabric and are very hard to remove later.
The good news is that regular interior car detailing prevents all of this. A little effort now saves a lot of money and headaches down the road.
Quick Tip: Set a reminder on your phone to do a quick interior clean every two weeks. Small habits make a huge difference over time.
Essential Tools and Products for Interior Car Cleaning
Before you start cleaning, you need the right tools. Using the wrong products can damage your surfaces. Here is what every car owner should have in their detailing kit.
Core Cleaning Tools
- Car vacuum cleaner: A handheld or portable vacuum with multiple attachments is essential. It removes dust, crumbs, and debris from seats, carpets, and crevices.
- Microfiber cloths: These are gentle on all surfaces and leave no lint behind. Get at least five or six different colors to avoid cross-contamination.
- Car detailing brush set: Soft-bristle brushes help loosen dirt from fabric, vents, and textured surfaces without causing scratches.
- Upholstery cleaner: A quality spray cleaner designed for fabric and carpet. Look for one that is safe for all interior materials.
- Glass cleaner: A streak-free formula specifically made for automotive glass. Regular household cleaners can leave residue.
- Spray bottle with fine mist: This helps you apply cleaners evenly and avoid soaking surfaces.
Surface-Specific Products
Different parts of your car interior need different treatments. Using one product on everything is a common mistake. Here is a simple breakdown.
- Dashboard polish: Protects the dash from UV rays and gives it a clean, matte finish. Avoid greasy formulas that make the steering wheel slippery.
- Leather cleaner and leather conditioner: If your car has leather seats, you need both a cleaner to wash them and a conditioner to keep the leather soft and supple.
- Vinyl trim restorer: This brings faded plastic trim back to life and protects it from cracking.
- Odor eliminator: A quality odor eliminator neutralizes smells instead of just masking them with perfume.
- Carpet stain remover: A targeted formula for lifting set-in stains from fabric carpets and floor mats.
| Surface | Best Product Type | How Often to Clean |
|---|---|---|
| Dashboard and console | Dashboard polish or protectant | Every 2 weeks |
| Leather seats | Leather cleaner + conditioner | Every 4 weeks |
| Fabric seats and carpet | Upholstery cleaner | Every 2 weeks |
| Windows and mirrors | Automotive glass cleaner | Every week |
| Vinyl and plastic trim | Vinyl trim restorer | Every 2 weeks |
| Air vents | Soft brush + compressed air | Every week |
Step-by-Step Car Interior Detailing Tips
Now that you have your tools and products ready, let us walk through the actual process. Following these car interior detailing tips in order will give you the best results every time.
Step 1: Remove All Loose Items and Trash
Start by taking everything out of your car. Remove floor mats, seat organizers, phone mounts, and any personal items. Shake out your floor mats outside. This gives you full access to every surface and makes the rest of the process much faster.
Step 2: Vacuum Everything Thoroughly
Use your car vacuum cleaner with the brush attachment for seats and carpets. Start from the top and work your way down. Vacuum the seats, including between the cushions. Get the carpets, floor wells, and trunk area. Use the crevice tool for tight spaces between seats and the center console.
This step removes the loose dirt that can scratch surfaces when you start wiping them down. Do not rush this step. Take your time to get into every corner.
Step 3: Clean the Dashboard and Console
Spray a small amount of dashboard polish onto a microfiber cloth. Wipe the dashboard, center console, and door panels. Use gentle circular motions. The polish not only cleans but also leaves a protective layer that repels dust.
For air vents, use a soft detailing brush or a cotton swab dipped in cleaner. These narrow spaces collect a surprising amount of dust and grime. Clean them carefully to improve airflow and air quality inside your car.
Step 4: Treat the Seats
Your seats take the most abuse. Whether they are fabric, leather, or vinyl, each type needs specific care.
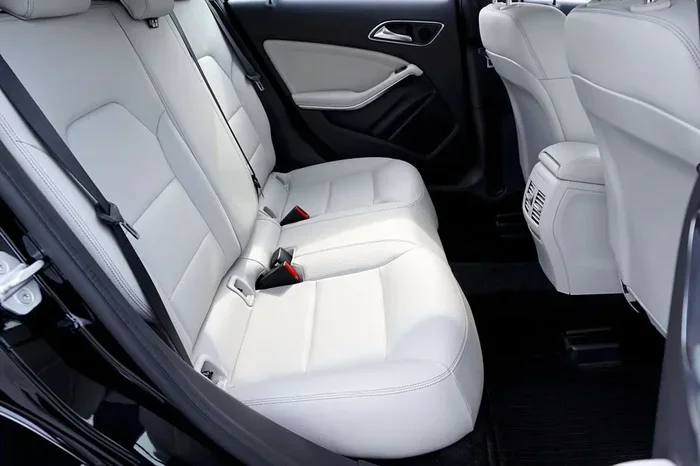
For leather seats, spray a leather cleaner onto a microfiber cloth and gently wipe down each seat. Follow up with a leather conditioner to keep the material hydrated and prevent cracking. Let the conditioner absorb for a few minutes, then buff off any excess with a clean cloth.
For fabric seats, spray your upholstery cleaner and gently scrub with a soft brush. Blot with a clean microfiber cloth to lift moisture. Repeat if needed for stubborn spots. Allow the seats to air dry completely before putting anything back in the car.
Expert Insight: Always test any cleaning product on a small hidden area first. This prevents discoloration or damage that you cannot see coming.
Step 5: Clean the Windows and Mirrors
Use a dedicated glass cleaner and a clean microfiber cloth. Spray the cleaner onto the cloth, not directly onto the glass. This prevents overspray from getting on your dashboard or trim. Wipe in an S-pattern for streak-free results. Do the inside of the windows first, then the outside.
Step 6: Detail the Floor Mats and Carpets
Take your floor mats outside and shake them well. If they are rubber mats, hose them down and scrub with a brush. For carpet mats, spray them with upholstery cleaner and scrub gently. Let them dry completely before putting them back in the car. Wet mats can trap moisture and cause mold or mildew smells.
Step 7: Final Touches and Protection
Once everything is clean and dry, spray a fabric refresher or odor eliminator inside the car. This gives the entire cabin a fresh scent. Apply a UV protectant to any exposed plastic or vinyl surfaces. Finally, put your clean floor mats back in and return all personal items.
Key Takeaways from the Step-by-Step Process:
- Always work from top to bottom so dirt falls onto already-cleaned surfaces.
- Use separate cloths for different areas to avoid spreading grime.
- Let everything dry completely before reassembling your car’s interior.
- Follow the product instructions on every car cleaning product you use.
Tackling Stubborn Stains and Odors
Even with regular cleaning, some stains and smells just will not go away. Here is how to handle the toughest situations with proven car interior detailing tips.
Removing Coffee and Drink Stains
Coffee stains are one of the most common seat stains in any car. The key is to act fast. Blot the spill immediately with a clean cloth. Do not rub, as this pushes the liquid deeper into the fabric. Mix a solution of warm water and a few drops of dish soap. Dab it onto the stain with a microfiber cloth and blot gently. Repeat until the stain lifts.
For older, set-in stains, use an upholstery cleaner with a built-in stain remover. Spray it directly on the spot, let it sit for five minutes, and then blot with a clean, damp cloth.
Eliminating Pet Odors
Pet odors can sink deep into your car’s fabric and carpet. Start by vacuuming thoroughly to remove any pet hair. Then spray an odor eliminator designed for automotive interiors. These products break down odor-causing molecules instead of just covering them up.
For persistent smells, sprinkle baking soda on the carpets and seats. Let it sit for at least 30 minutes, then vacuum it up. Repeat if needed. This simple trick works wonders for car odor removal.
Dealing with Grease and Oil Spots
Grease stains often come from food or mechanical work. Sprinkle cornstarch or talcum powder on the spot and let it sit for 15 minutes. The powder absorbs the grease. Vacuum it up, then clean the area with a mild detergent solution. For carpet stains that remain, use a dedicated carpet stain remover and follow the product directions carefully.
Common Mistakes:
- Using too much water, which can lead to mold growth in your carpet and seats.
- Using household cleaning products that contain bleach or ammonia, which can damage and discolor interior materials.
- Rubbing stains instead of blotting them, which spreads the stain and pushes it deeper into the fabric.
Maintaining a Pristine Car Interior Between Deep Cleans
The best car interior detailing tips are the ones that prevent problems before they start. A little daily care goes a long way toward keeping your cabin looking and smelling great.
Daily Habits That Make a Difference
- Remove trash every time you exit the car. A quick grab of any wrappers or bottles takes seconds and prevents buildup.
- Keep a small trash bag in the car. Tie it up and empty it regularly. This simple habit prevents odors and clutter.
- Wipe down surfaces after eating. A quick pass with a dry microfiber cloth removes crumbs before they become stuck-on messes.
- Use floor mats and seat covers. These protect your original surfaces from wear, spills, and stains.
Weekly and Monthly Maintenance Routine
Set up a simple schedule to keep your car interior refresh routine consistent:
- Weekly: Vacuum the floors and seats. Wipe down the dashboard and console with a microfiber cloth. Clean the windows with glass cleaner.
- Monthly: Deep clean the seats with the appropriate cleaner for your material. Treat any new stains immediately. Spray an odor eliminator throughout the cabin.
- Every 3 Months: Condition leather seats if applicable. Apply UV protectant to all plastic and vinyl surfaces. Wash and dry your floor mats thoroughly.
Sticking to this routine means your deep clean sessions take half the time and look twice as good. Consistency is the secret to a always-ready car interior.
Common Mistakes to Avoid When Detailing Your Car’s Interior
Even the most enthusiastic car owners make mistakes when cleaning their interiors. Here are the most common errors and how to avoid them.
Using Too Much Product
More product does not mean better cleaning. Using too much cleaner leaves residue on your surfaces. This residue attracts more dirt and can create a sticky or greasy feel. Spray your cleaner onto a cloth first, then apply it to the surface. This gives you much better control.
Skipping the Air Vents
Air vents are one of the dirtiest spots in any car. They collect dust, pollen, and allergens that blow directly into your cabin. Use a soft detailing brush or a specialized vent cleaning tool. Compressed air also works well to blow out dust from hard-to-reach vent slats.
Neglecting the Headliner
The headliner, or the ceiling fabric inside your car, often gets overlooked. It collects dust, and in humid conditions, it can develop mold. Gently vacuum it with a soft brush attachment. For stains, use a fabric cleaner and a light touch. Avoid soaking the headliner, as the moisture can cause the fabric to sag or peel away.
Forgetting to Clean Your Car Cleaning Tools
This sounds odd, but dirty tools spread dirt around instead of removing it. Wash your microfiber cloths after each use. Rinse out your brushes. Empty your vacuum canister or replace the bag regularly. Clean tools make clean cars.
Expert Insight: Professionals in car detailing always work in a shaded area. Direct sunlight causes cleaning products to dry too fast, leaving streaks and residue behind. Find a shaded spot or work in your garage for the best results.
Conclusion
Car interior detailing tips are simple once you know the right approach. Start with the right tools, follow a proven process, and stay consistent with your maintenance routine. Your car’s interior is one of the first things people notice, and a clean cabin makes every drive more pleasant.
Remember that interior car cleaning is not a one-time job. It is an ongoing practice that protects your investment and improves your daily driving experience. Whether you are dealing with carpet stains, seat stains, or just want a general car interior refresh, the steps in this guide will get the job done right.
Pick one section to start with today. Grab your microfiber cloth and vacuum. Give your car the care it deserves. You will be amazed at the difference a thorough car interior detailing session makes. Your car will look better, smell better, and feel better every time you get behind the wheel.
Frequently Asked Questions
How often should I detail my car’s interior?
A full interior detail every 4 to 6 weeks is ideal for most drivers. If you eat in your car or have pets, you may need to clean more frequently. Even a quick vacuum and wipe-down every week makes a big difference in keeping your car interior detailing results lasting longer.
Can I use household cleaners on my car’s interior?
It is best to avoid regular household cleaners. Many contain harsh chemicals like ammonia or bleach that can damage and discolor automotive surfaces. Stick to products specifically designed for interior car cleaning to protect your leather, vinyl, fabric, and trim.
What is the best way to clean leather seats at home?
Start by wiping them down with a damp microfiber cloth to remove surface dirt. Then apply a dedicated leather cleaner and gently scrub with a soft brush. After cleaning, apply a leather conditioner to keep the material soft and prevent cracking. Always let the seats dry completely before using them again.
How do I get rid of stubborn car odors?
First, identify and remove the source of the smell. Then use an odor eliminator designed for automotive use, not just a air freshener that masks the smell. For deep odors, sprinkle baking soda on your carpets and seats, let it sit for 30 minutes, and vacuum it up. Repeat if necessary for strong smells.
Do I need special equipment for car interior detailing?
You do not need expensive equipment to get great results. A basic handheld car vacuum cleaner, a set of microfiber cloths, a soft detailing brush, and a few quality car cleaning products are all you need to start. As you get more serious, you can add tools like an air compressor for vent cleaning or a steam cleaner for deep fabric treatment.
Is it worth paying for professional car interior detailing?
Professional detailing is worth it if you want a deep, thorough clean or are preparing your car for sale. Professionals have industrial-grade equipment and products that deliver results hard to replicate at home. However, with the right car interior detailing tips and a regular routine, you can maintain a pristine interior between professional sessions and save money in the long run.