How to Wash a Car Like a Pro with These Simple Steps
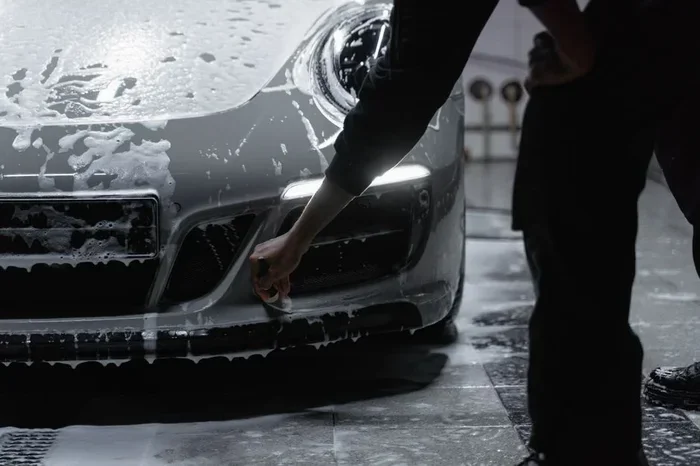
Learning how to wash a car at home saves money and keeps your paint looking great. This guide walks you through every step of the car wash process, from gathering supplies to applying the final wax. You will discover easy car wash tips that make the job faster and safer for your vehicle.
There is something deeply satisfying about a clean car. It shines. It smells fresh. And it feels like a whole new ride. If you have been wondering how to wash a car properly at home, you are in the right place. This guide breaks down every step so you can get professional results without visiting a car wash.
Washing your car at home is easier than most people think. You do not need fancy equipment or a garage full of supplies. With the right car wash soap, a few basic tools, and a little patience, you can make your vehicle look amazing. Let us dive into the process.
Key Takeaways
- Gather the right supplies first: Using proper car wash soap, microfiber towels, and two buckets makes a huge difference.
- Follow the two-bucket method: This simple technique prevents scratches and keeps your wash mitt clean.
- Wash from top to bottom: Gravity helps pull dirt downward, so you avoid dragging grime across clean panels.
- Dry properly with a microfiber towel: This prevents water spots and keeps your finish looking sharp.
- Wax after washing: Adding a layer of protection extends the life of your clean paint job.
- Avoid common mistakes: Skip the dish soap, never wash in direct sunlight, and always rinse before scrubbing.
- Wash every two weeks: A consistent car care routine protects your vehicle year-round.
📑 Table of Contents
Why Washing Your Car Matters
Some people skip car washes and let dirt build up. That is a mistake. Dirt, bird droppings, tree sap, and road grime all eat away at your paint over time. The longer you wait, the harder the damage gets. Regular hand wash car sessions protect your investment and keep the resale value high.
A clean car also performs better in certain ways. For example, clean windows improve visibility. Clean wheels prevent brake dust buildup. And a well-maintained exterior means fewer rust problems down the road. A solid car care routine is one of the simplest things you can do for your vehicle.
What You Need Before You Start
Before you grab a sponge and start scrubbing, let us talk about supplies. Having the right tools makes the whole process smoother and safer for your paint. Here is what you need.
Gather Your Supplies
- Car wash soap: Never use dish soap. It strips wax and damages paint. A dedicated car wash soap is gentle and effective.
- Two buckets: One for soapy water and one for rinsing your mitt. This is the two-bucket method and it is essential.
- Wash mitt: A soft microfiber or lambswool mitt lifts dirt without scratching.
- Microfiber drying towels: These absorb water quickly and leave zero streaks.
- Wheels cleaner: Brake dust needs a special cleaner. Do not use your wash soap on wheels.
- Hose with a nozzle: A gentle spray setting helps rinse without blasting water under seals.
- Wax or sealant: Optional but highly recommended for added protection after washing.
- Glass cleaner: For streak-free windows after the wash.
If you want to level up your setup, consider a foam cannon that attaches to your hose. It applies a thick layer of suds that loosens dirt before you even touch the car. A pressure wash car option on the low setting also works great for the initial rinse.
The Step-by-Step Car Washing Process
Now for the fun part. Follow these car wash steps in order for the best results. Each step builds on the last, so do not skip around.
Step 1: Rinse the Car Thoroughly
Start by rinsing the entire vehicle with water. This removes loose dirt, leaves, and debris. Use a gentle spray from top to bottom. Skipping this step is the number one cause of scratches during a home wash. The goal is to soften and remove surface grime before you touch anything with a mitt.
Step 2: Clean the Wheels First
Wheels are the dirtiest part of any car. Apply your dedicated wheels cleaner and let it sit for a minute or two. Use a separate brush for the wheels so you do not transfer brake dust to the paint. Rinse the wheels thoroughly before moving on to the body.
Step 3: Prepare the Two-Bucket Method
Fill one bucket with soapy water and the other with clean rinse water. Place a grit guard at the bottom of each bucket if you have one. The grit guard catches dirt at the bottom so your wash mitt stays clean. This is the secret weapon of anyone who knows how to wash car without scratching.
Dip your mitt into the soap bucket, wash one panel at a time, and rinse the mitt in the clean water bucket before re-dipping. This simple habit prevents you from dragging dirt across your paint over and over again.
Step 4: Wash From Top to Bottom
Start at the roof and work your way down. The lower panels collect the most dirt and grime, so washing them last keeps you from dragging that debris onto already-clean sections. Use gentle, straight-line motions rather than circular scrubbing. This reduces the chance of swirl marks on your paint.
Pay extra attention to areas where dirt builds up, like the lower doors, wheel wells, and the rear bumper. These spots collect road salt, mud, and bugs. Take your time and do not rush through them.
Step 5: Rinse Off All Soap
Once you have washed the entire car, rinse it completely from top to bottom. Make sure no soap residue remains. Soap left on the surface can leave spots and film once it dries. A thorough rinse ensures a clean surface for the drying step.
Step 6: Dry the Car Properly
Use a clean, soft microfiber towel to dry the car. Pat or gently blot the surface rather than dragging the towel. Start at the top and work down again. Microfiber towels are incredibly absorbent and will soak up water without scratching.
Do not let the car air dry. Water spots form quickly, especially if you have hard water. These spots can be stubborn to remove and may require a separate cleaning step. Drying immediately after rinsing is the easiest way to prevent them.
Step 7: Apply Wax or Sealant
After the car is completely dry, you can apply a layer of wax or paint sealant. Wax adds a protective barrier against UV rays, bird droppings, and environmental contaminants. It also gives the paint a deep, glossy shine that makes the whole car look fantastic.
Apply wax in thin, even layers using a foam applicator. Let it haze according to the product instructions, then buff off with a clean microfiber towel. A good coat of wax can protect your paint for several weeks, making your next wash even easier.
Common Mistakes to Avoid
Even well-meaning car owners make mistakes during the wash process. Here are the most common ones and how to avoid them.
- Using dish soap: It cuts grease on dishes but strips protective wax from your car. Always use a pH-balanced car wash soap.
- Washing in direct sunlight: Soap and water dry too fast in the sun, leaving spots and residue. Choose a shaded spot or wash in the early morning or evening.
- Using one bucket: This just recirculates dirty water onto your paint. The two-bucket method is simple and effective.
- Scrubbing with a rough sponge: Old kitchen sponges have abrasive particles that create fine scratches. Use a proper wash mitt.
- Drying with a regular towel: Cotton towels can trap dirt and scratch paint. Stick with microfiber for drying.
- Forgetting to rinse the wheels: Wheels cleaner is acidic and can damage paint if left on too long. Always rinse thoroughly.
How Often Should You Wash Your Car
The ideal car wash frequency depends on where you live and how you use your vehicle. If you drive on salty roads in winter, wash your car every week or two during the cold months. If you park in a garage and drive mostly on clean highways, every two to four weeks is fine.
As a general rule, wash your car whenever you notice a buildup of dirt or grime. Bird droppings and tree sap should be removed as soon as possible because they can damage paint within hours. A consistent wash car at home schedule is one of the best things you can do for long-term paint health.
During pollen season or after a big storm, an extra wash helps protect the finish. Think of it like brushing your teeth. A little regular effort prevents bigger problems later.
Pro Tips for a Showroom-Ready Finish
Want to take your car detailing tips to the next level? Here are some expert-level tricks that make a noticeable difference.
- Use a rinse aid in your final rinse. This helps water sheet off the surface and reduces spotting.
- Keep a separate towel for the wheels. Never use the same towel on your paint that you used on your wheels.
- Wash in cool weather. Cooler temperatures keep soap from drying too fast and give you more working time.
- Use filtered water for the final rinse. Hard water leaves mineral deposits that are hard to remove.
- Do a quick interior wipe-down after washing the exterior. A clean car inside and out feels brand new.
- Store your wash mitt and towels properly. Hang them to dry between uses so they stay clean and last longer.
These small habits add up over time. Your car will look better for longer, and you will spend less time fixing problems caused by neglect.
Benefits of Washing Your Car at Home
Many people pay for automatic car washes or hand wash services. There is nothing wrong with that. But washing your car at home has real benefits. First, it saves money over time. A single bottle of car wash soap lasts for many washes and costs less than a single trip to a car wash.
Second, you have full control over the process. You choose the products, the tools, and the level of care. You are not rushed by a machine or an overworked attendant. Third, washing your car at home is a relaxing activity. Many people find it meditative and satisfying. It is a chance to slow down, notice details, and take pride in your vehicle.
Finally, a thorough home wash lets you spot problems early. While you are washing, you might notice a small scratch, a loose trim piece, or a chip in the paint. Catching these early means cheaper repairs and less damage over time.
Frequently Asked Questions
Can I use a pressure washer to wash my car?
Yes, you can use a pressure washer, but keep it on a low setting. High pressure can damage paint seals and push water under trim. Hold the nozzle at least 12 inches from the surface and use a wide fan tip for the safest results.
What is the best time of day to wash a car?
The best time is in the early morning or late afternoon. Avoid washing in direct sunlight because the heat causes soap and water to dry too quickly, leaving spots and residue. A shaded driveway or garage is ideal.
How do I prevent water spots after washing?
The best way to prevent water spots is to dry the car immediately after rinsing. Use a clean microfiber towel and blot gently. If you live in an area with hard water, use filtered water for your final rinse or apply a quick detailer spray after drying.
Is the two-bucket method really necessary?
Yes, it really is. The two-bucket method keeps your wash mitt clean by rinsing dirt off in a separate bucket before dipping back into soapy water. This simple habit dramatically reduces the risk of swirl marks and scratches on your paint.
Can I wash my car with just a garden hose?
Absolutely. A standard garden hose works perfectly fine for rinsing and washing. If you want more pressure for the initial rinse, you can add a hose nozzle with a jet setting. Just keep the pressure gentle when rinsing the paint to avoid forcing water into seams and gaps.
Should I wax my car after every wash?
No, waxing after every wash is not necessary. Most waxes last between four and eight weeks depending on the product and weather conditions. A good rule is to wax every two to three months or whenever you notice water no longer beading on the surface.