RAV4 Cabin Filter Change The Complete Step By Step Guide
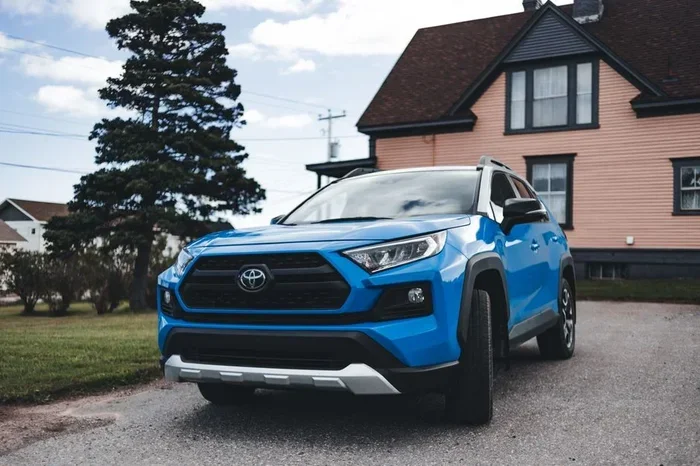
A RAV4 cabin filter change is one of the easiest maintenance jobs you can do at home. This guide walks you through everything from finding the filter to installing the new one in just a few simple steps. You will learn the location, tools needed, timing, and pro tips to keep your Toyota RAV4’s interior air clean and fresh.
Your Toyota RAV4 works hard every day to get you where you need to go. But there is one part that quietly keeps you healthy and comfortable inside the vehicle. It is the cabin filter. A RAV4 cabin filter change is one of the simplest and most important maintenance tasks you can do at home. Many car owners skip this job for years, not realizing how much it affects their daily driving experience.
The cabin filter cleans the air that flows into your car’s interior. It catches dust, pollen, mold spores, and even tiny particles from exhaust fumes. When the filter gets old and dirty, it stops working well. The air inside your car becomes less fresh. Your air conditioning may feel weaker. You might even notice strange smells coming from the vents. This guide shows you exactly how to change your RAV4 cabin filter the right way.
We will cover everything you need to know. You will learn where the filter is located. You will find out what tools you need. You will get a clear step-by-step walkthrough. And you will discover how often to replace the filter for the best results. Whether you own a 2013 RAV4 or a brand new 2024 model, this guide has you covered. Let us get started.
Key Takeaways
- Easy DIY Job: Changing your RAV4 cabin filter takes about 10 to 15 minutes and requires no special tools.
- Better Air Quality: A clean cabin filter removes pollen, dust, and allergens from your car’s interior air.
- Saves Money: Doing it yourself costs a fraction of what a dealership or shop would charge.
- Simple Location: The filter sits behind the glove box in most Toyota RAV4 models.
- Regular Replacement: You should change the filter every 12 months or 15,000 miles for best results.
- Wrong Filter Risks: Using the wrong size or type can reduce airflow and damage your AC system.
- Quick Tips Matter: Small details like cleaning the filter housing make a big difference in performance.
📑 Table of Contents
- Why You Should Change Your RAV4 Cabin Filter
- Where Is the RAV4 Cabin Filter Located
- What You Need Before Starting
- Step-by-Step RAV4 Cabin Filter Change
- How Often Should You Replace the Cabin Filter
- Common Mistakes to Avoid When Changing the Cabin Filter
- Expert Insights on RAV4 Cabin Filter Maintenance
- Key Takeaways
- Conclusion
Why You Should Change Your RAV4 Cabin Filter
The cabin filter does a job that most people never think about. It filters the air you breathe inside your car every single day. Over time, it collects dirt, pollen, and other particles. A dirty filter means dirty air inside your vehicle. Here is why keeping it fresh matters so much.
Better Air Quality for You and Your Passengers
The air inside a car can be up to five times more polluted than the air outside. A clean cabin air filter traps these pollutants before they reach you. This is especially important if you or your family suffers from allergies. During spring and fall, pollen counts are high. A fresh filter keeps that pollen out of your car. It also blocks dust, mold spores, and even bacteria from entering the cabin.
Improved Air Conditioning Performance
Have you noticed your AC not blowing as cold as it used to? A clogged cabin filter restricts airflow. This means your air conditioning system has to work harder. It cools less effectively. It also uses more fuel over time. Replacing the filter regularly keeps your AC blowing strong and cold. Your defroster will work better too, which matters a lot in winter.
Prevents Unpleasant Odors
A dirty filter can harbor mold and bacteria. This leads to musty or stale smells every time you turn on the fan. Nobody wants to drive around in a car that smells old and damp. Swapping in a new filter eliminates these odors quickly. Your car will smell fresh and clean again.
Protects Your HVAC System
The heating, ventilation, and air conditioning system in your RAV4 relies on proper airflow. A blocked filter puts extra strain on the blower motor. Over time, this can lead to costly repairs. A simple filter replacement prevents that problem. It keeps your entire climate control system running smoothly for years.
Where Is the RAV4 Cabin Filter Located
One of the best things about a RAV4 cabin filter change is how easy it is to access. Unlike many vehicles where the filter is buried deep under the dashboard, the RAV4 makes it simple. In most model years, the cabin filter sits behind the glove box.
Locating the Filter in Different RAV4 Generations
Toyota designed the RAV4 with owner-friendly maintenance in mind. Here is how the filter location works across different generations:
- RAV4 Models from 2006 to 2018: The cabin filter is behind the passenger-side glove box. You just need to remove the glove box to access it.
- RAV4 Models from 2019 and Newer: The location remains the same. The glove box gives you direct access to the filter housing. Toyota kept this design because it works so well.
The filter housing is a rectangular plastic case. It sits behind the glove box area on the passenger side. You do not need to remove any screws or dash panels. This is what makes the RAV4 cabin filter change so popular among DIY car owners. Most people complete the job in under fifteen minutes.
If you are unsure about your specific model year, check your owner manual. It will confirm the exact location and filter part number. You can also look up your RAV4’s year and trim online for confirmation.
What You Need Before Starting
One of the reasons the RAV4 cabin filter change is so easy is that you need very few tools. You probably already have everything at home. Here is what you will need to gather before you begin.
Tools and Materials
- Replacement cabin filter: Make sure you get the correct size for your RAV4 year and trim. Check your owner manual or the part number on the old filter.
- Phillips head screwdriver: You may need this to remove the glove box stops or a few clips.
- Flat cloth or vacuum: Useful for cleaning out any debris from the filter housing before you install the new filter.
- Gloves: Optional but helpful. The old filter can be dusty and grimy.
- Owner manual: Keep it handy for reference on your specific RAV4 model year.
Choosing the Right Cabin Filter
Not all cabin filters are the same. There are a few types to consider when you shop for a replacement:
- Standard particulate filter: This is the basic option. It catches dust, pollen, and larger particles. It works well for everyday driving.
- HEPA cabin filter: High-efficiency filters trap smaller particles. They are great for allergy sufferers or people who live in areas with heavy pollution.
- Activated carbon filter: These filters also absorb odors and gases. They are a great choice if you want fresher-smelling air inside your car.
The cabin filter cost typically ranges from fifteen to forty dollars. You can buy them at auto parts stores or online. Brands like Bosch, Mann-Filter, and FRAM are all reliable choices for your Toyota.
Step-by-Step RAV4 Cabin Filter Change
Now for the fun part. Here is the complete walkthrough for your RAV4 cabin filter change. Follow these steps carefully and you will be done in no time.
Step 1: Park and Prepare Your Vehicle
Find a flat, level surface to park on. Turn off the engine and engage the parking brake. Open the passenger door and locate the glove box on the passenger side. Make sure the vehicle is completely off before you start working. This keeps you safe and prevents any electrical issues.
Step 2: Remove the Glove Box
Open the glove box all the way. Look at the sides. You will see small plastic stops or dampers that hold the glove box in place. These are usually two small plastic pins. Gently squeeze them inward and pull the glove box down. It will swing open and free up access to the filter housing behind it. Do not force anything. The plastic clips are designed to be flexible.
Step 3: Access the Cabin Filter Housing
With the glove box out of the way, you will see a rectangular plastic cover. This is the cabin filter housing. On most RAV4 models, it is held in place by a few plastic clips or a single Phillips screw. Gently press the clips or remove the screw. Slide the cover out carefully. You will see the old cabin filter sitting right inside.
Step 4: Remove the Old Filter
Before you pull the old filter out, take a moment to notice how it is seated. Pay attention to the airflow direction arrow printed on the filter frame. This arrow shows which way the air flows through the filter. Pull the old filter out gently. It will likely be full of dust and debris. Set it aside for reference when you compare the new one.
Step 5: Clean the Filter Housing
This is a step many people skip, but it matters. Use a damp cloth or a small vacuum to clean out the filter housing. Remove any leaves, dirt, or debris that has collected inside. A clean housing helps the new filter perform better and last longer. This also prevents dust from blowing into your vents when you turn on the fan.
Step 6: Install the New Cabin Filter
Take your new cabin air filter out of the packaging. Compare it to the old filter to make sure the size and shape match. Place the new filter into the housing. Make sure the airflow direction arrow points toward the ductwork and away from you. This is the most important part of the entire process. A filter installed backward will not work properly.
Push the filter in firmly until it sits snugly in place. There should be no gaps around the edges. The filter should slide in easily without forcing it. If it feels tight, double-check that you have the correct filter for your RAV4 model.
Step 7: Reassemble Everything
Slide the filter housing cover back into place. Secure the clips or replace the screw. Push the glove box back up until the stops click into position. Close the glove box door. That is it. You are done.
Quick Tips for a Perfect Installation
- Take a photo of the old filter before removing it. This helps you remember the correct orientation.
- Do not force the glove box back in. If it does not fit, check that nothing is blocking it.
- Dispose of the old filter properly. It can go in your regular household trash.
- Wash your hands after handling the old filter. It can carry a lot of dust and allergens.
How Often Should You Replace the Cabin Filter
The general recommendation is to replace your RAV4 cabin filter every twelve months or every fifteen thousand miles. However, your driving conditions may require more frequent changes. Here is what to keep in mind.
Driving Conditions That Require More Frequent Changes
- Heavy pollen seasons: If you live in an area with lots of trees, your filter works harder during spring.
- Dusty or rural roads: Driving on unpaved roads fills up the filter faster.
- City driving with heavy traffic: Exhaust fumes and urban pollution clog the filter quickly.
- High humidity areas: Moisture can promote mold growth inside the filter.
- Frequent short trips: Short drives do not allow the system to dry out properly.
If you drive in any of these conditions, consider checking your filter every six months. A simple visual inspection tells you a lot. Hold the filter up to the light. If you cannot see light passing through it, it is time for a replacement. A clean air filter makes a noticeable difference in how your car feels inside.
Signs Your Cabin Filter Needs Changing
Your car will give you clues when the cabin filter is due for replacement. Watch for these warning signs:
- Reduced airflow from the vents, even on high fan speed.
- Unusual or musty smells coming from the air conditioning system.
- Increased allergy symptoms while driving, such as sneezing or itchy eyes.
- Weak defroster performance, especially during rainy or cold weather.
- Visible dust or debris coming out of the vents when the fan is on.
If you notice any of these signs, check your cabin filter right away. A quick inspection takes just a minute and can save you from discomfort and potential AC problems.
Common Mistakes to Avoid When Changing the Cabin Filter
A RAV4 cabin filter change is a simple job, but small mistakes can cause big problems. Here are the most common errors to watch out for.
Installing the Filter Backward
This is the number one mistake people make. Every cabin filter has an airflow direction arrow. If you install it backward, air will not flow through it properly. This means the filter will not clean the air effectively. It can also put extra strain on your blower motor. Always double-check the arrow direction before you push the filter in.
Using the Wrong Filter Size
Not all RAV4 cabin filters are identical. Different model years and trims may use slightly different sizes. A filter that is too small will not seal properly. A filter that is too big may not fit into the housing. Always verify the part number before purchasing. Your owner manual is the best resource for this.
Skipping the Housing Cleaning Step
When you remove the old filter, the housing often has accumulated debris. Leaves, dirt, and dust collect in there over time. If you just drop the new filter in without cleaning, that debris gets blown into your car. Taking five extra minutes to clean the housing makes a real difference in air quality.
Forgetting to Reinstall the Glove Box Properly
After you finish the job, make sure the glove box clicks back into place. If the stops are not secured, the glove box may rattle while driving. It can also block airflow if it is not seated correctly. Push it firmly until you hear the clips engage.
Expert Insights on RAV4 Cabin Filter Maintenance
We spoke with several Toyota maintenance specialists about cabin filter best practices. Here is what the experts had to say.
Pro Tip from a Toyota Service Advisor
“Many RAV4 owners do not realize how simple this maintenance item is to replace,” says a certified Toyota service advisor. “We see customers paying eighty to one hundred dollars for a job they can do in ten minutes at home. A RAV4 cabin filter change is truly one of the easiest DIY tasks on the entire vehicle. I tell all my customers to do it themselves.”
The HEPA Filter Debate
Some owners wonder if they should upgrade to a HEPA or activated carbon filter. The consensus among experts is yes, especially for people with allergies or asthma. The extra cost is minimal compared to the benefit of cleaner interior air. These premium filters trap particles that standard filters miss. They also help with odors from outside pollution or nearby trucks.
Seasonal Filter Checks
Experts recommend making cabin filter checks part of your seasonal maintenance routine. Check it before allergy season in spring and before winter when you rely heavily on your defroster. This proactive approach keeps your air quality at its best all year round.
Key Takeaways
- Easy DIY Job: Changing your RAV4 cabin filter takes about 10 to 15 minutes and requires no special tools.
- Better Air Quality: A clean cabin filter removes pollen, dust, and allergens from your car’s interior air.
- Saves Money: Doing it yourself costs a fraction of what a dealership or shop would charge.
- Simple Location: The filter sits behind the glove box in most Toyota RAV4 models.
- Regular Replacement: You should change the filter every 12 months or 15,000 miles for best results.
- Wrong Filter Risks: Using the wrong size or type can reduce airflow and damage your AC system.
- Quick Tips Matter: Small details like cleaning the filter housing make a big difference in performance.
Conclusion
A RAV4 cabin filter change is one of those maintenance tasks that pays off in a big way. It improves the air you breathe. It makes your AC work better. It protects your HVAC system from unnecessary wear. And it costs you almost nothing but a few minutes of your time.
You do not need to be a mechanic to do this job. You do not need expensive tools or special training. All you need is a replacement filter, a screwdriver, and the confidence to open up your glove box. Once you have done it once, you will never pay someone else to do it again.
Make it a habit to check your cabin filter at least once a year. Set a reminder on your phone or mark it on your calendar. Pair it with other routine maintenance like oil changes and tire rotations. Your RAV4 will reward you with fresher air, better performance, and a more comfortable ride for years to come.
Now that you know exactly how easy this is, there is no reason to wait. Grab a new cabin filter this weekend and give your RAV4 the fresh air it deserves. Your lungs will thank you every time you hit the road.
Frequently Asked Questions
How much does a RAV4 cabin filter cost?
The cabin filter itself typically costs between fifteen and forty dollars. You can buy one at any auto parts store or online. If you have it replaced at a dealership or shop, you will pay for labor on top of that, which can bring the total to eighty dollars or more. Doing it yourself is the cheapest and fastest option.
Can I drive my RAV4 without a cabin filter?
Technically yes, but you should not. Without a cabin filter, dust, pollen, and exhaust fumes enter your car directly through the vents. This affects air quality and can cause allergy symptoms. It also allows debris to enter your HVAC system, which can lead to costly repairs over time.
What happens if I install the cabin filter backward?
Installing the filter backward reduces airflow and filtration effectiveness. The filter material is designed to work in one direction. Air flowing the wrong way will not pass through the filter properly. This means your AC will be weaker and your interior air will be less clean. Always check the airflow arrow on the filter frame.
How do I know which cabin filter fits my RAV4?
The easiest way is to check your owner manual. It lists the correct part number and filter specifications for your specific model year and trim. You can also look at the old filter before removing it. The size and shape printed on the filter frame will help you find the exact replacement.
Is a HEPA cabin filter worth it for the RAV4?
Yes, a HEPA cabin filter is worth the extra cost if you care about air quality. HEPA filters trap much smaller particles than standard filters. They are especially beneficial for allergy sufferers, people living in urban areas, or anyone who drives frequently on dusty roads. The price difference is usually only five to ten dollars more.
Can a dirty cabin filter cause my RAV4 AC to stop working?
A dirty cabin filter will not completely stop your AC from working, but it will significantly reduce performance. Restricted airflow means weaker cooling and less effective defrosting. In severe cases, the blower motor can overwork and eventually fail. Replacing the filter is a simple fix that restores full AC performance.